
Complete Setup Guide: Connecting Popsixle with Meta
Introduction
This guide walks you through the full process of connecting Popsixle with Meta (formerly Facebook) to ensure accurate advertising data. Following these steps will help you avoid double-counting events, remove unwanted signals, and ensure your events are properly verified in Meta’s Events Manager.
By the end, you’ll have Popsixle fully integrated with your Shopify store and Meta ad account, with clean, deduplicated data flowing into your campaigns.
Step 1: Identify Your Meta Pixel/Dataset, CAPI Token & Test Event Code
To connect Popsixle with Meta, you’ll first need to identify the correct Meta dataset (pixel) that your business uses.
Log in to Meta Business Manager.
Navigate to Data Sources > Pixels.
Copy the Pixel ID (Dataset ID).
Obtain your Conversions API (CAPI) Token.
This can be generated inside Events Manager → Settings.
Copy your Test Event Code (for verifying Popsixle events during setup).
You’ll paste these values into Popsixle during onboarding.
Step 2: Share Your Meta Ad Account Access with Popsixle
Popsixle requires access to your Meta Ad Account in order to deliver accurate attribution data.
In Meta Business Manager, go to Business Settings → Ad Accounts.
Select the correct Ad Account.
Add Popsixle as a partner with Admin access (required for event management).
Enter Popsixle's business ID (2600470493346123) and grant read-only/View performance access
Once access has been shared, link the ad account by pasting the ad account ID into the app's settings.
Step 3: Turn Off Data Sharing in Shopify
Shopify automatically shares data with Meta, which can lead to duplicate events. Popsixle replaces this connection with a cleaner, deduplicated dataset.
To turn off Shopify’s default Meta data sharing:
Log in to your Shopify Admin.
Navigate to Sales Channels → Facebook & Instagram by Meta.
In Data Sharing Settings, toggle Data Sharing = Off.
Save changes.
This ensures only Popsixle sends signals to Meta.
Step 4: Enable Popsixle-Meta Connection
Once Shopify’s data sharing is off, you’ll enable Popsixle events.
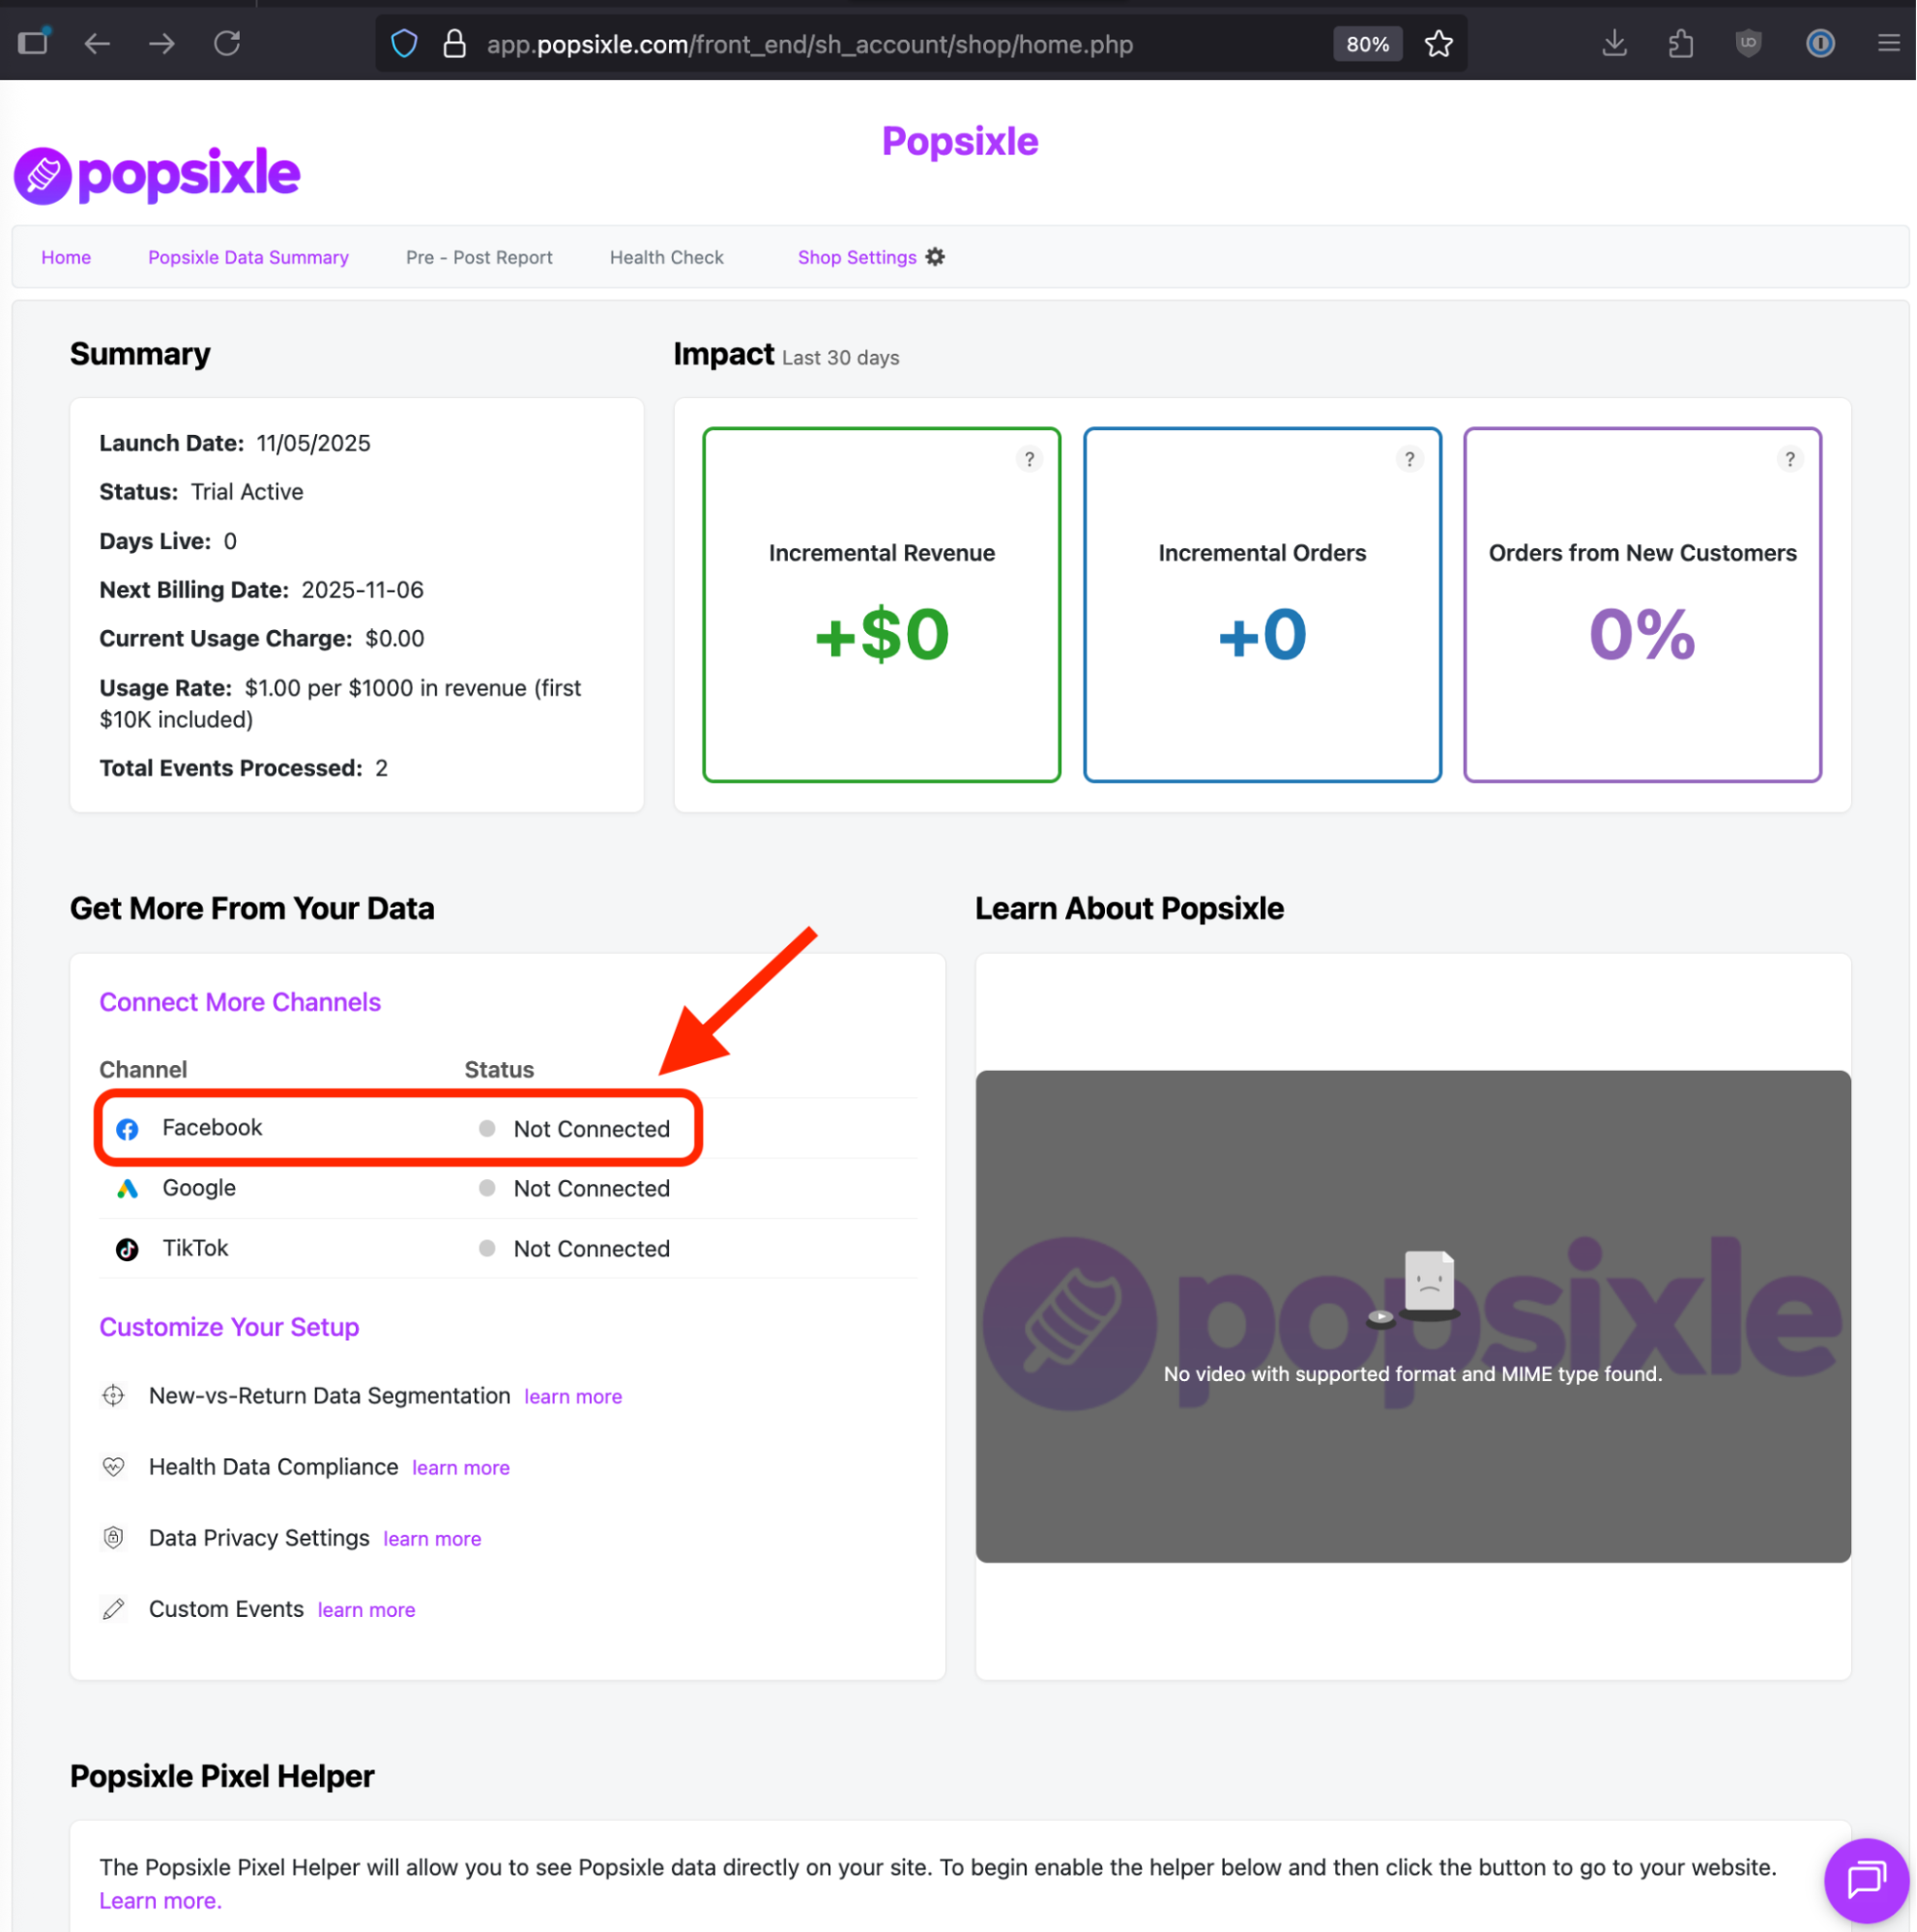
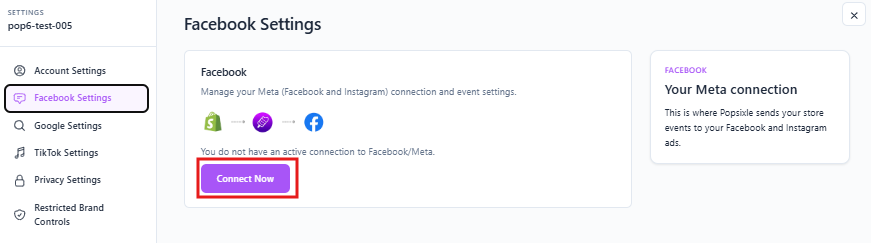
In Popsixle, navigate to Shop Settings → Facebook Settings
Click Connect Now
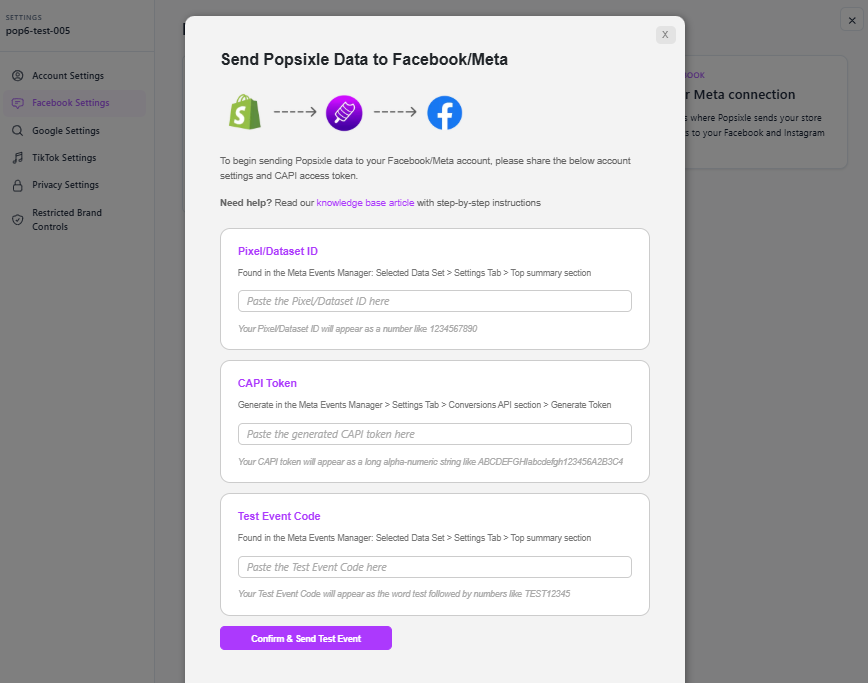
Enter your Pixel ID, CAPI Token, and Test Event Code.
Confirm
Troubleshooting & Best Practices
Duplicate events: If you see duplicates, confirm Shopify’s data sharing is off, no other CAPI connections/integrations and Popsixle is the only source.
Permissions issues: Make sure Popsixle has full Admin access to your Ad Account and Pixel.
Events not verifying: Check that your Meta credentials and make sure everything is correct.
Conclusion
You’ve now successfully connected Popsixle with Meta. With Shopify’s native data sharing disabled and Popsixle events properly flowing, you’ll get cleaner data, improved attribution, and better campaign performance.
Contact Us
If you run into any issues, reach out via live chat (during business hours) or email us at success@popsixle.com.