
Popsixle Step-by-Step Setup Guide
This step-by-step guide will show you how to install Popsixle, connect it to Meta, and instantly boost your store’s ROAS.
Permission Check
Before starting the install, let’s make sure you have the correct permissions in Shopify and Meta Business Manager. If you have the right permissions, this will be a breeze. If you lack the correct permissions, we’ll run into some road blocks so it’s best to make sure these are in place before getting started.
Shopify Permissions
Required Permission | Purpose | How do I check this? |
Install apps | Allows installing Popsixle from the Shopify App Store. | |
Approve app charges | Needed to accept Popsixle’s recurring charge when prompted. | |
Edit theme settings | Enables toggling Popsixle’s App Embed and saving it. |
If you lack any of these permissions, ask your Store owner to visit Settings → Users and permissions and check the boxes above for your account.
Meta (Facebook Business Manager) Permissions
Required Permission | Purpose | How do I check this? |
Business admin | Grants overall access to Business Settings and asset assignment. | |
Events Manager access | Needed to configure Pixel and Dataset events for Popsixle. | |
Pixel/Dataset admin | Required to connect Popsixle’s conversion tracking. | |
2FA enabled | Required by Meta for any admin-level access. |
If you lack any of these permissions, ask a Business admin (listed in Business Settings → People) to:
Invite you to the business with Full control.
Assign you to the correct Pixel or Dataset under Data Sources.
App Install
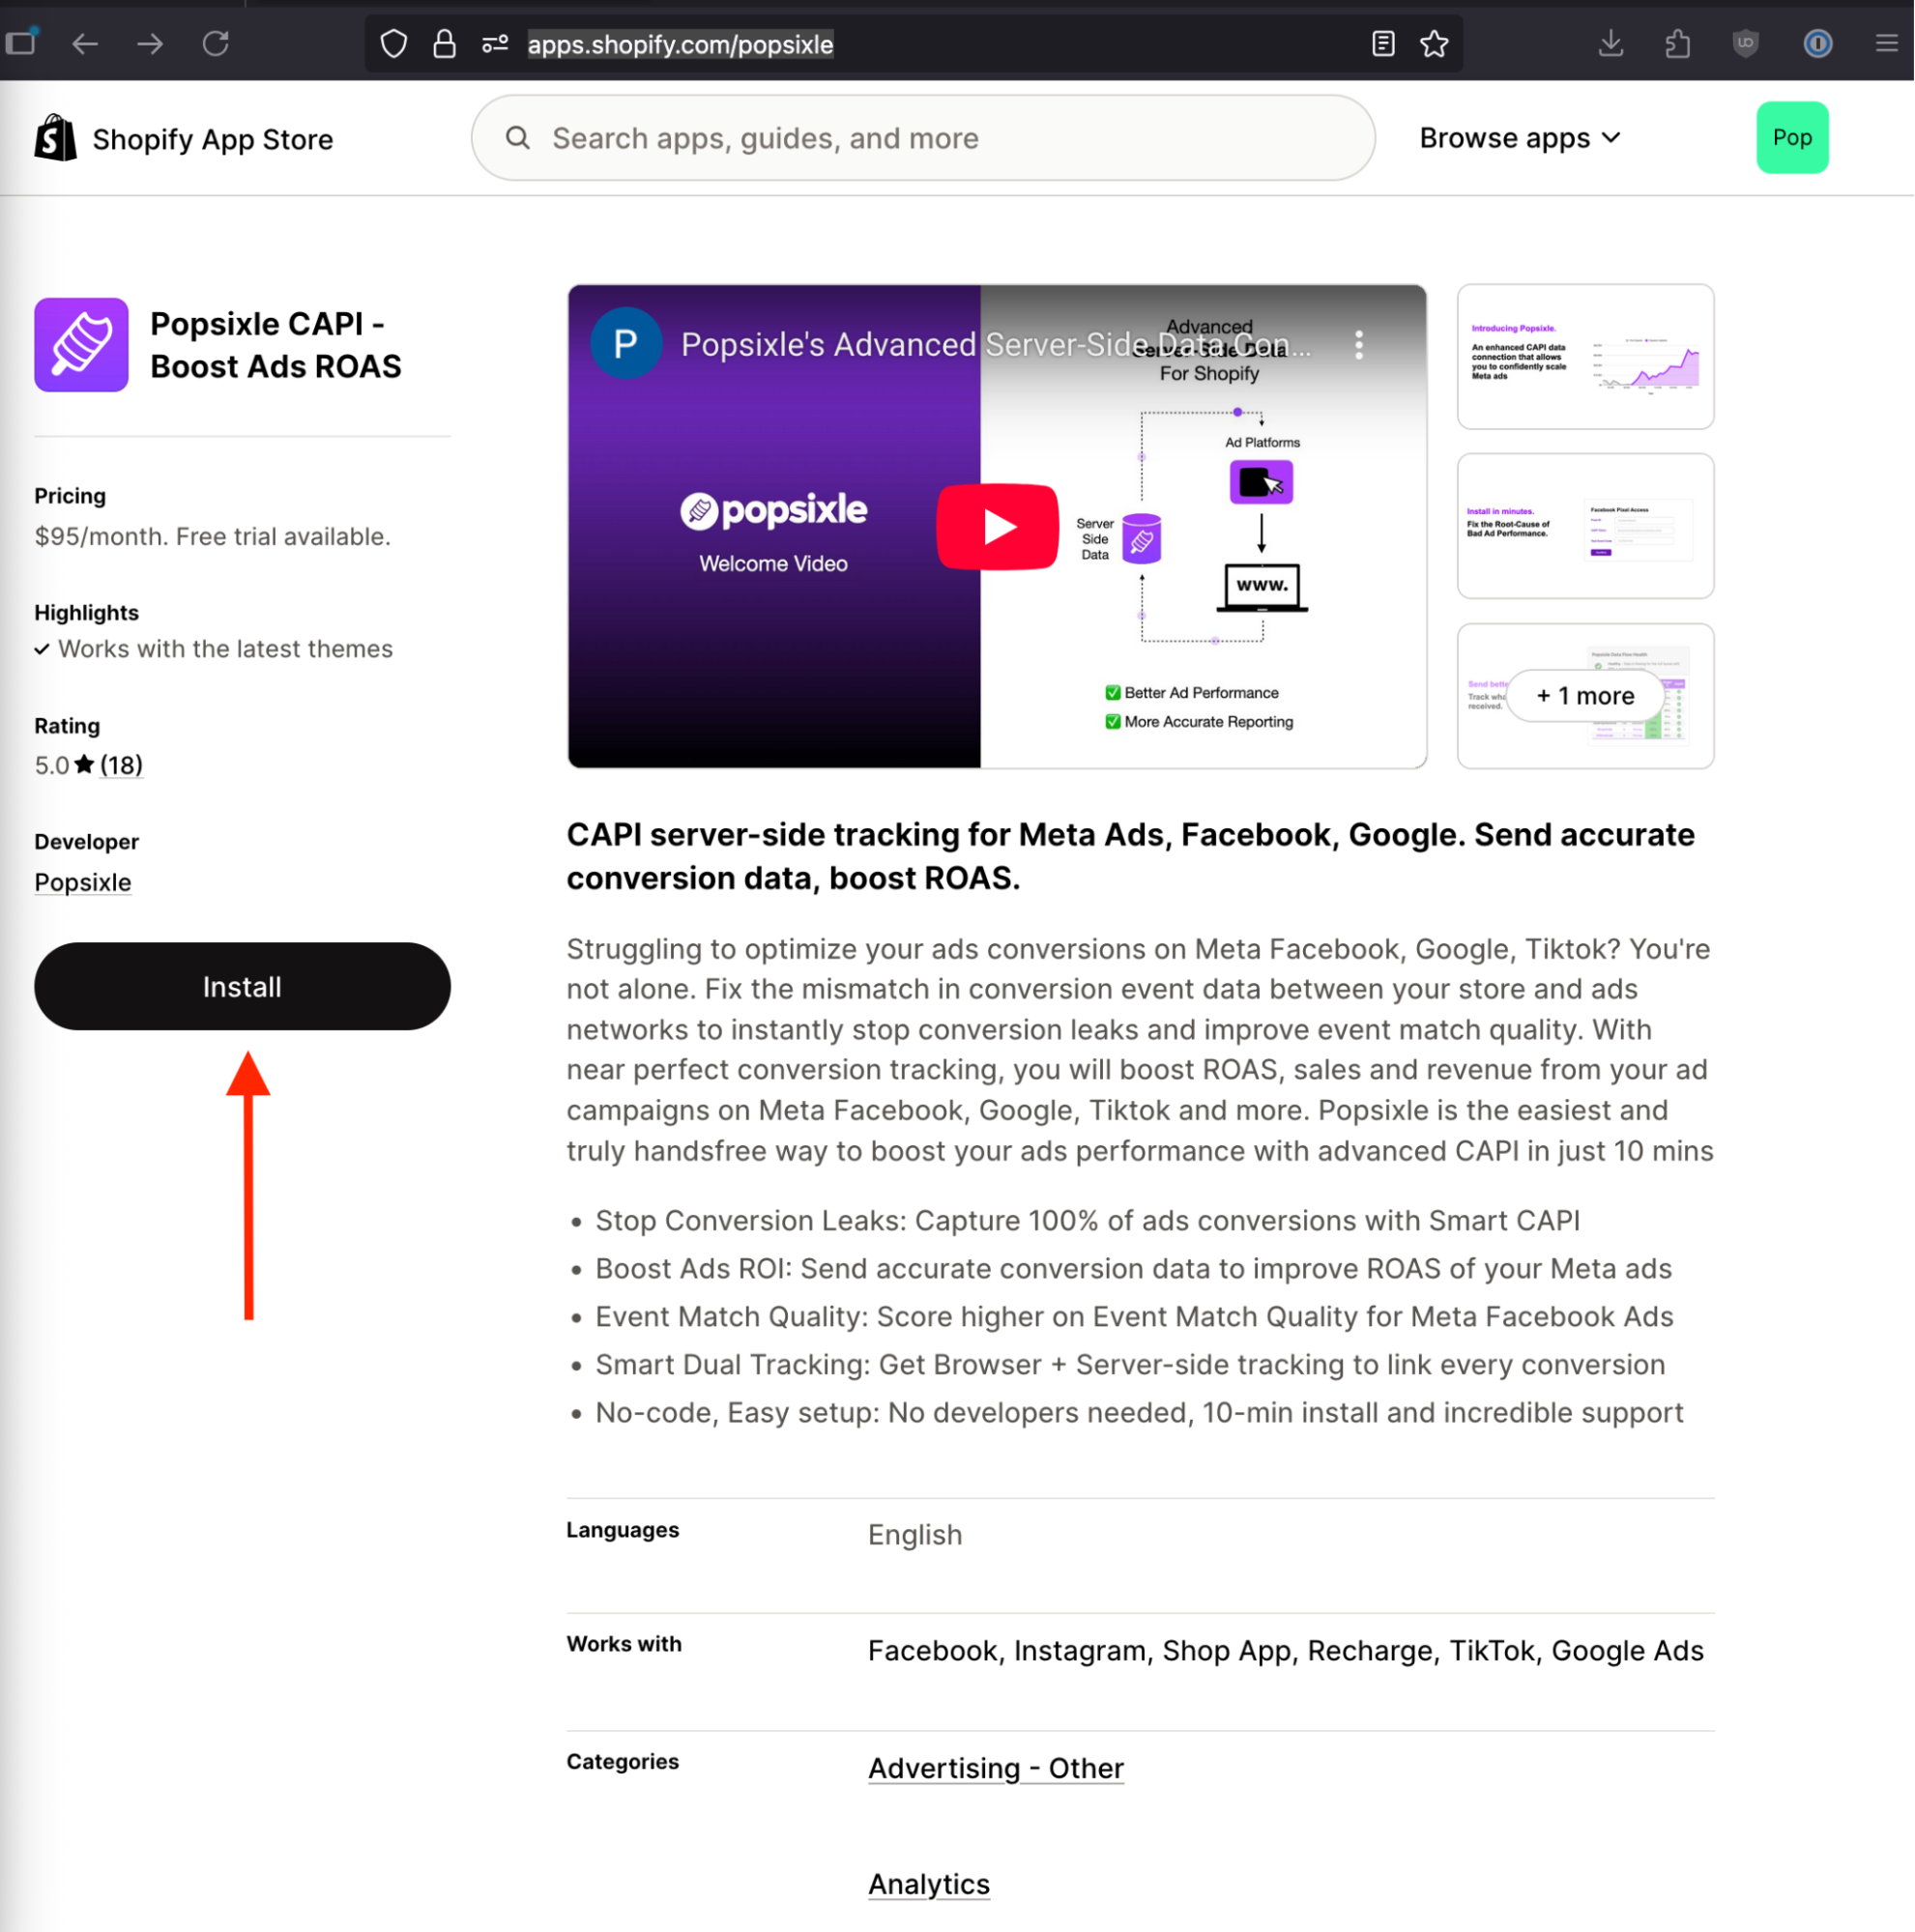
If you haven’t already, visit our store listing in the Shopify App Store: https://apps.shopify.com/popsixle
Go ahead and click the Install button.
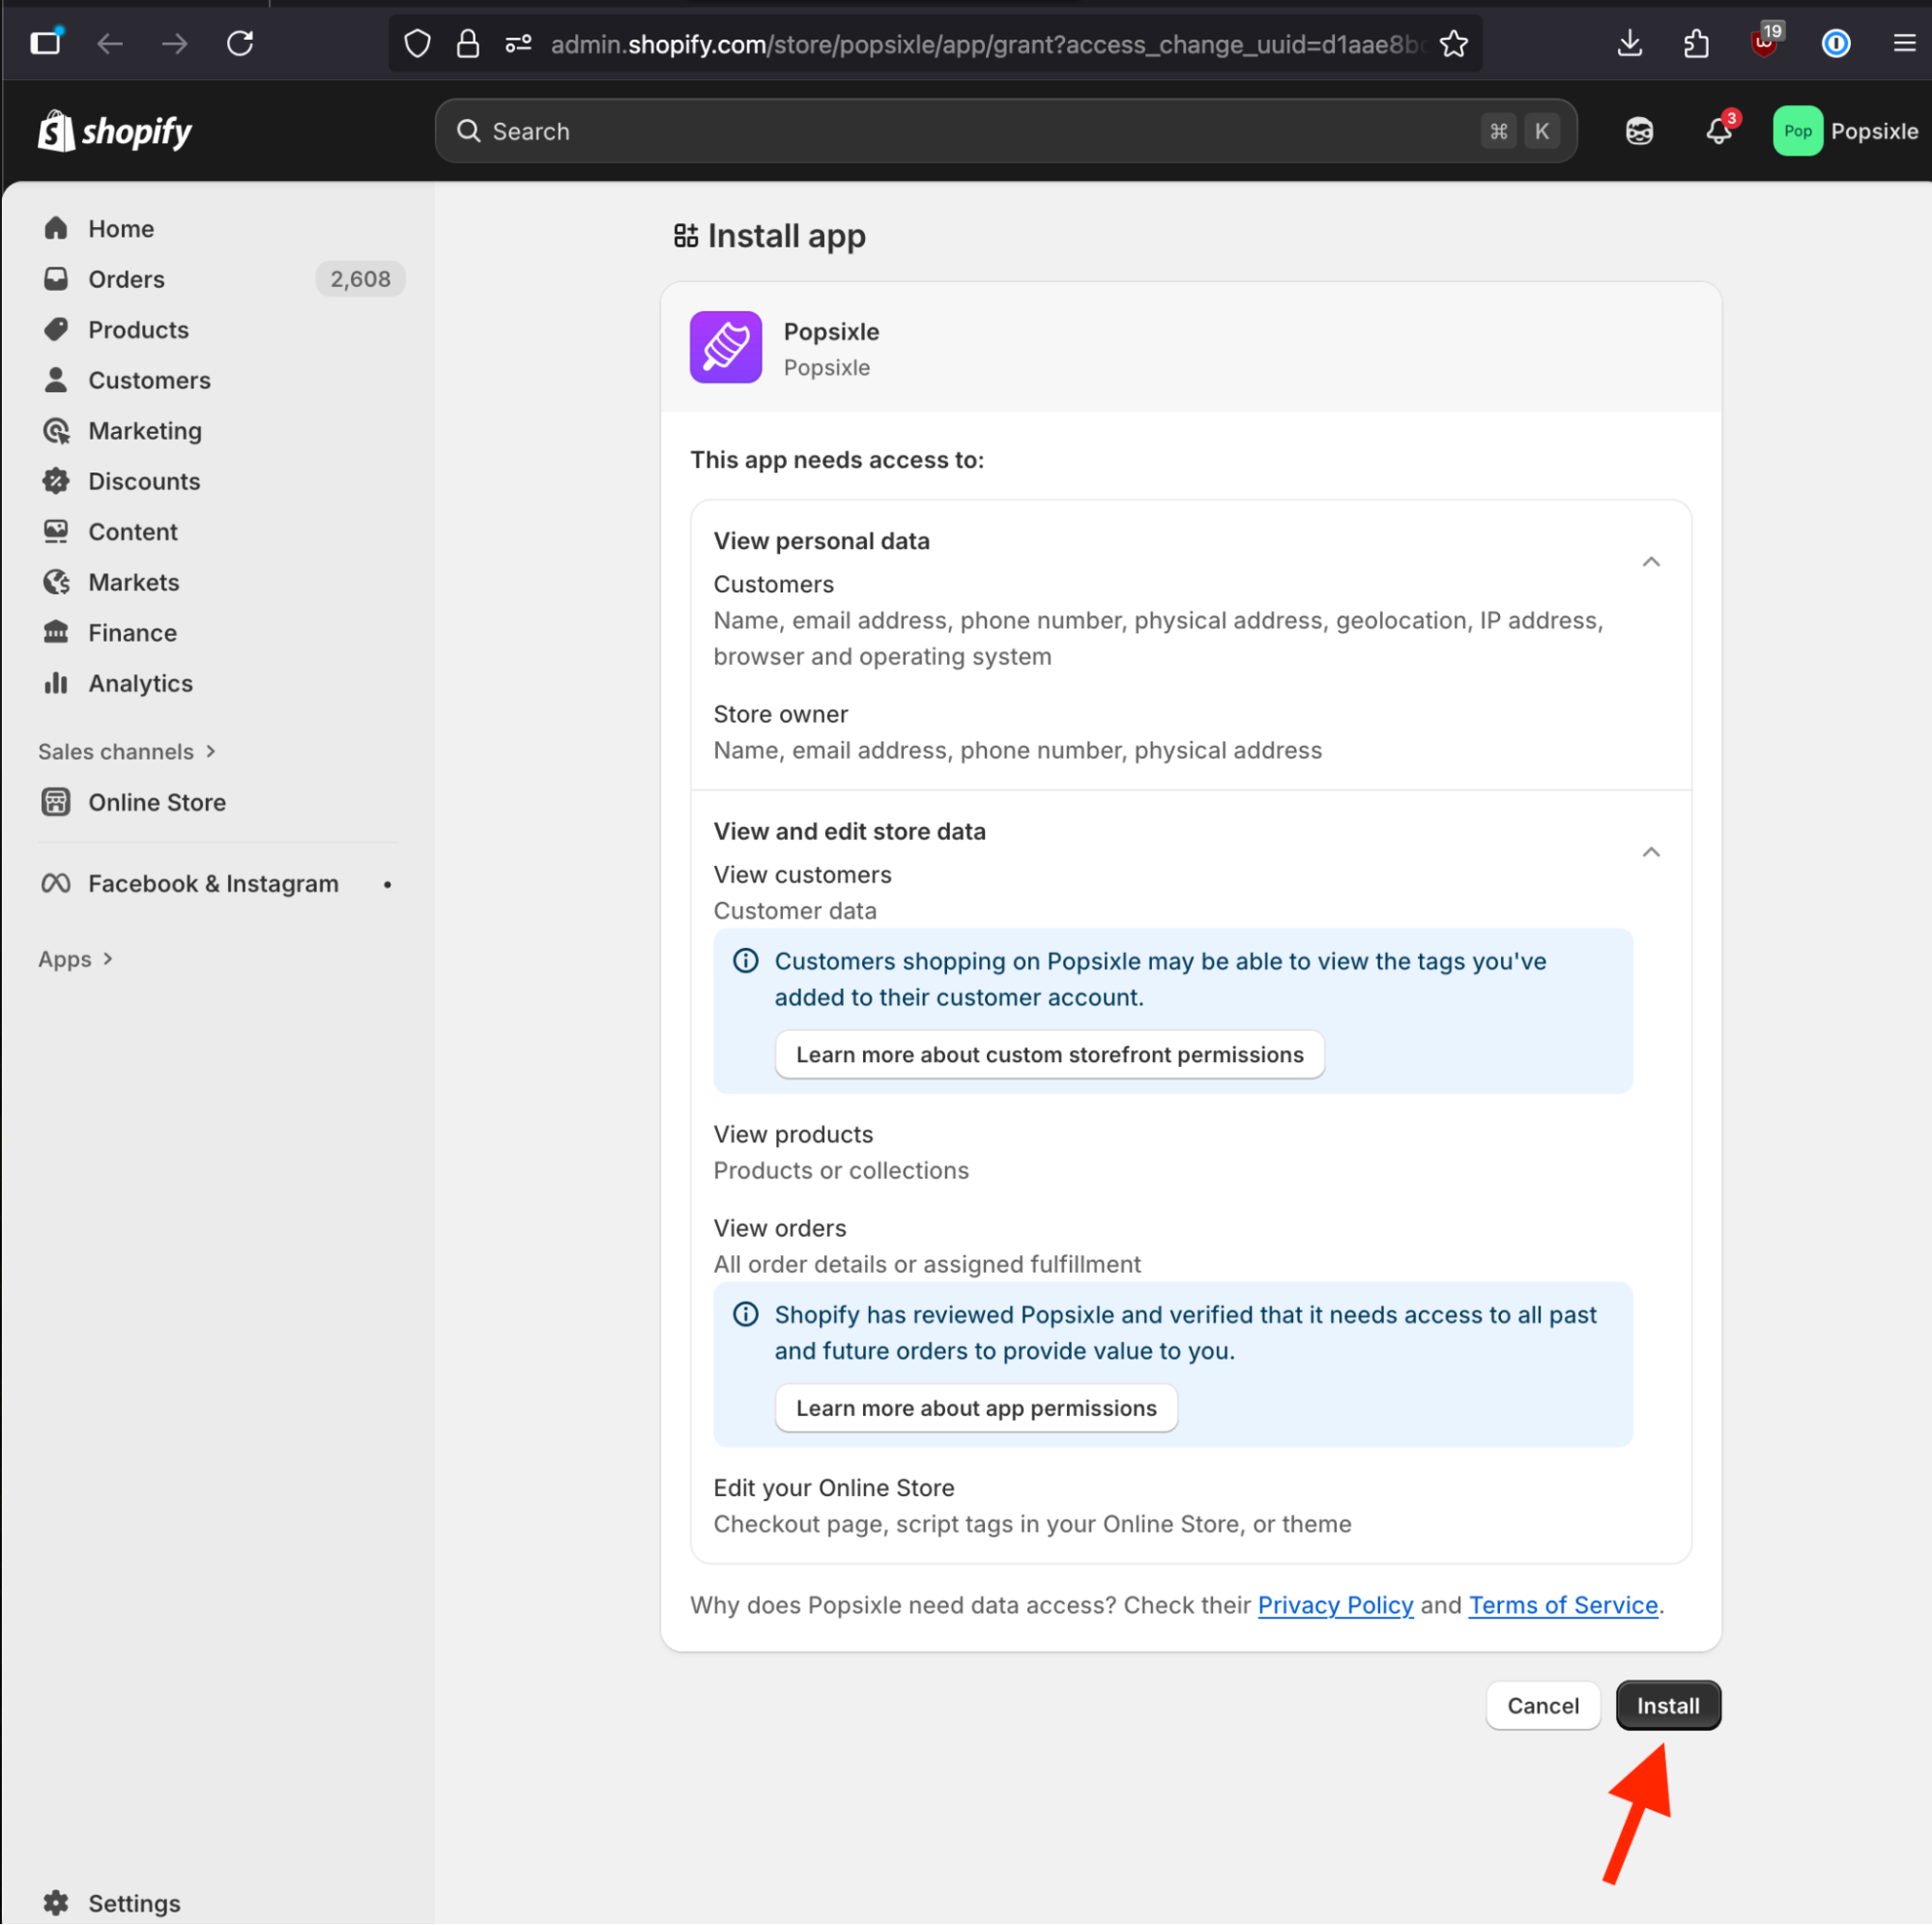
Once you’ve clicked Install, Shopify will show you the information Popsixle accesses to improve your store’s ad attribution and targeting.
Click the black Install button at the bottom of the page to continue.
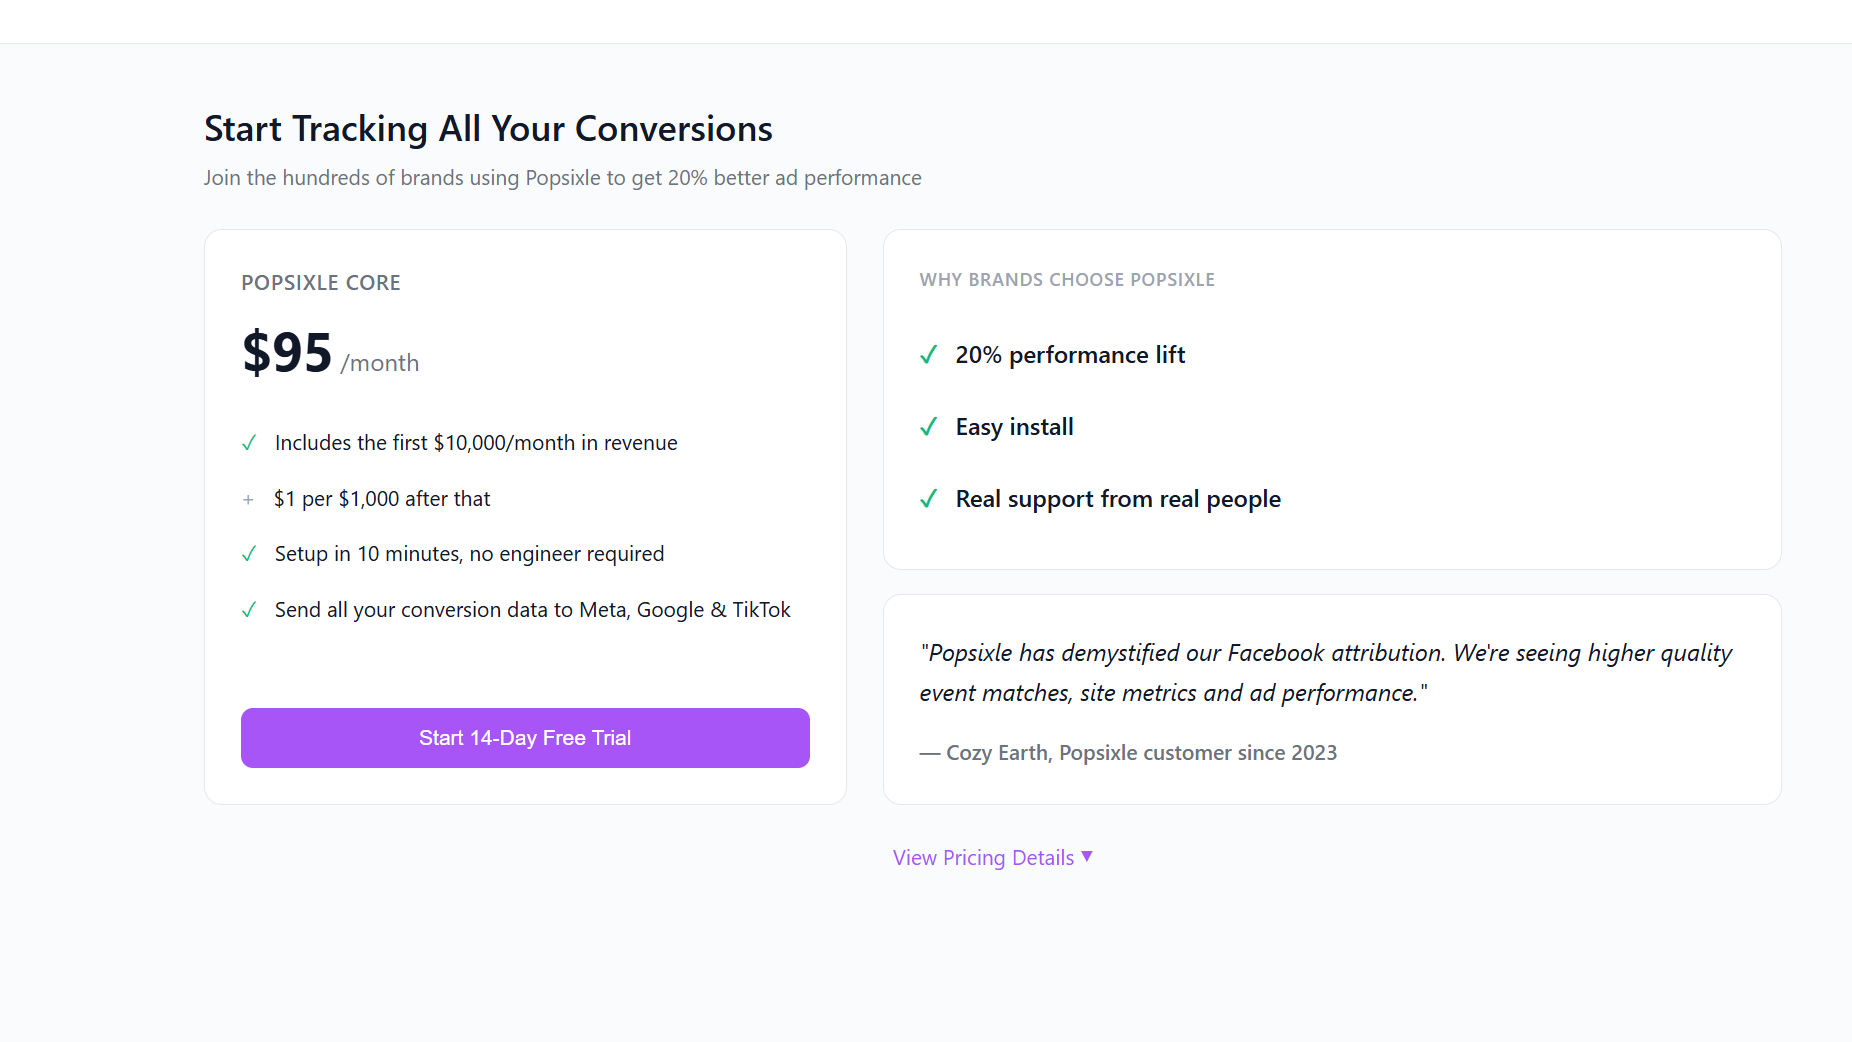
Once you click Install, you’ll be brought to a page that explains Popsixle’s subscription terms. You’ll start with a 14-day no risk free trial. After that, Popsixle is $95/mo + $1 for every $1,000 of monthly revenue over $10,000.
Click on the purple Subscribe button to continue, this will open a new tab in the Shopify admin page.
As mentioned above, you must have administrative permissions to approve app purchases within your Shopify admin account.
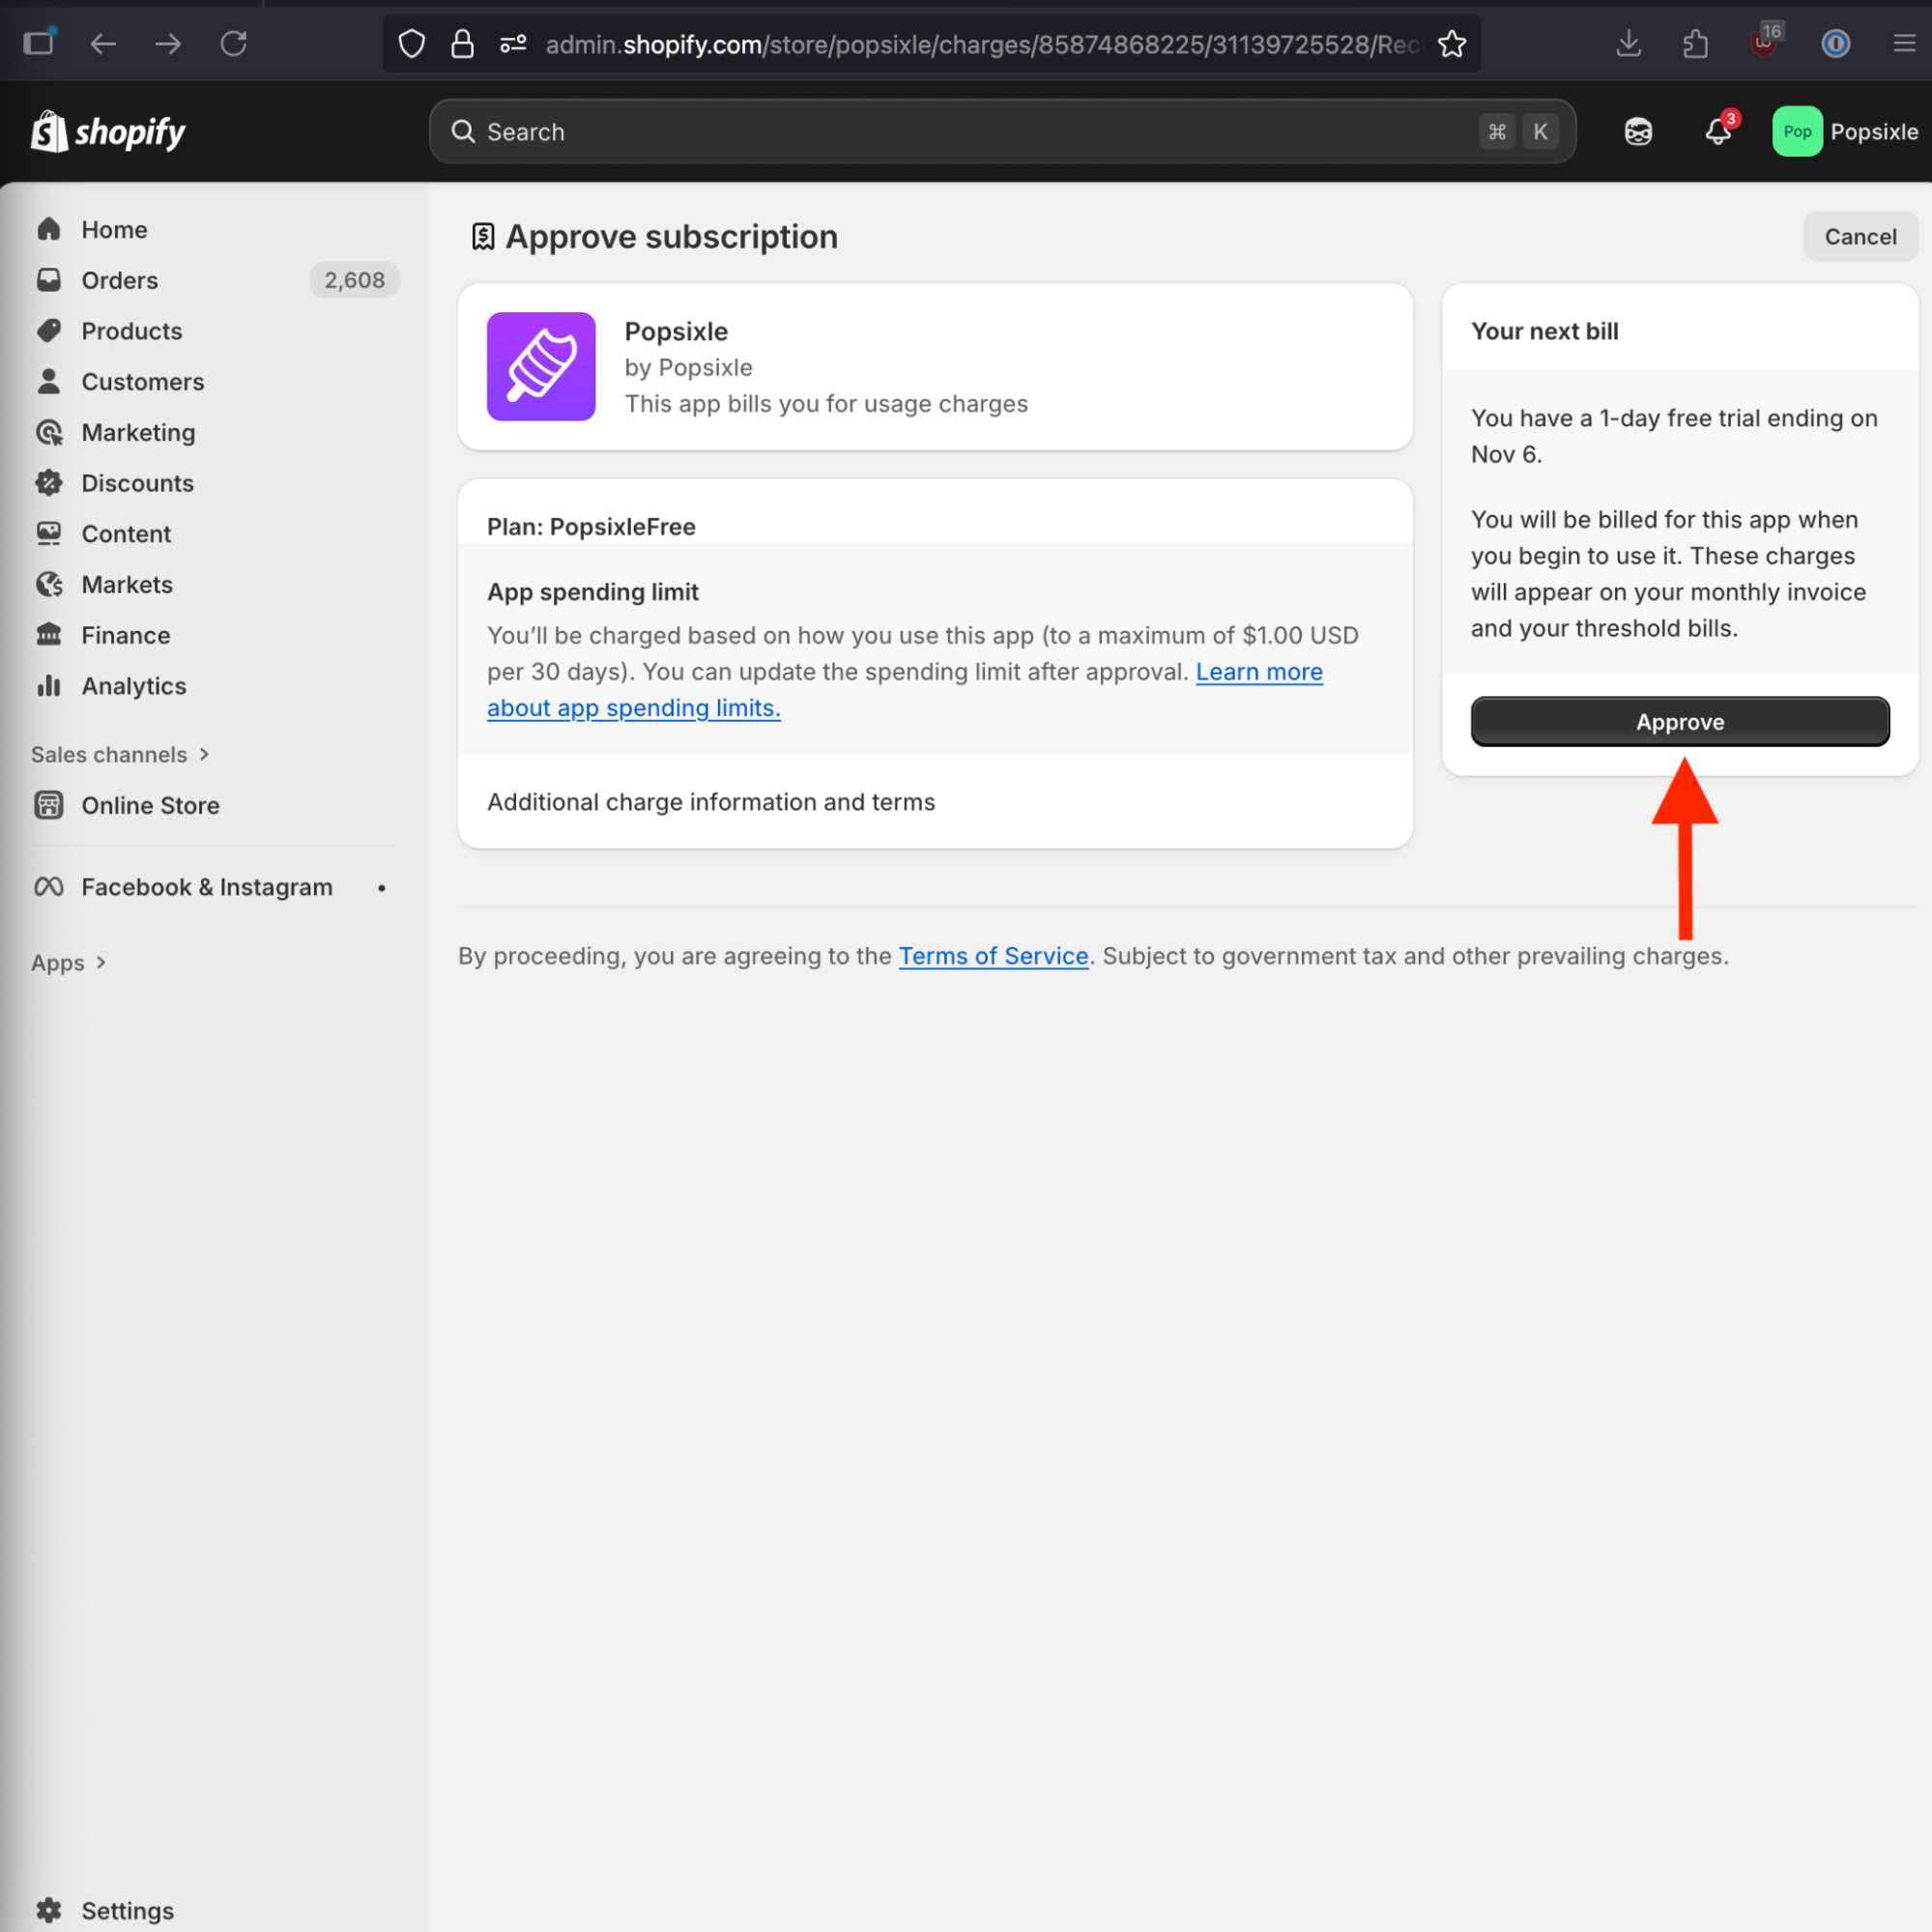
From the Approve Subscription page, click the black Approve button to begin your 14-day no risk free trial period.
After confirming, you’ll be taken to an overview page that will walk you through the full process of connecting Popsixle to your store and to ad channels. Click Get Started to continue.
Pro tip: if you have questions at any point, click the purple chat bubble in the bottom right corner and one of our onboarding guides will assist you right away. If you prefer to book a call, you use the link to do so at any time. We can typically assist you same-day!
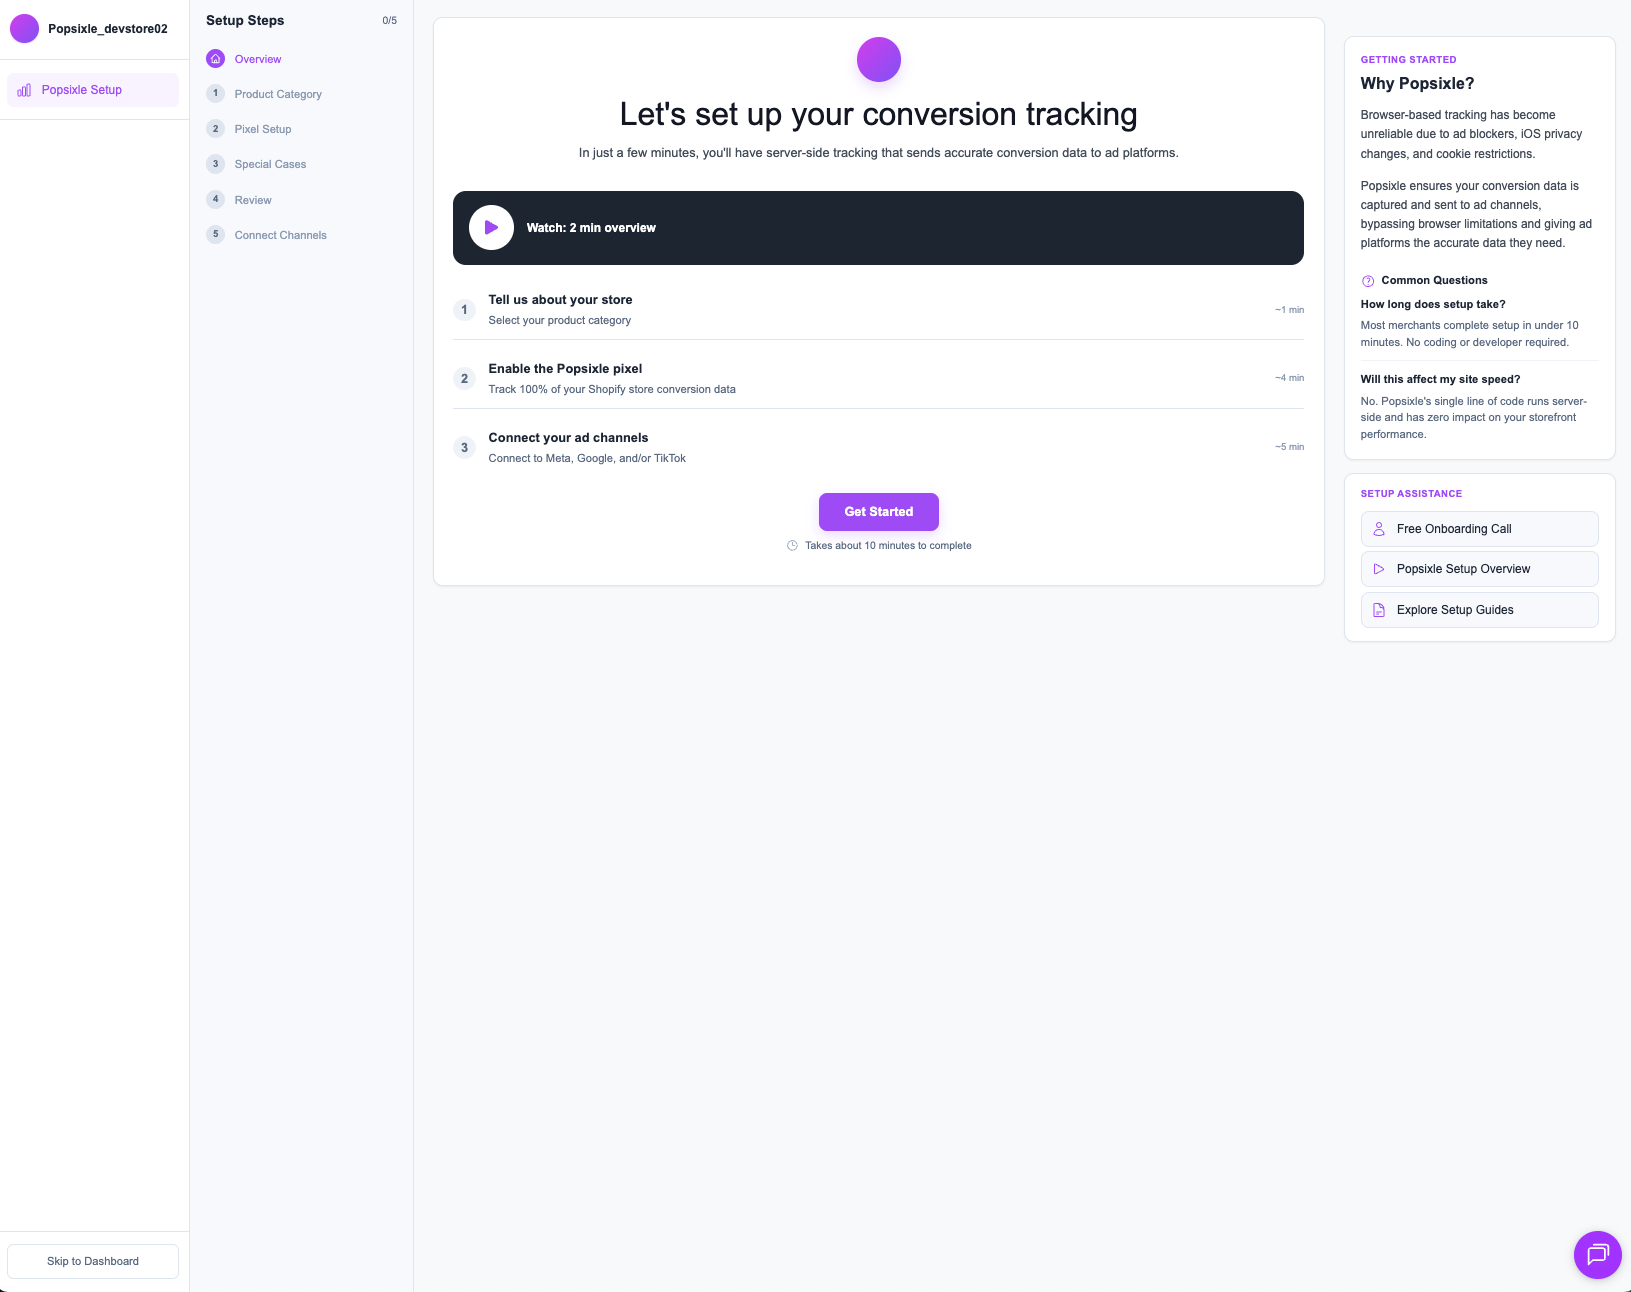
After confirming, you’ll be asked about what products you sell. If you are selling a product that has been impacted by Meta's Health and Wellness updates you will be prompted to setup a call with a member of our team as there are some additional steps to take before you can connect your data fully and ensure your ads stay live. If you have a standard store you can click continue.
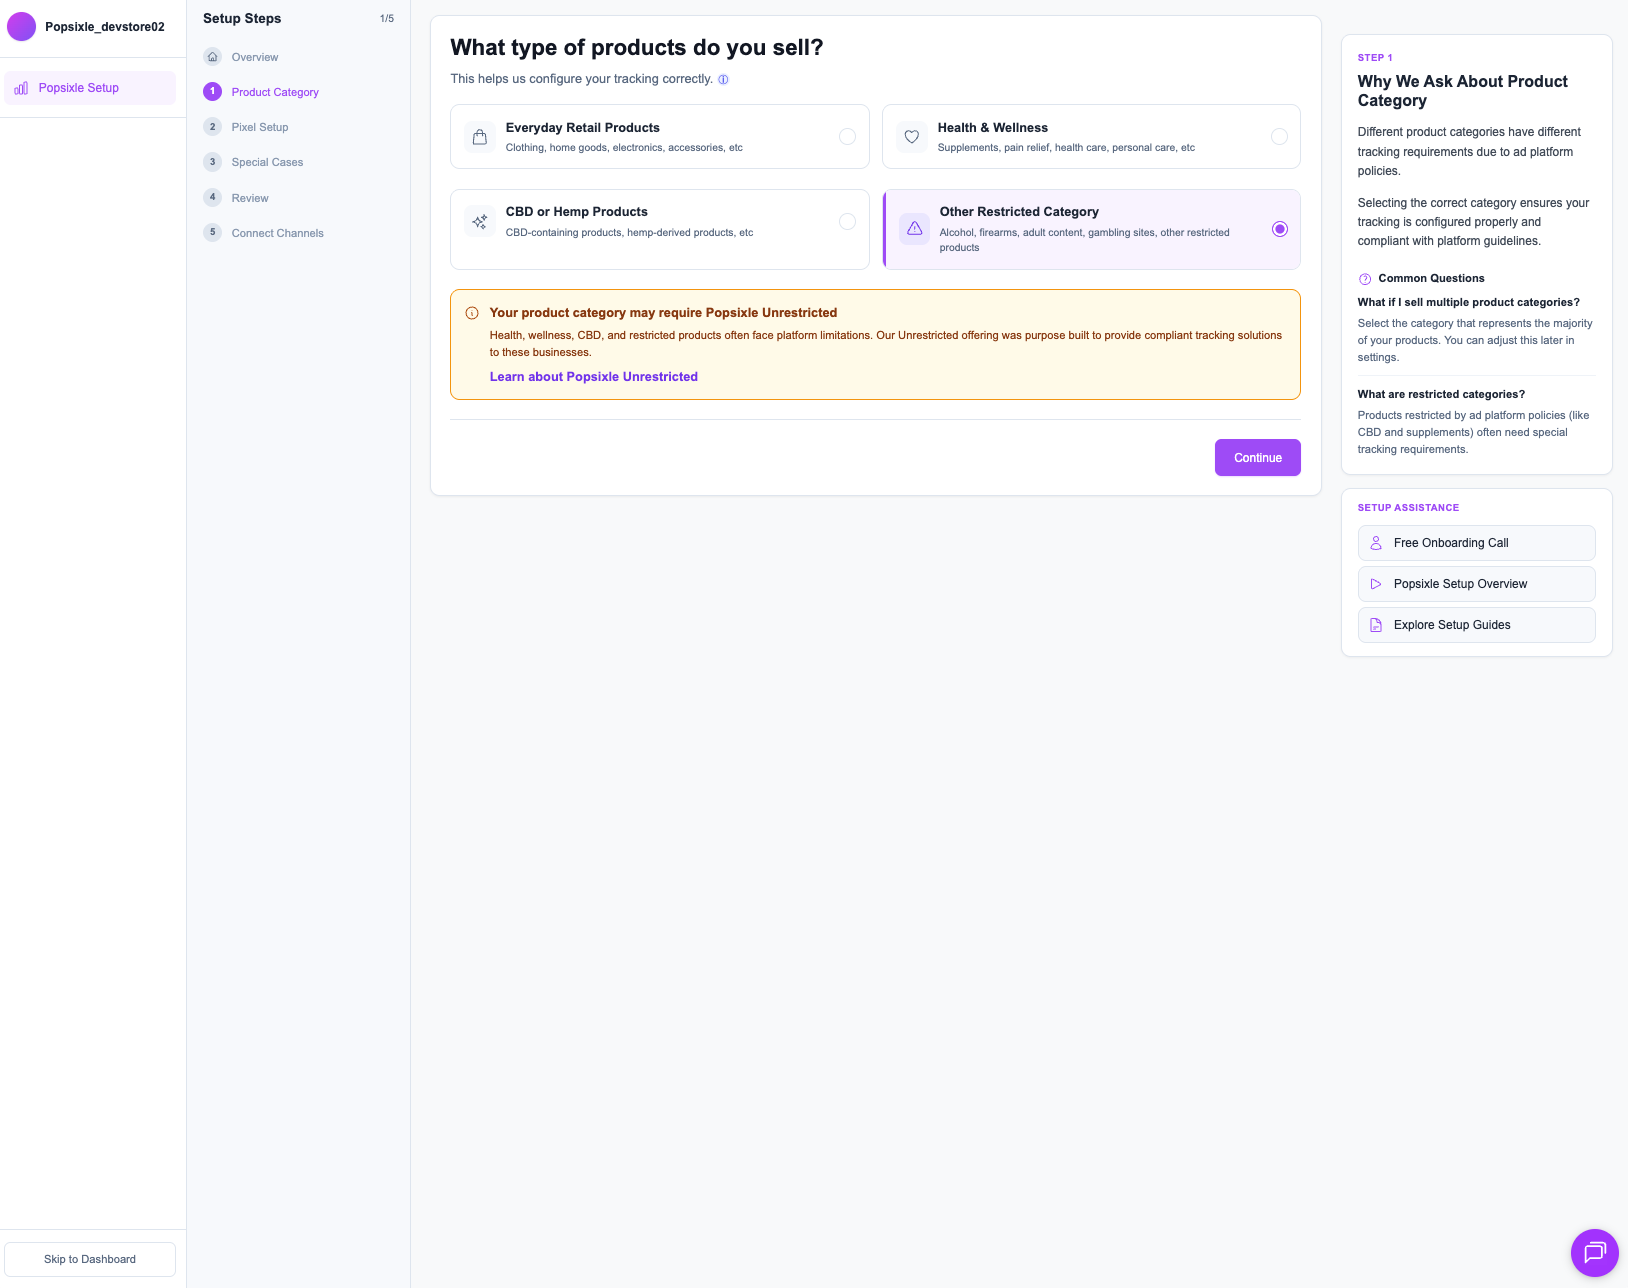
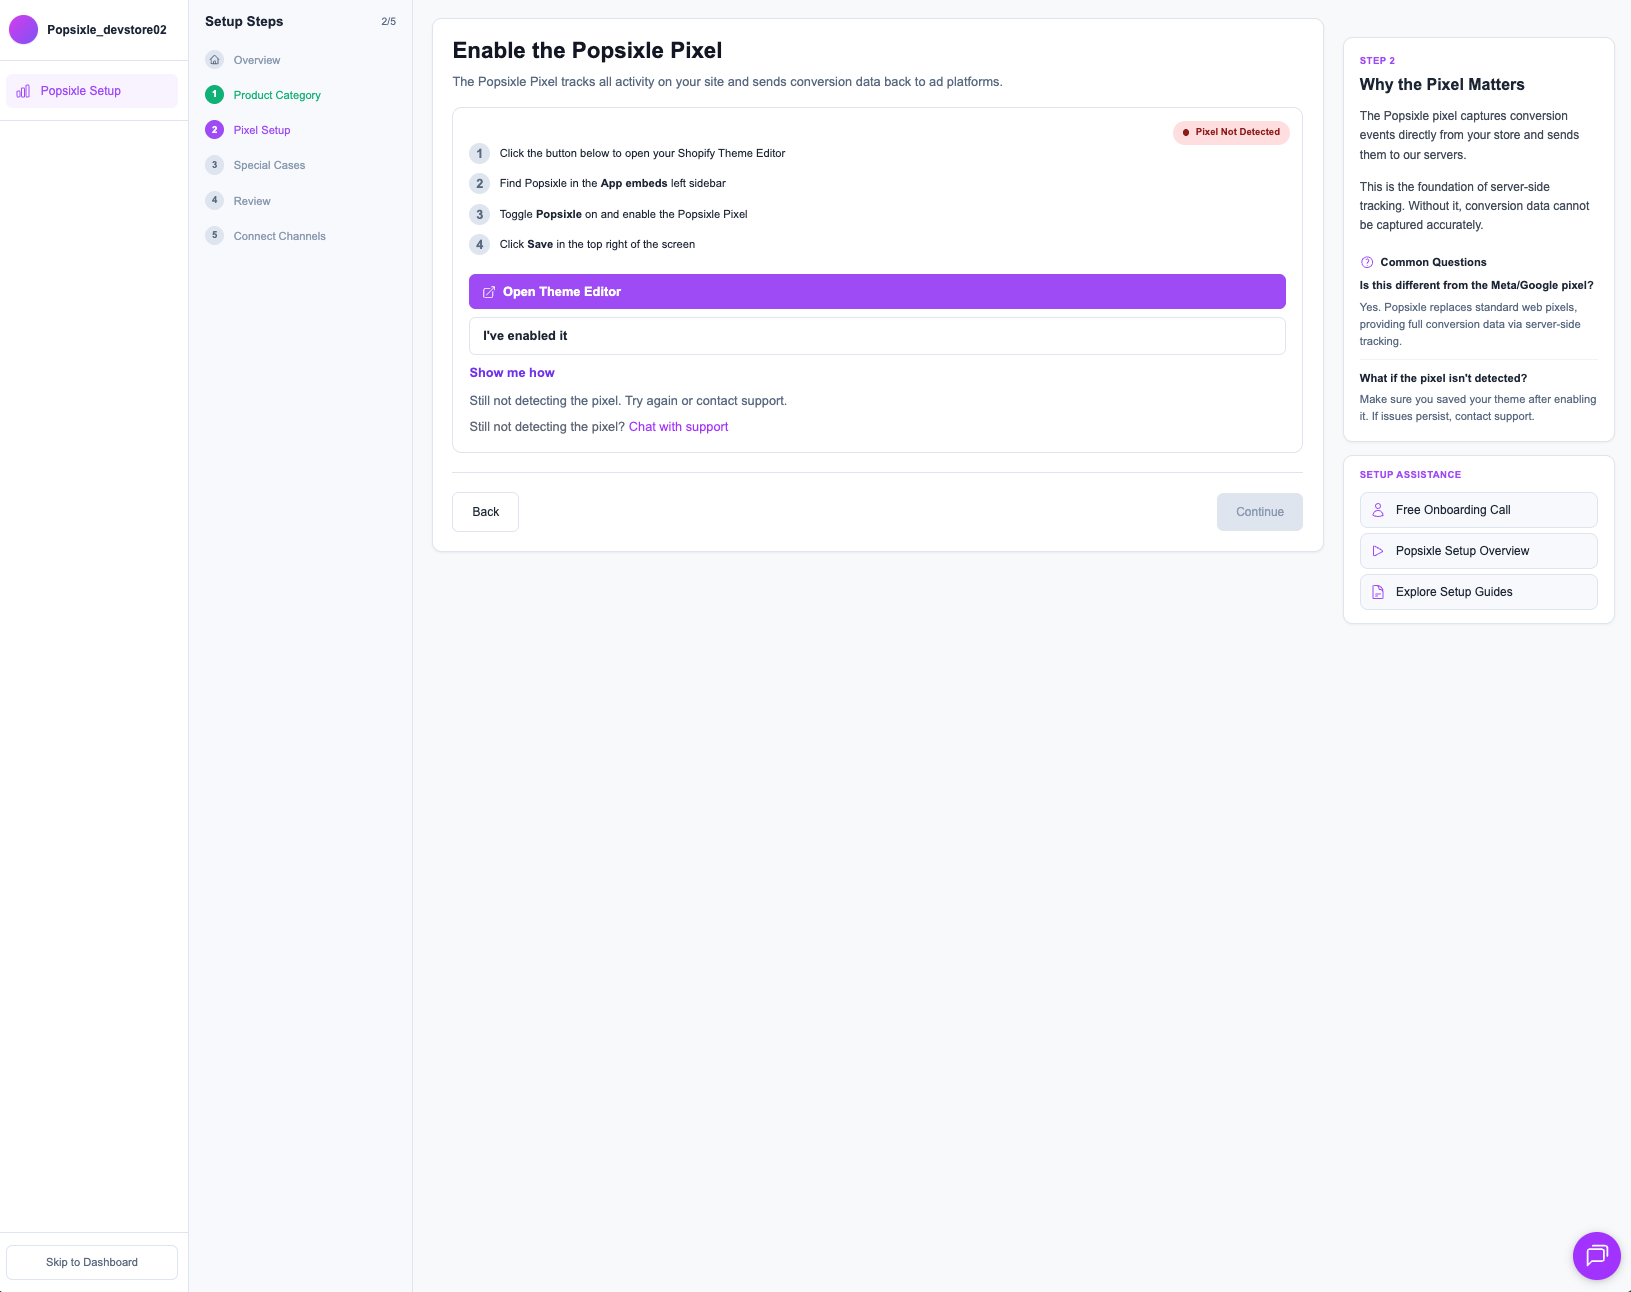
After confirming, you’ll next setup the Popsixle Pixel on your store. Click the purple button to open your theme editor in a new tab.
Note: You must have permission to update theme settings to complete this step.
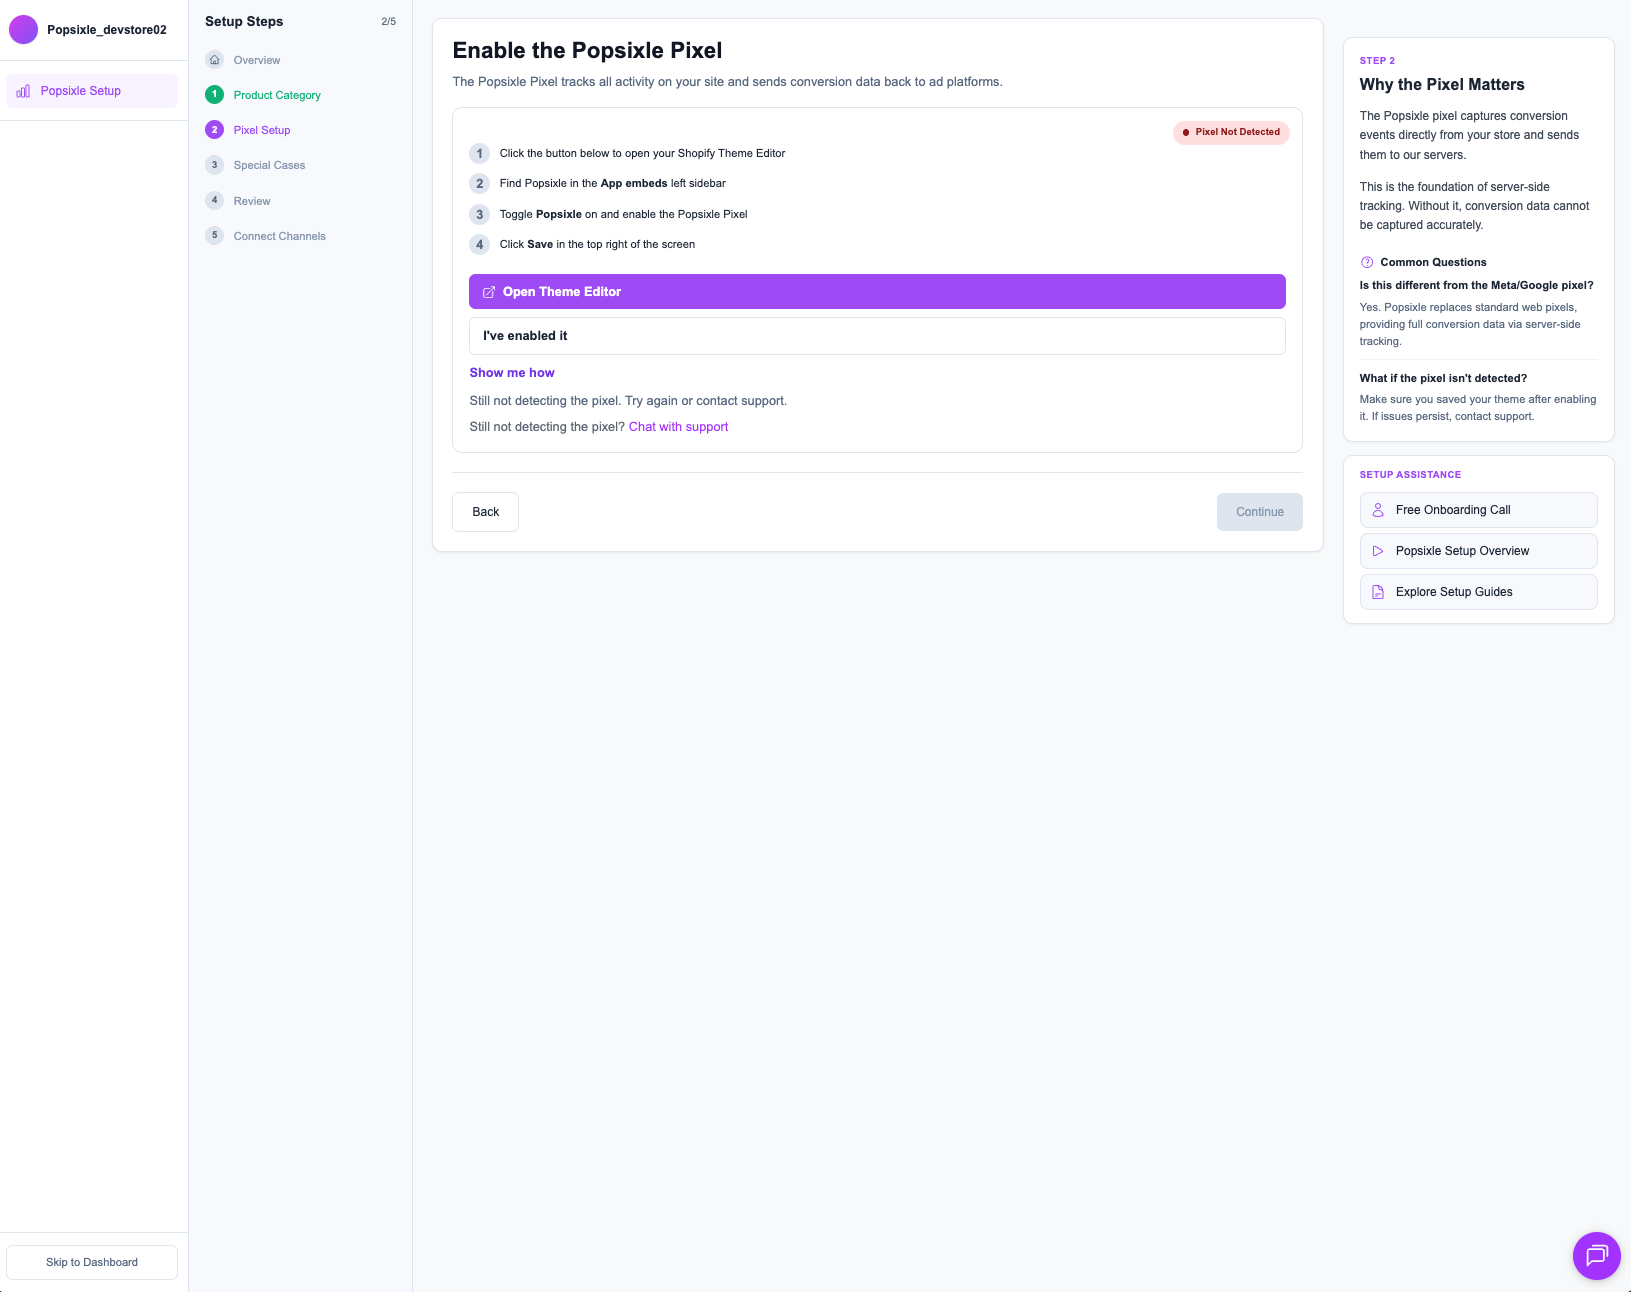
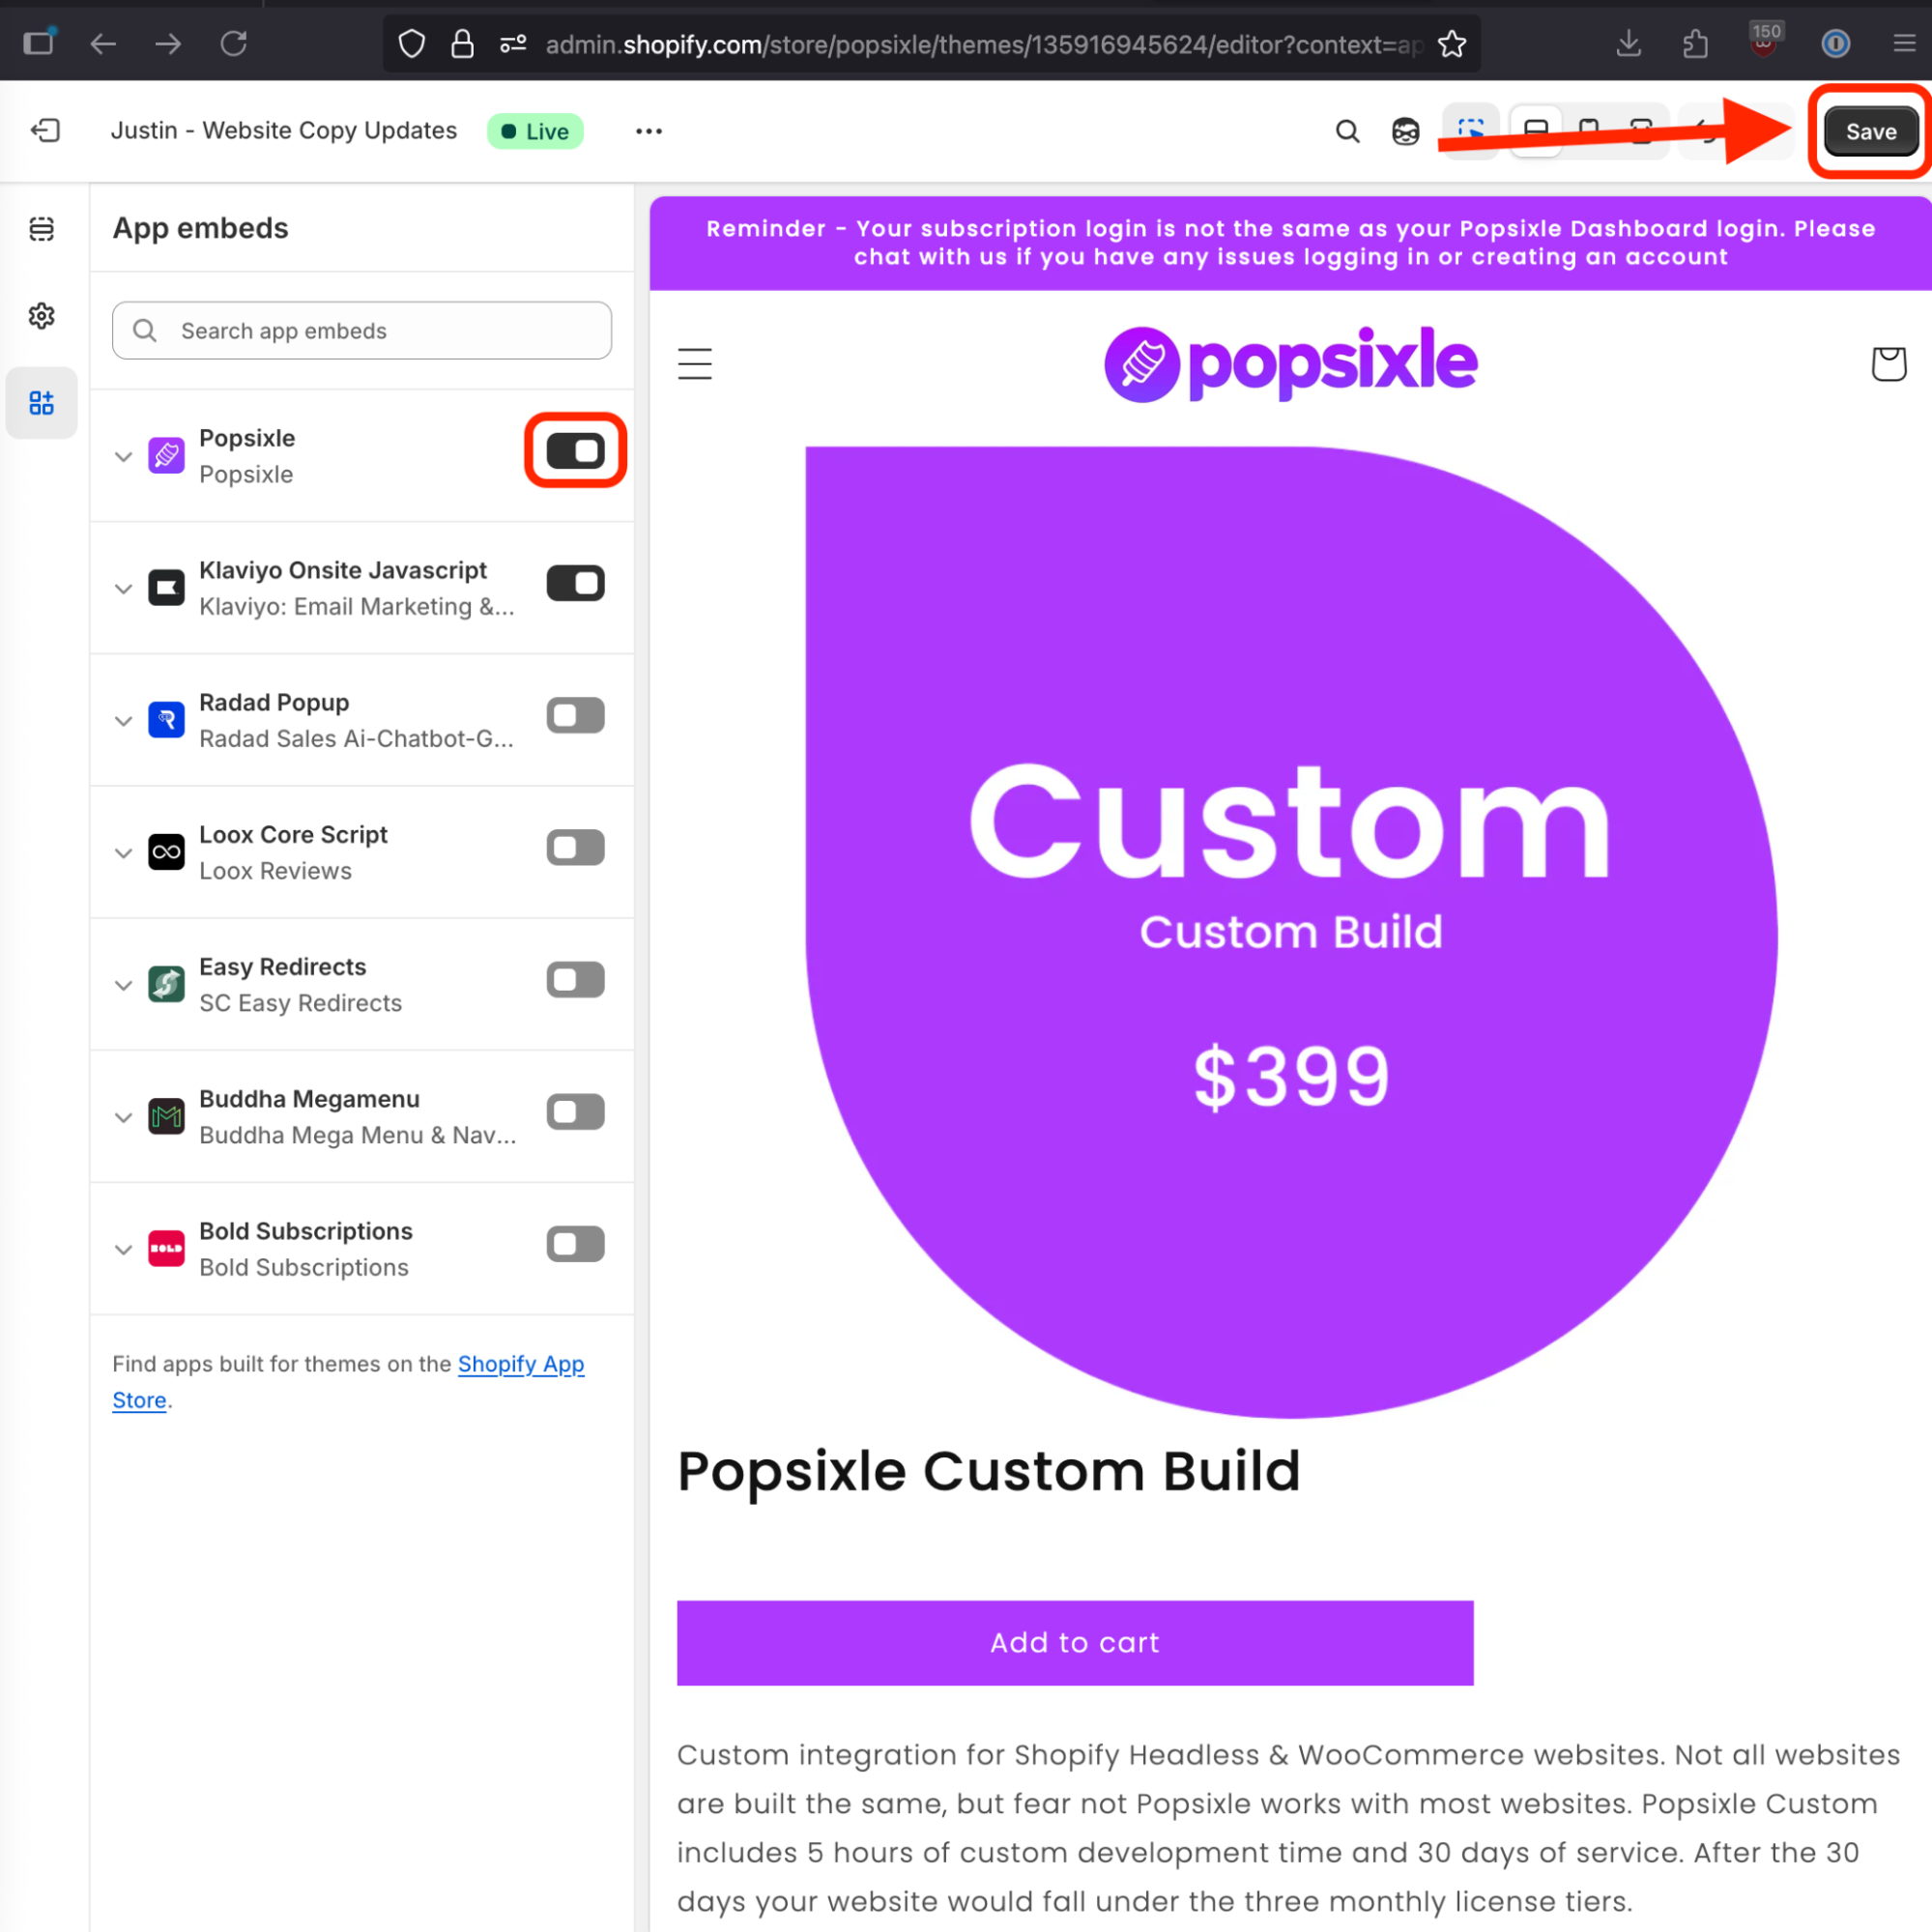
Now on the Shopify theme App embeds settings, find the Popsixle app and click the toggle to enable the app embed. Once enabled it will be switched to the right like in the screenshot below.
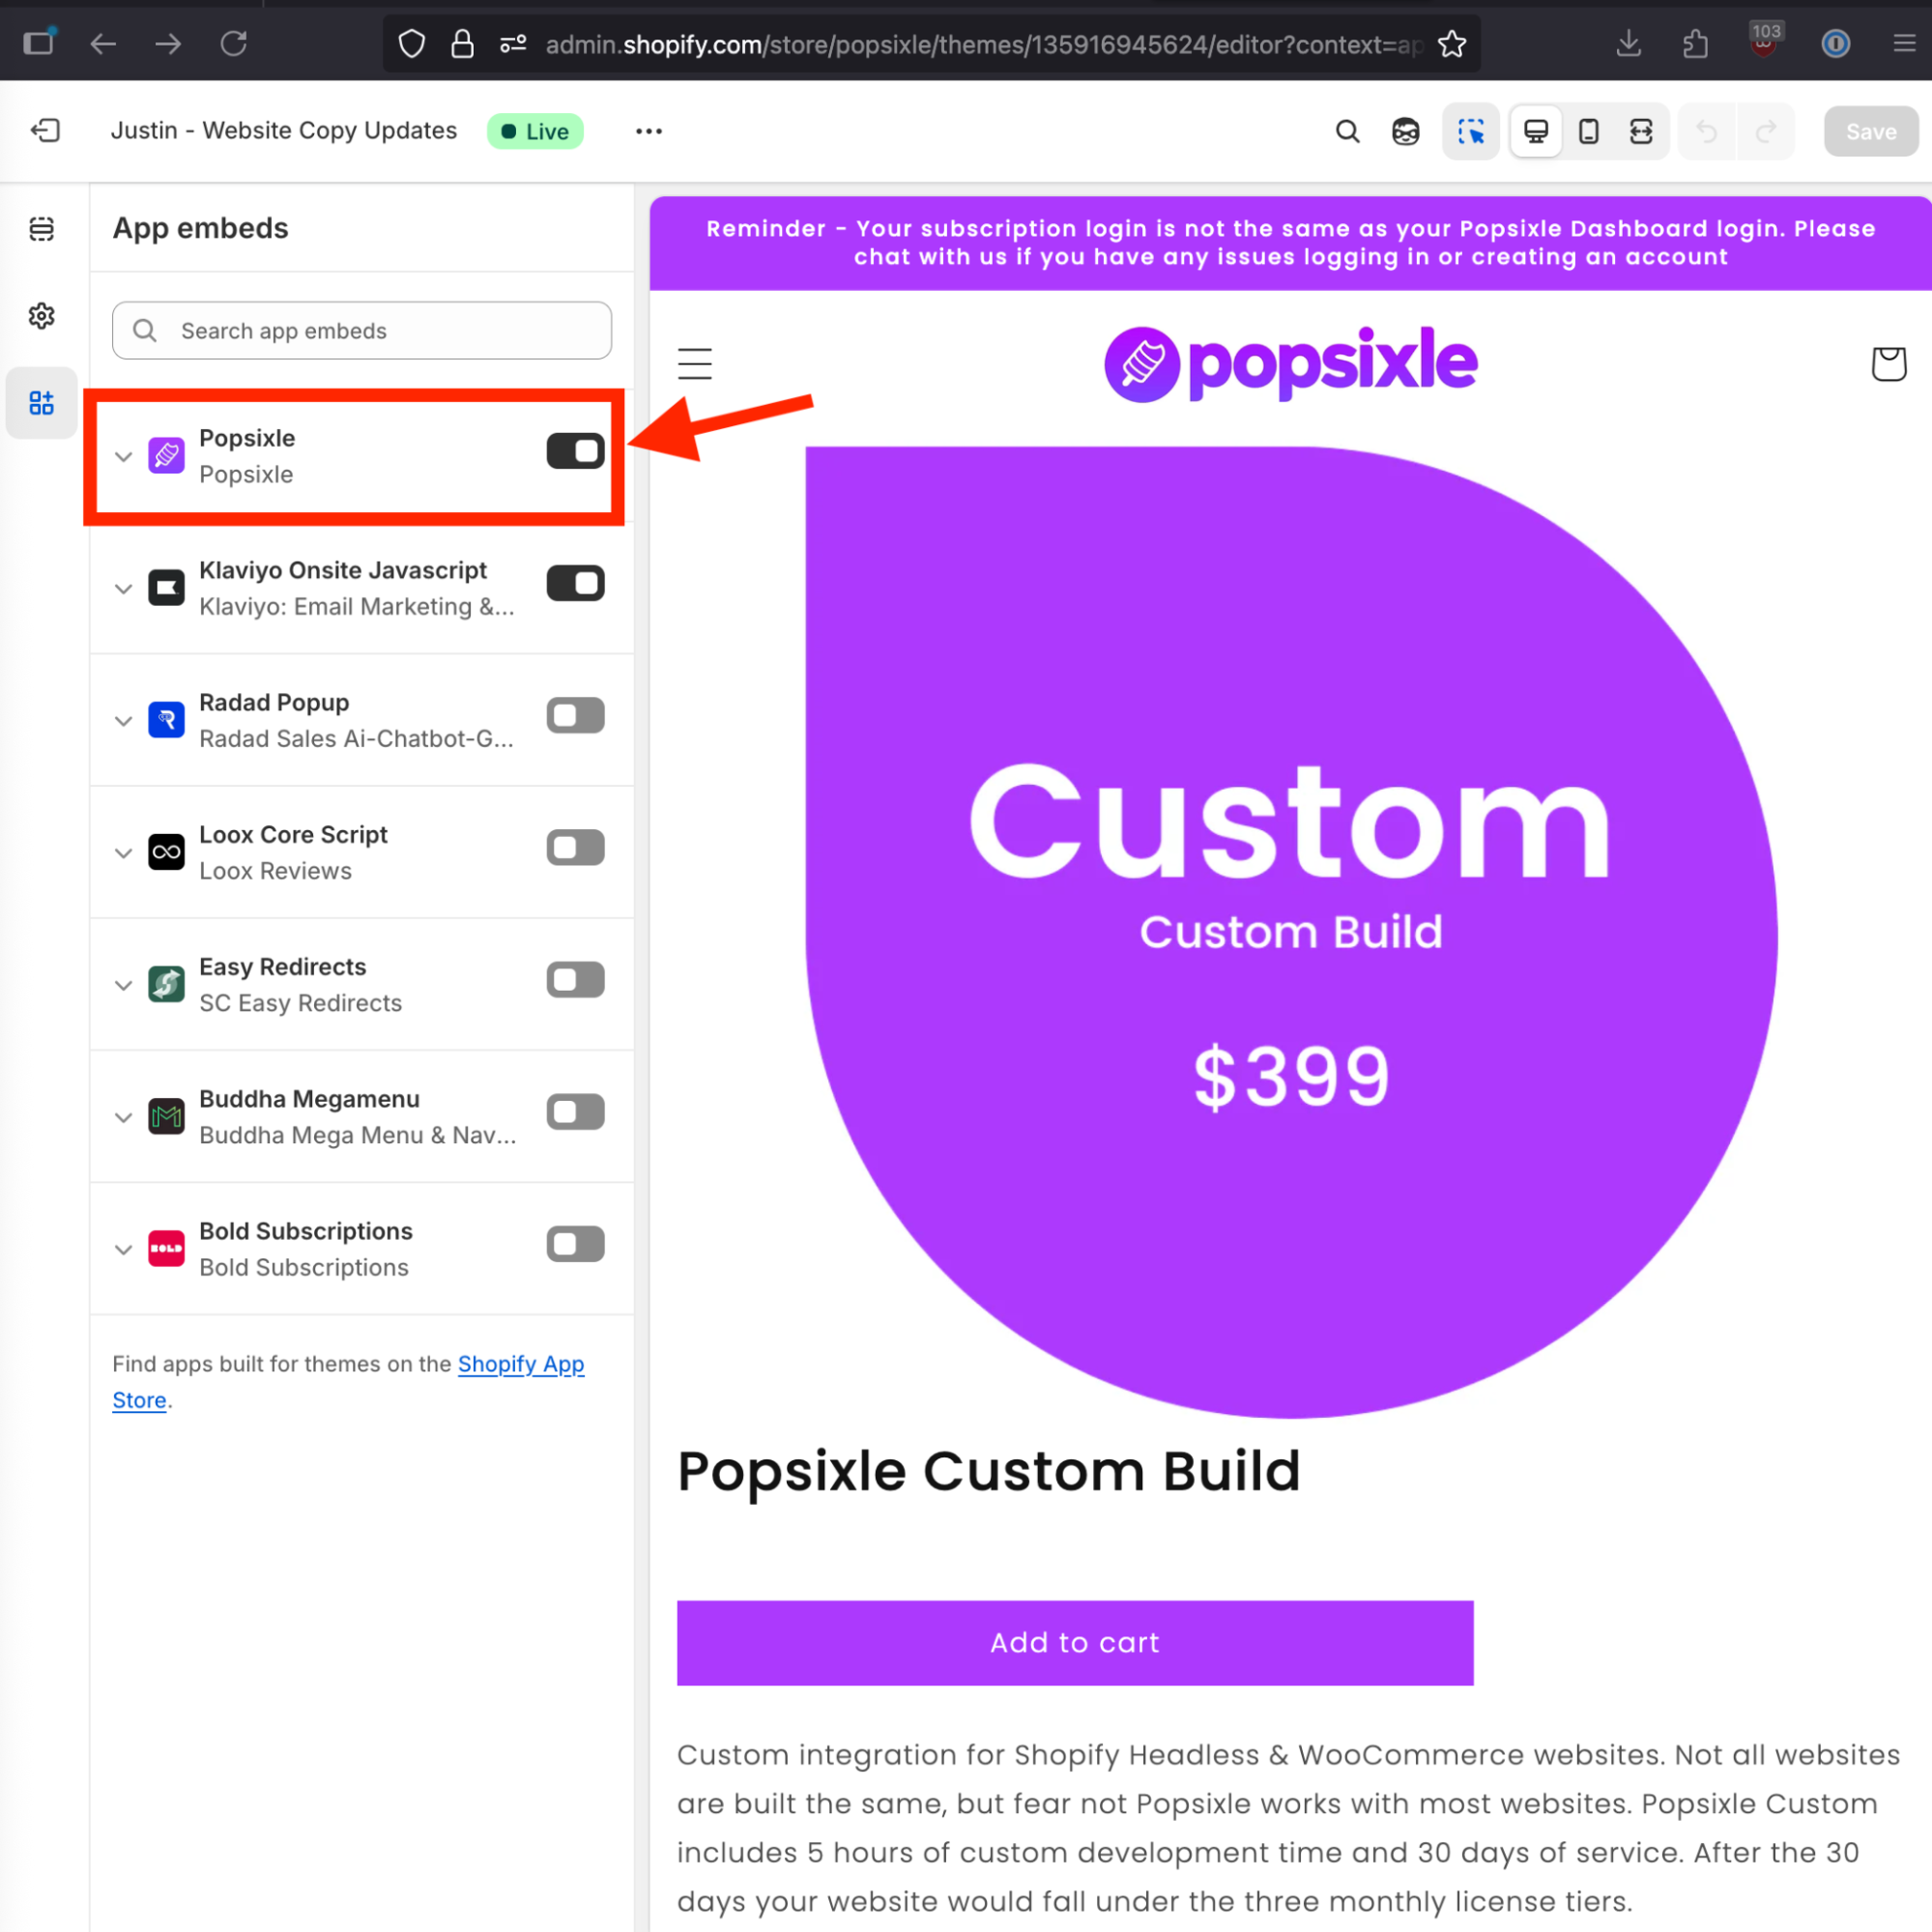
IMPORTANT NOTE: Once you enable the app embed toggle, you must click the black save button on the upper right hand side of the page before leaving the page.
Return to the Popsixle app and if you see a green Enabled alert your Popsixle Pixel is now collecting data and live! If you see anything else please try again or reach out to our support team via email or live chat.
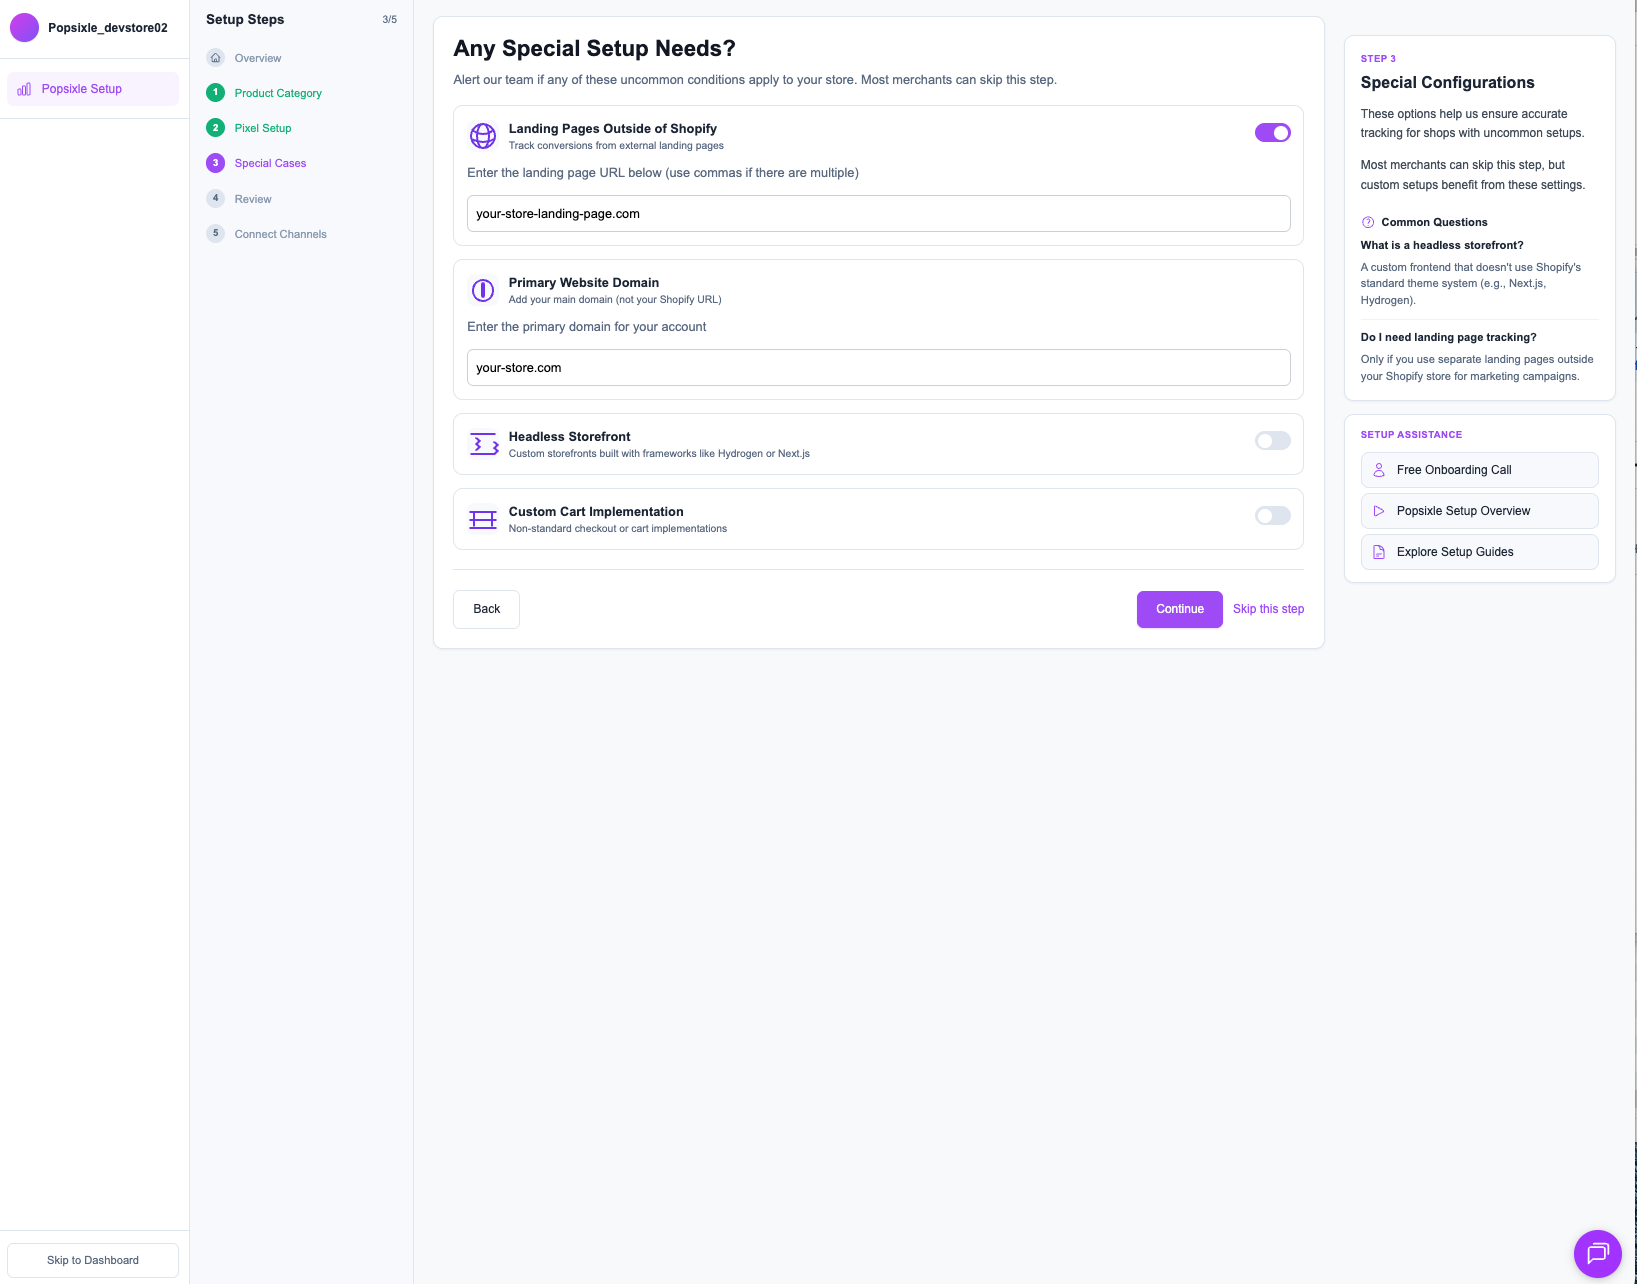
Your next step will go through some additional questions about your store. Don't worry if they are not applicable to your store. These questions will ensure our team can support you if additional steps are needed to have the best data possible.
Once completed click continue.
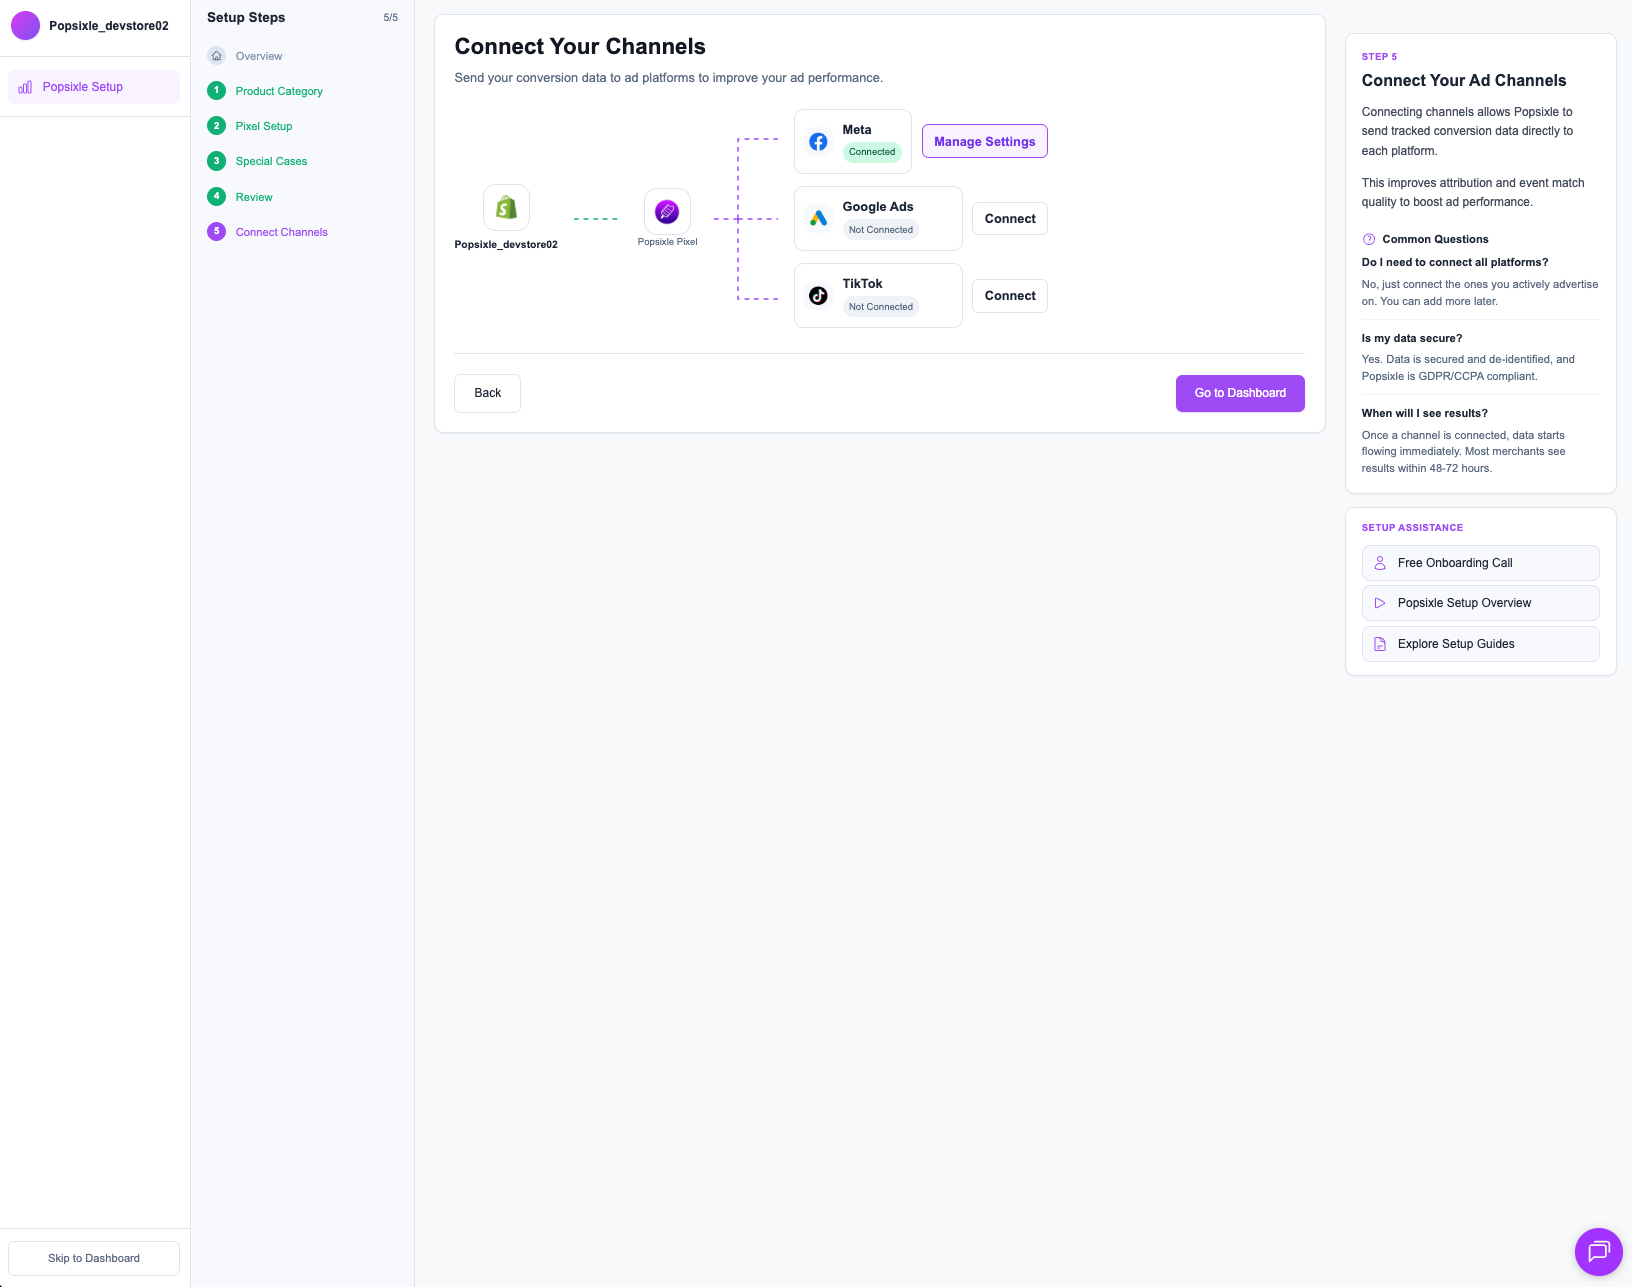
After confirming, you’ve successfully started collecting data with the Popsixle Pixel and it is now time to start sending data to your ad channels. This guide will continue to help you setup your Meta connector but feel free to use our other guides if you'd like to setup Google or TikTok.
To continue just click the connect button next to the channel of your choice.
Meta Integration
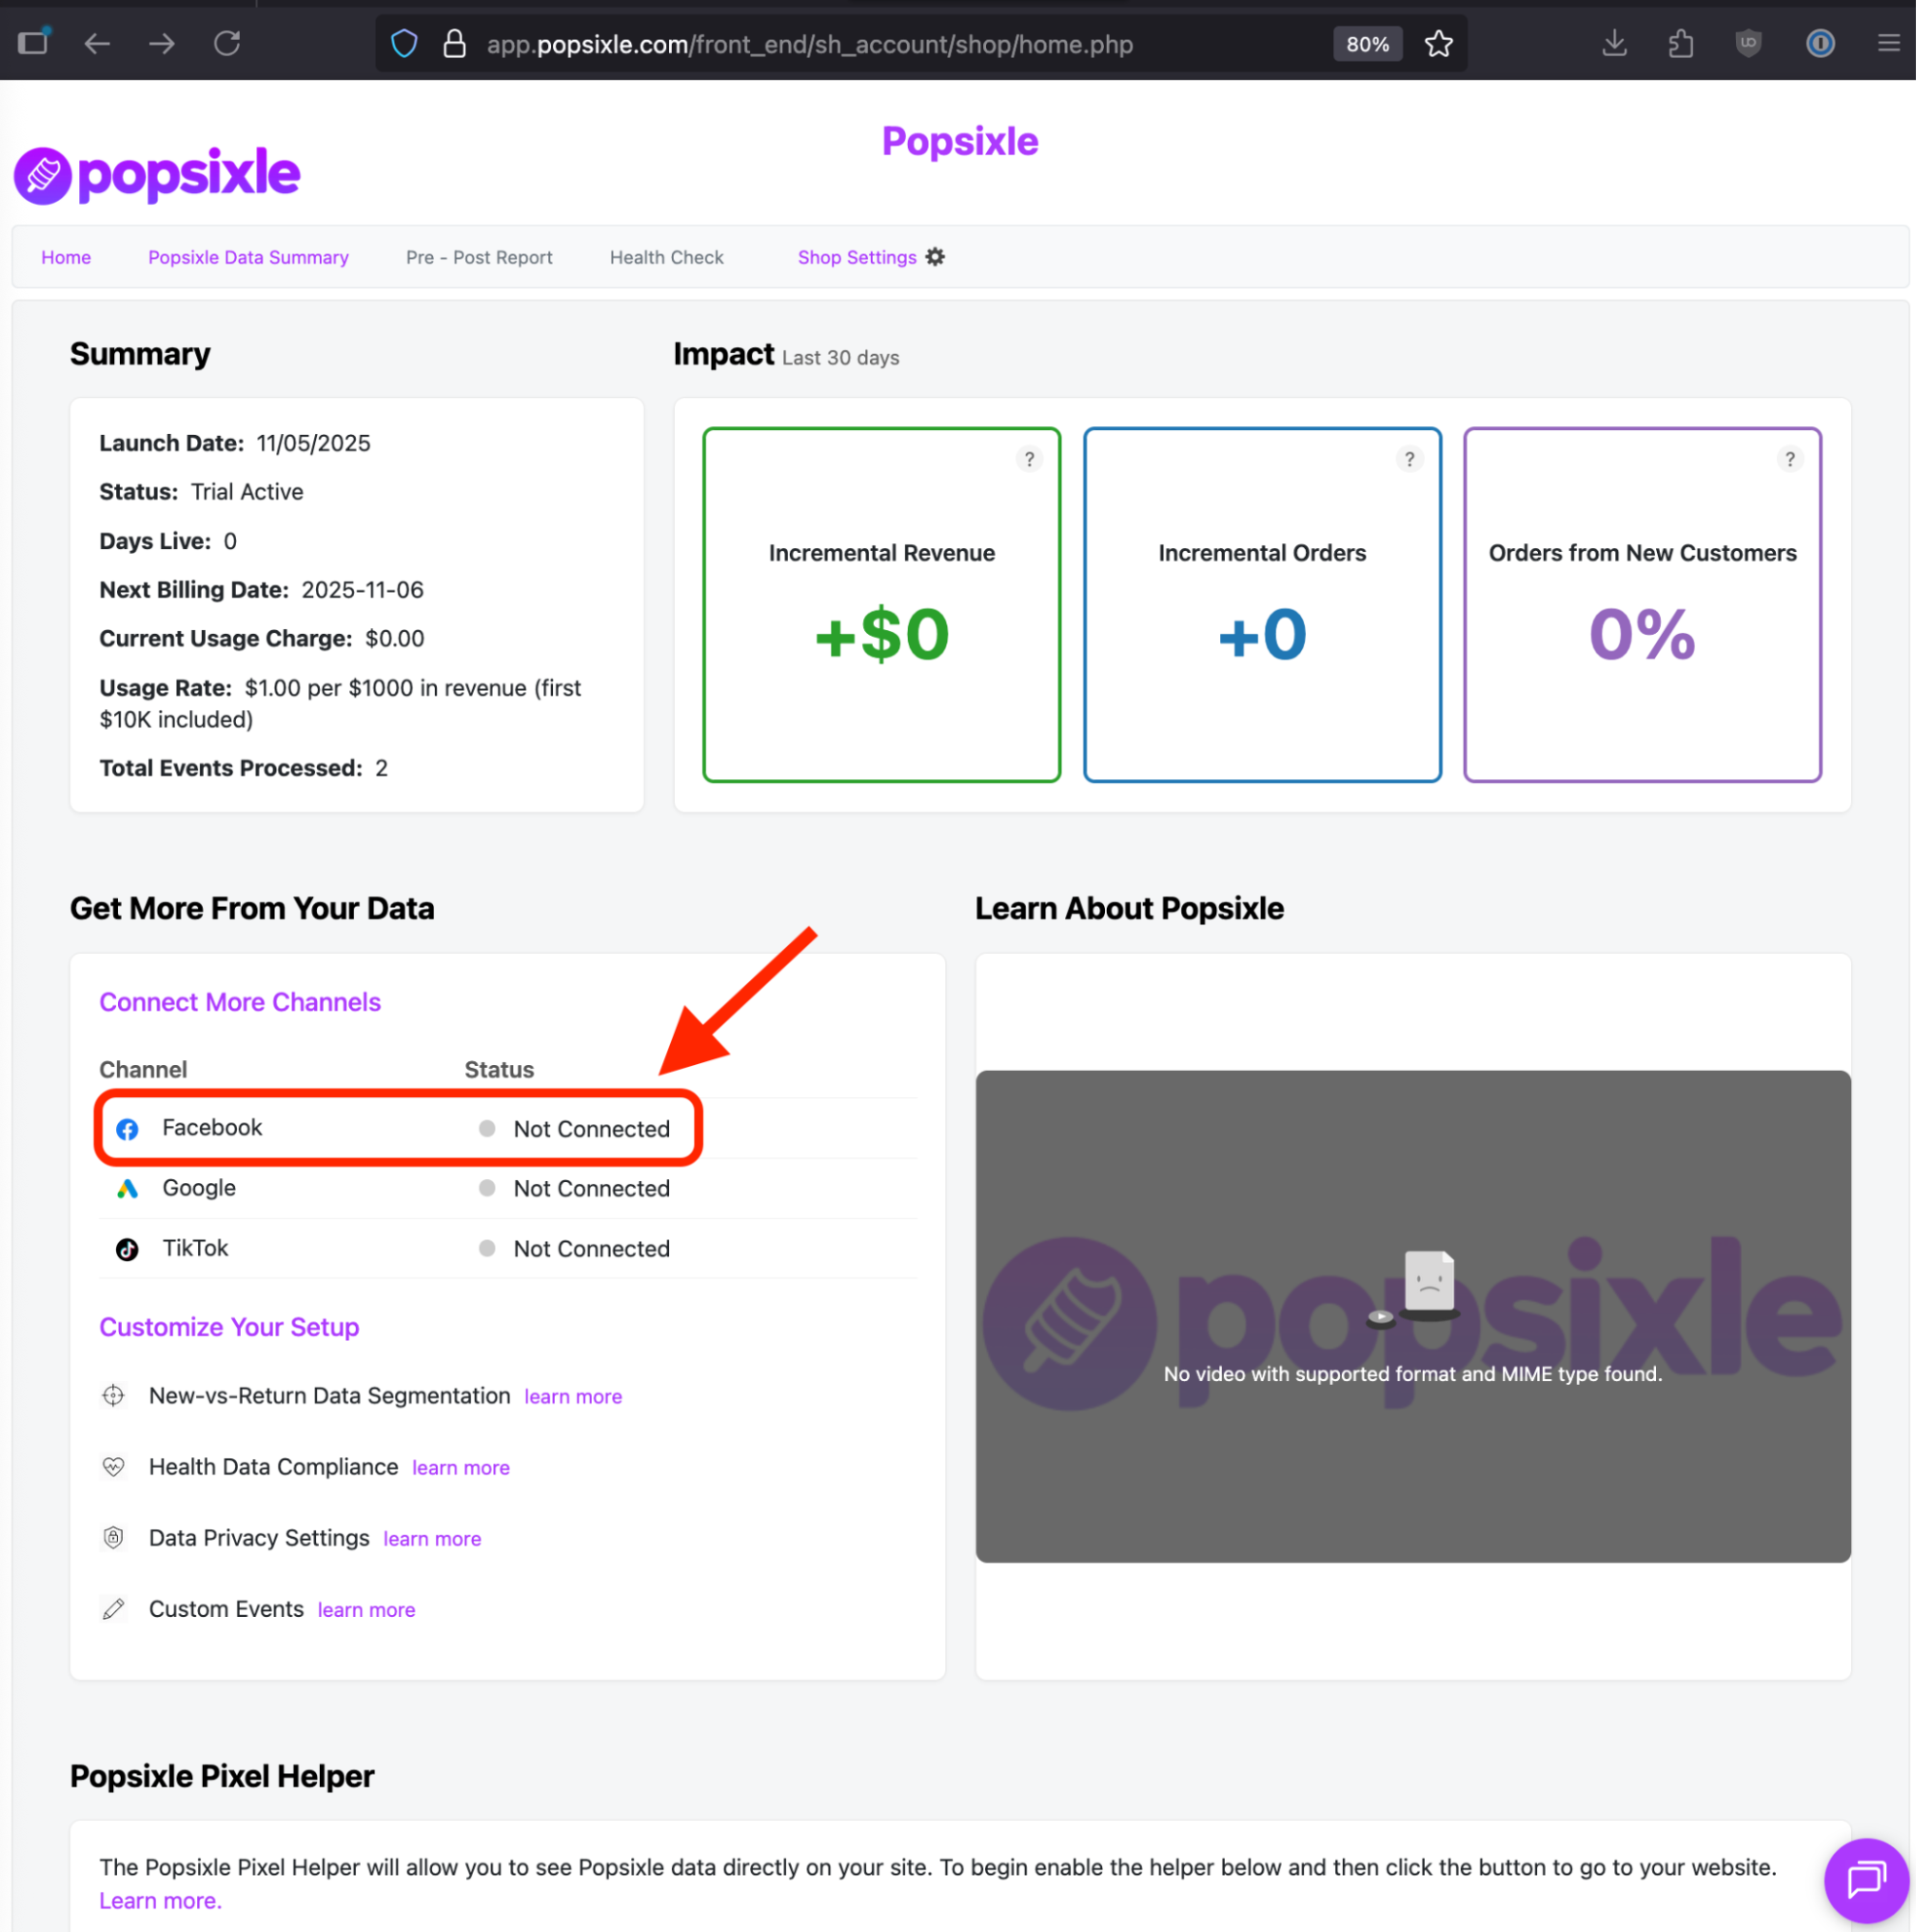
Click Connect Now to get started.
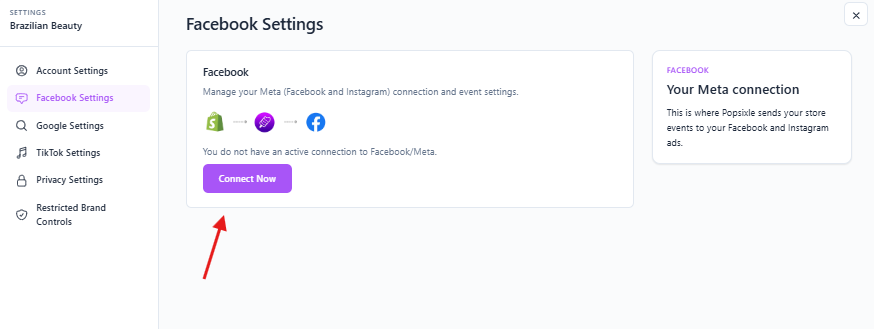
Pixel/Dataset ID
After clicking Connect Now, a modal will open where you can enter the Pixel/Dataset ID and the CAPI Token.
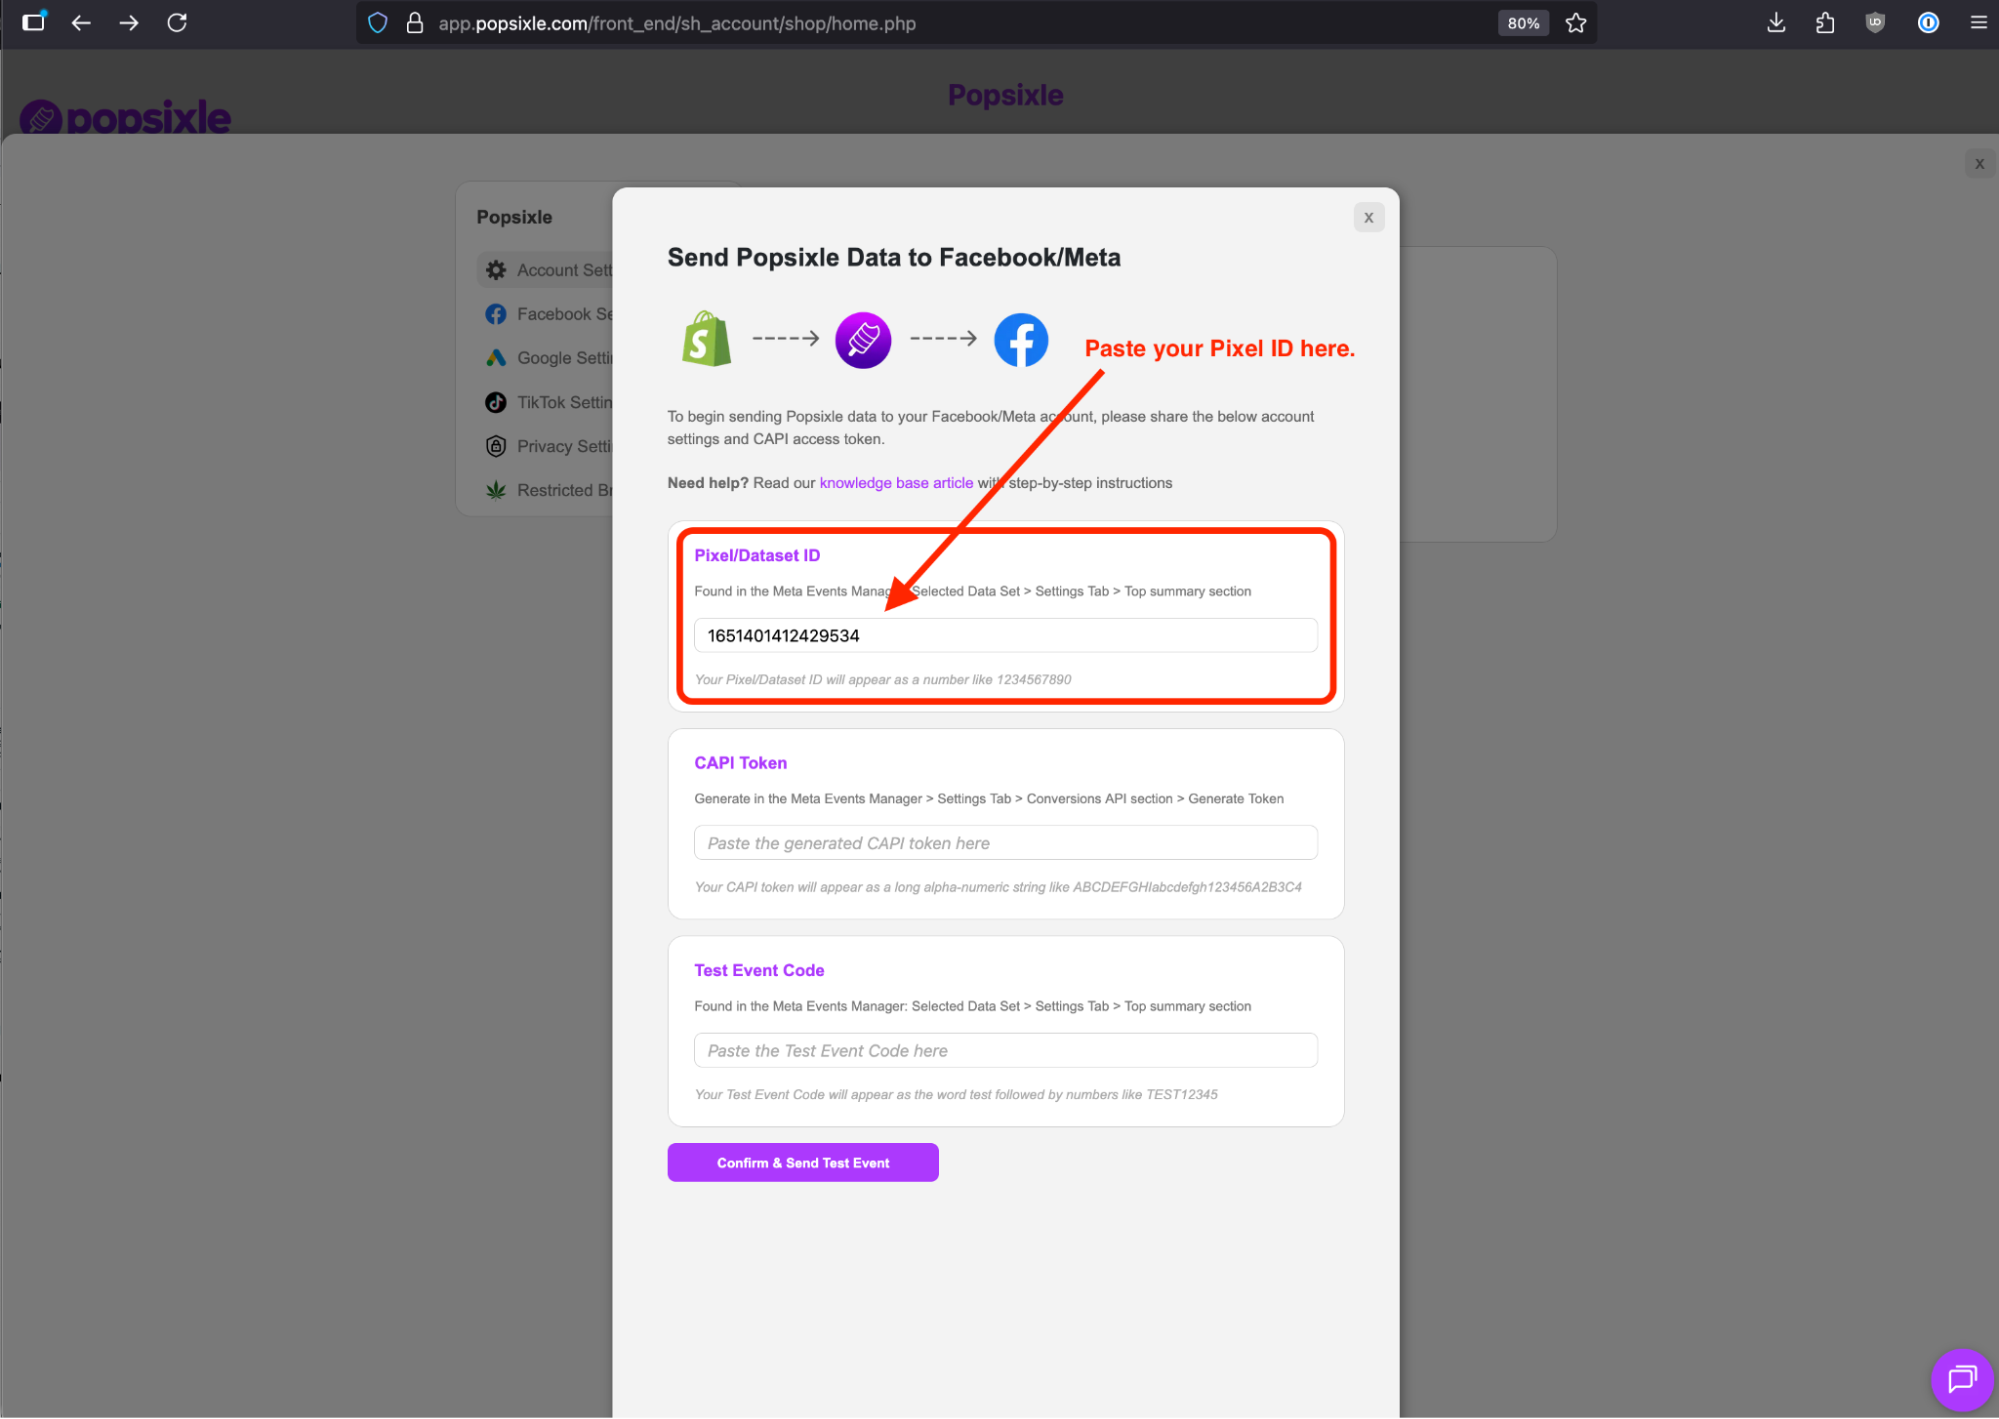
Lets start by entering your Pixel/Dataset ID.
Start by clicking here to log into Meta Business Manager.
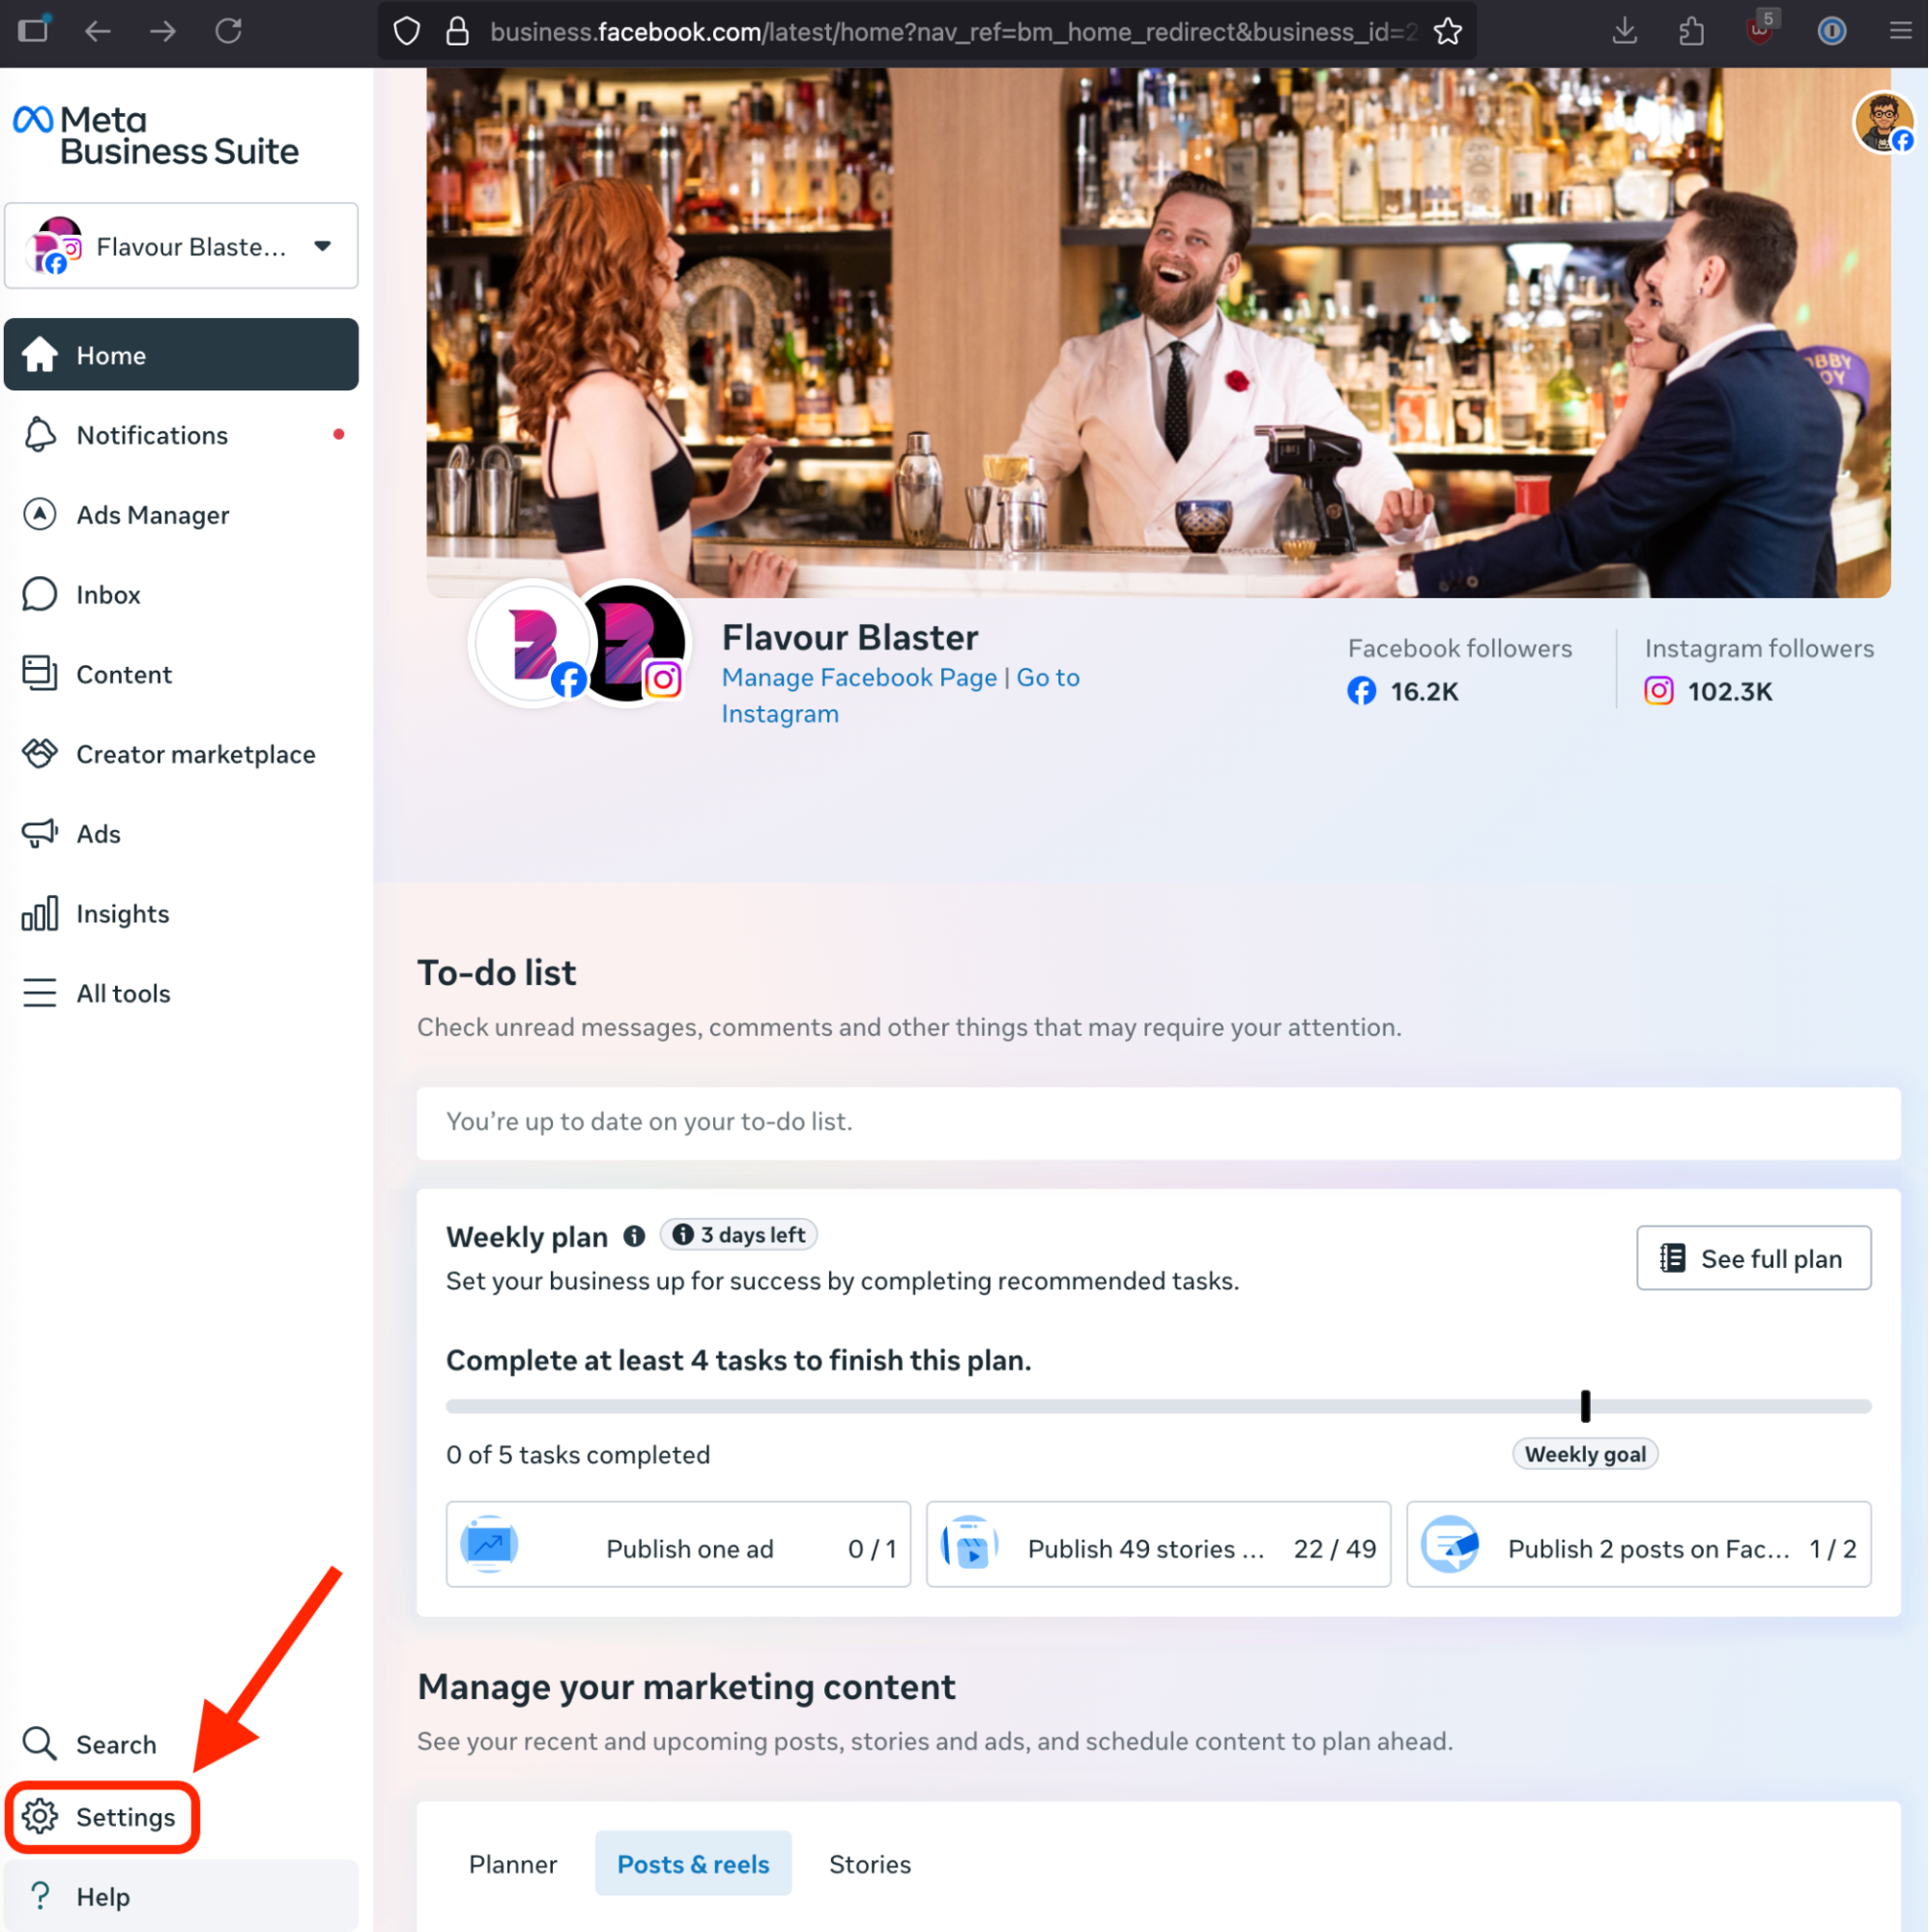
Once in the Meta business manager, click on Settings in the bottom left corner.
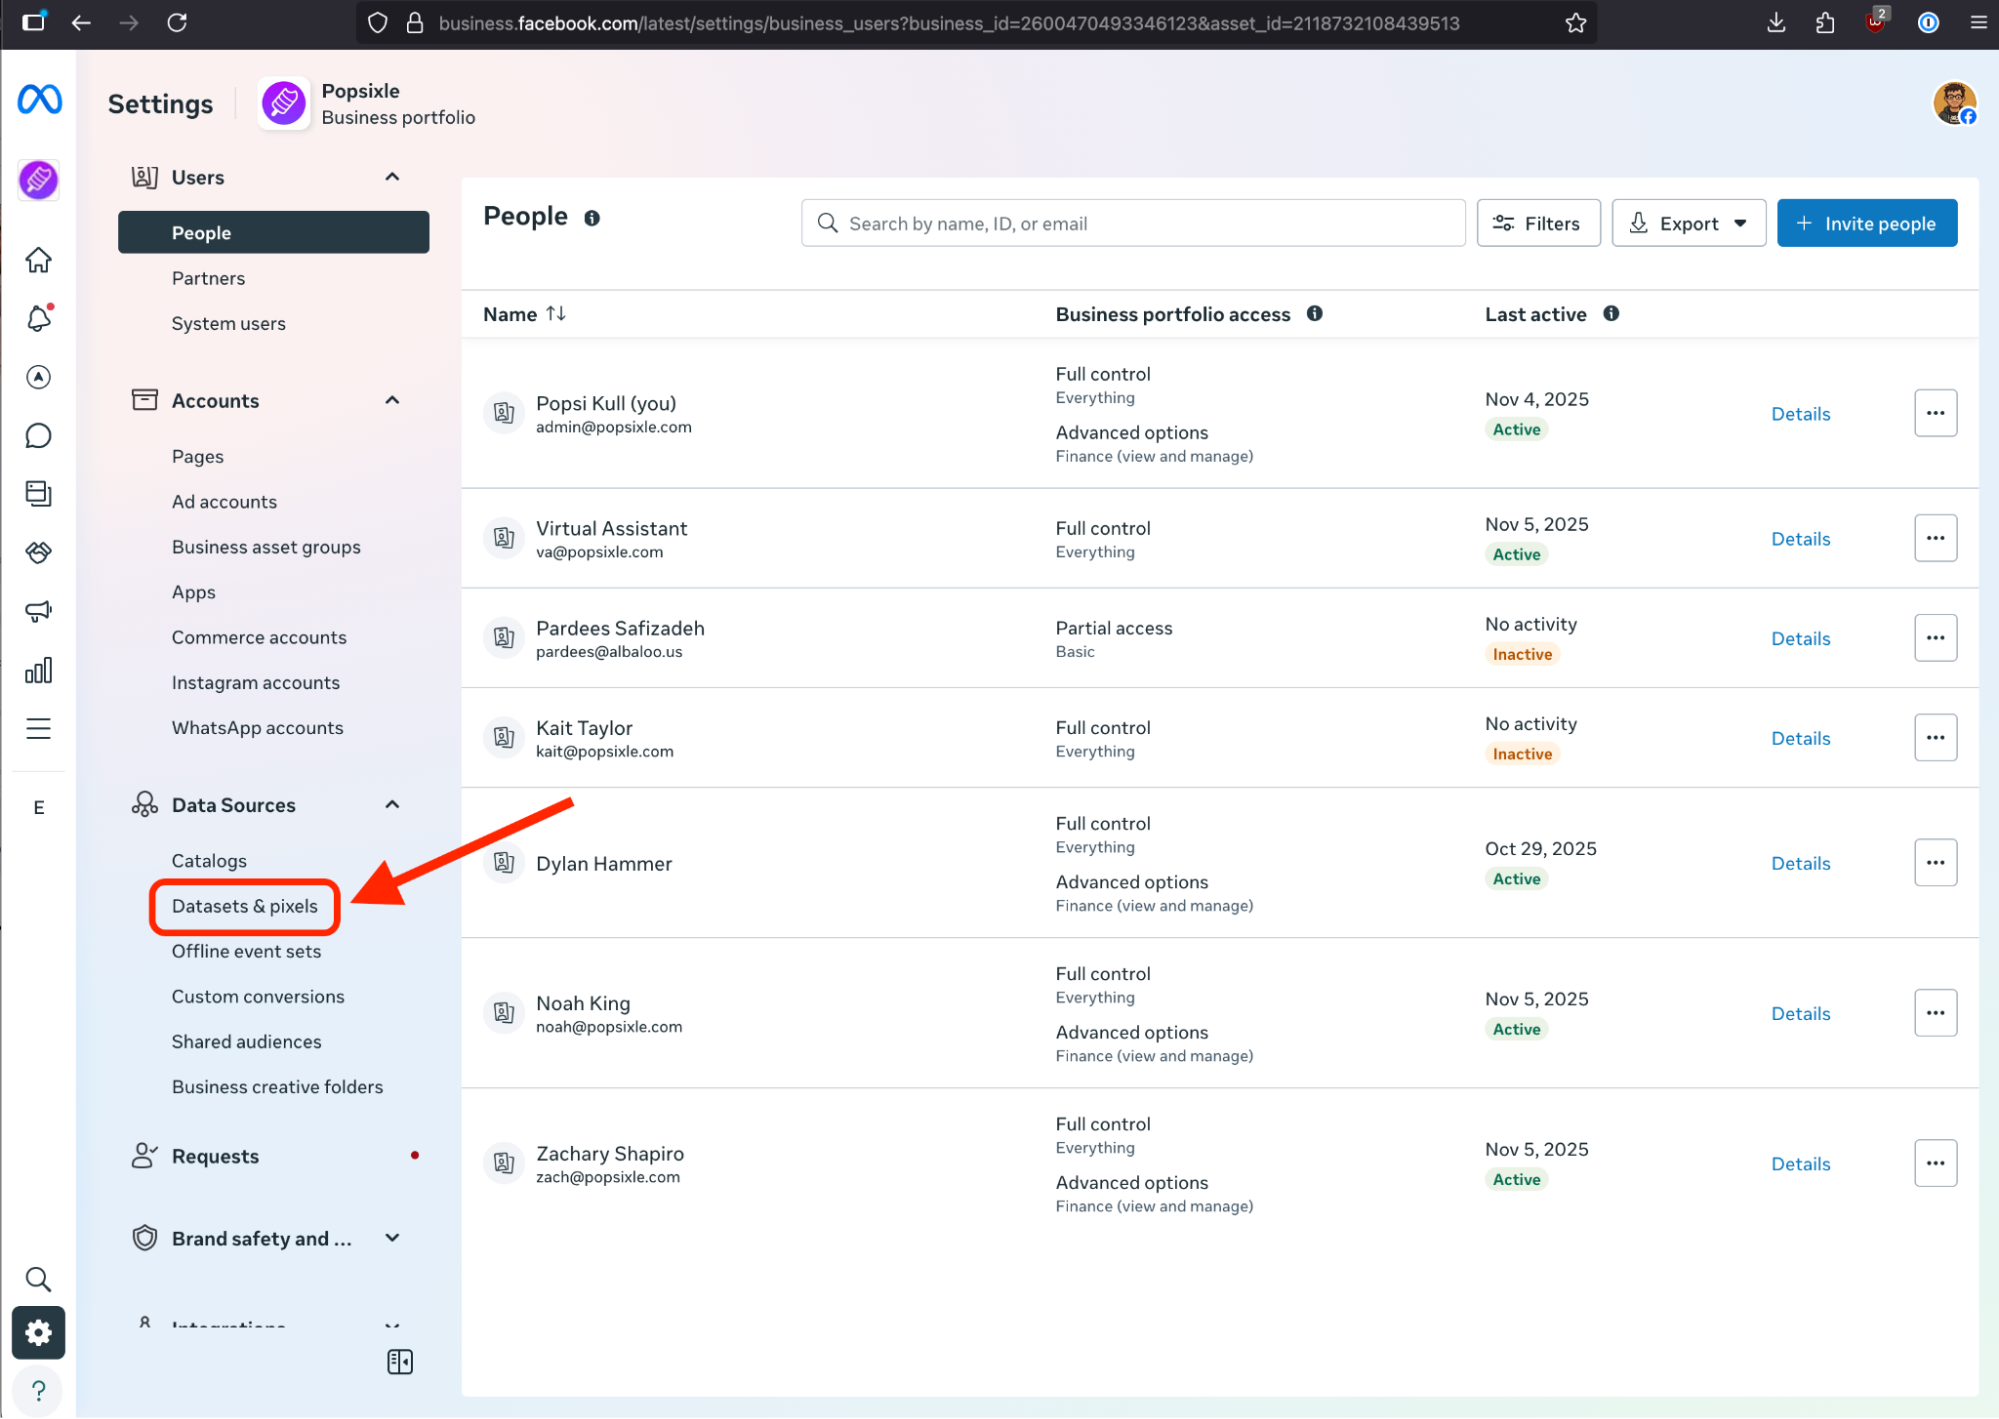
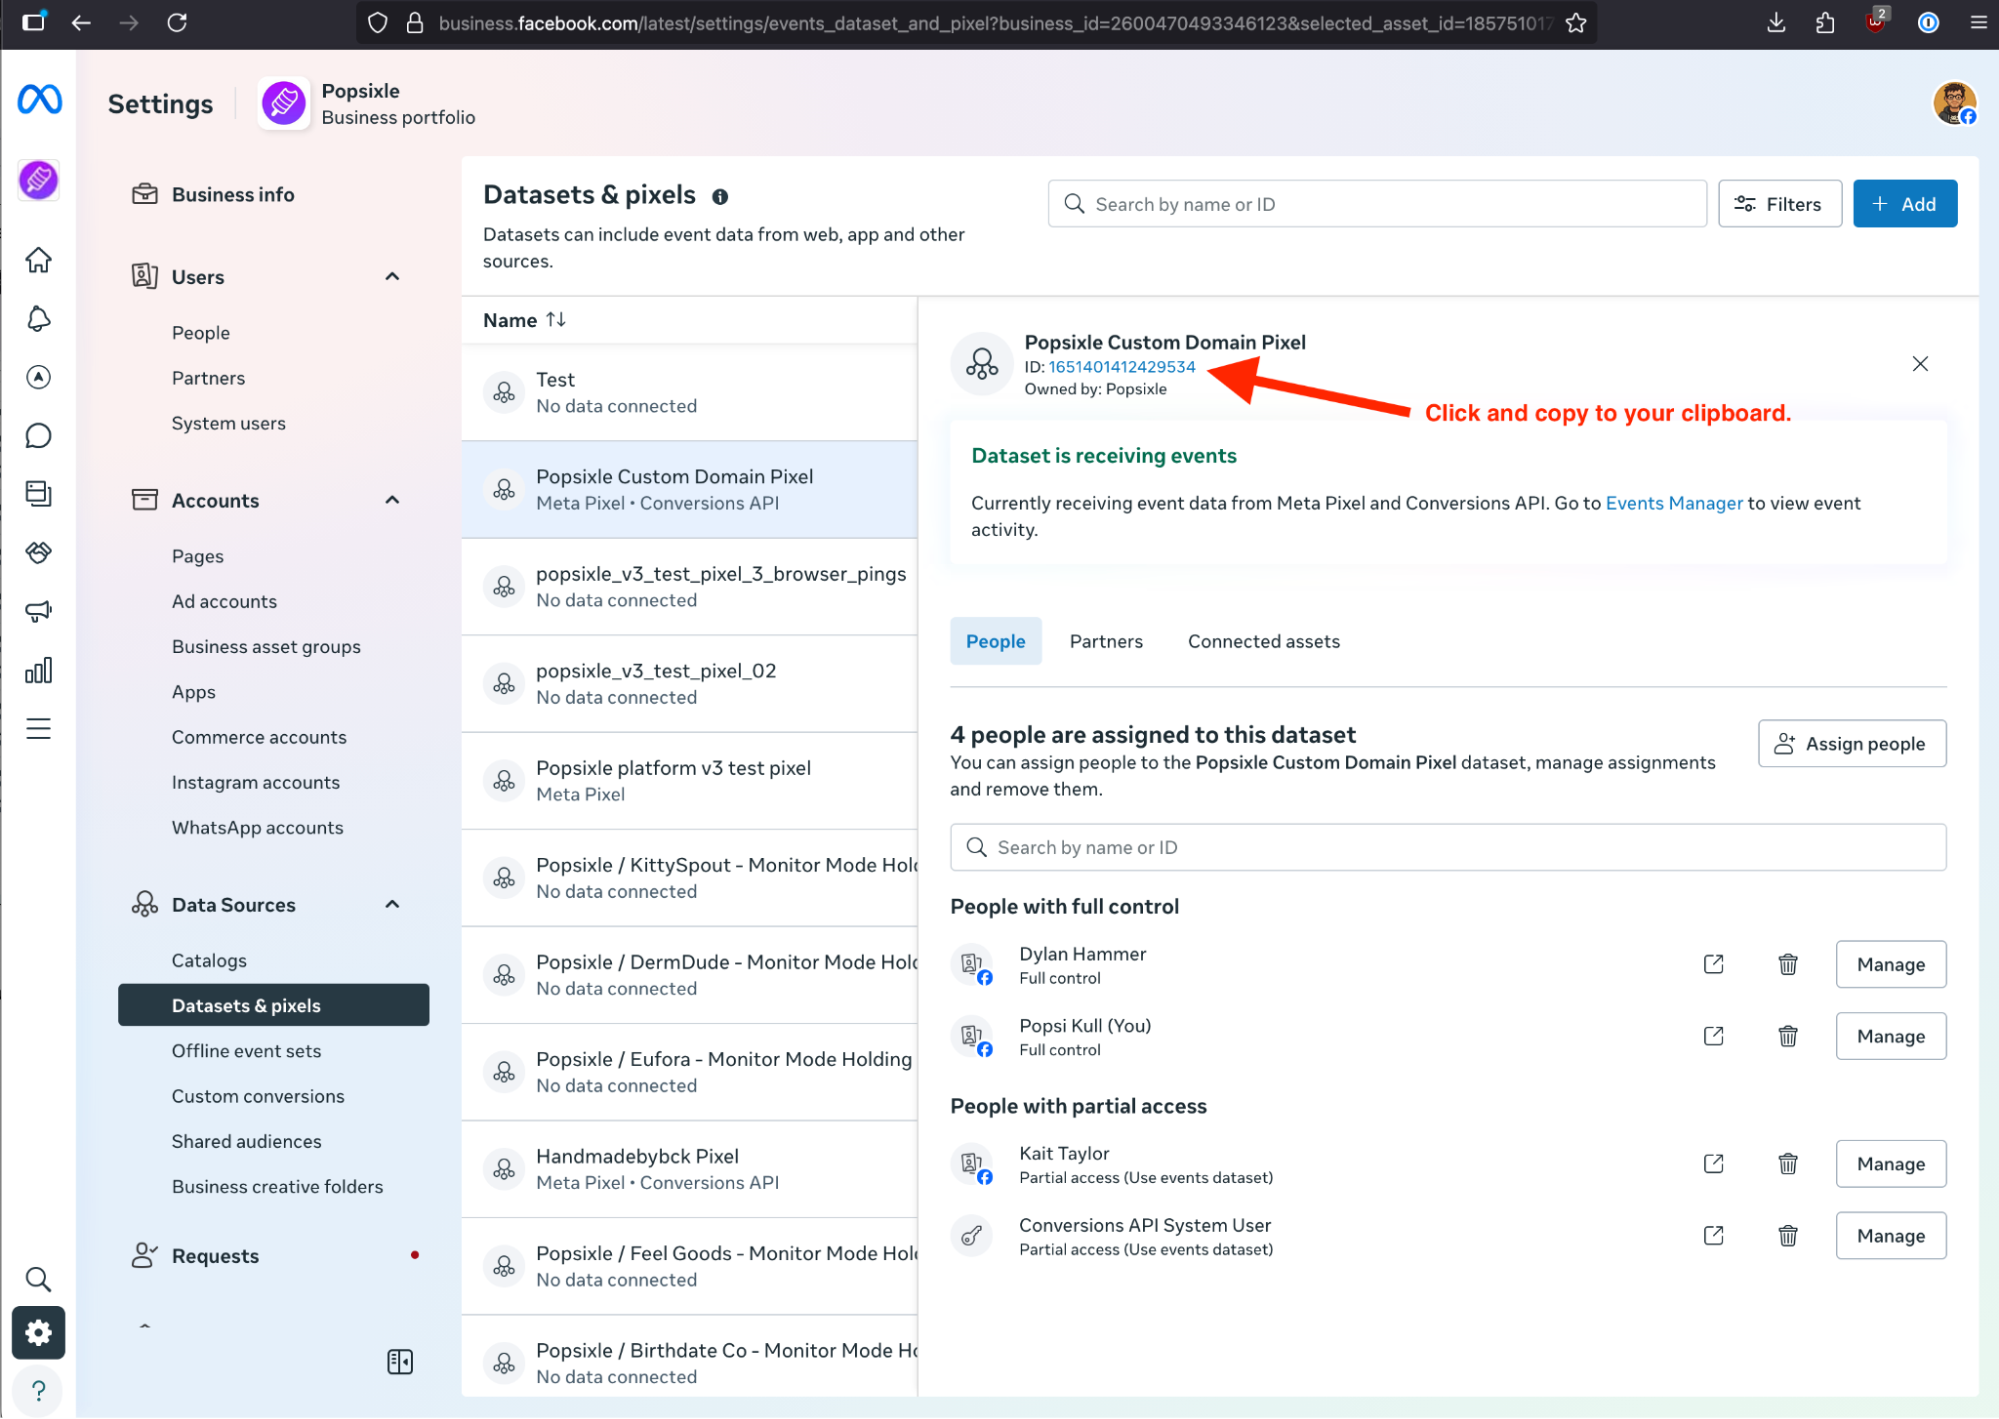
From Settings, find Data Sources on the left panel and click on Datasets & pixels.
From the Datasets & Pixels page, find your active pixel on the left navigational bar. The ID will be in blue on the very top of the page. Click the ID to copy it to your clipboard.
Return to the Popsixle dashboard, and paste the ID into the top field.
CAPI Token
Now, lets go get your CAPI Token.
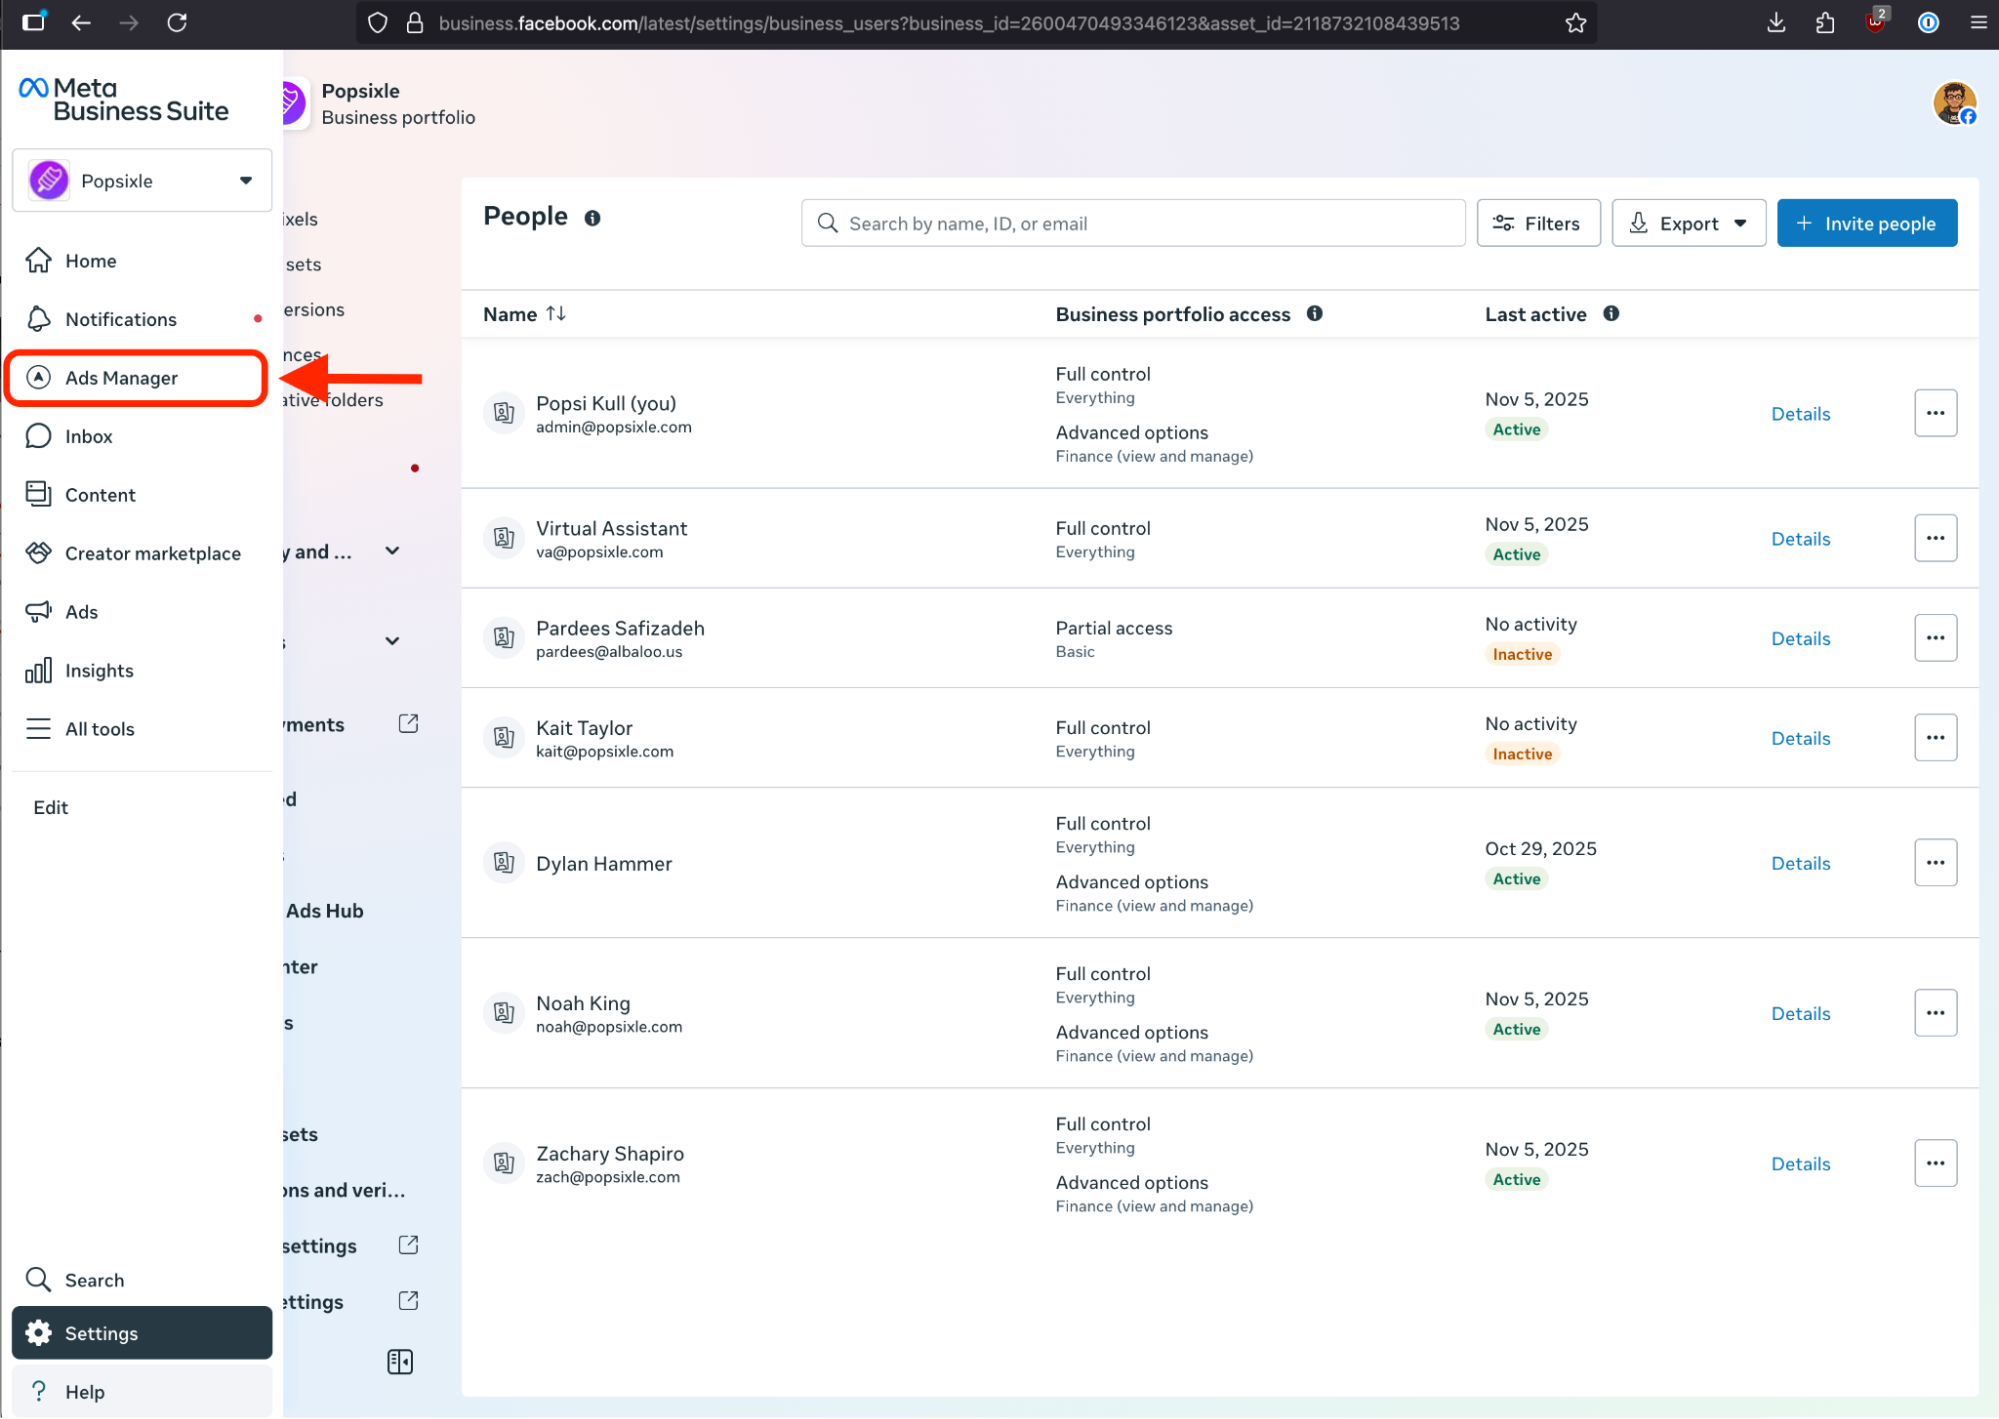
Start by returning to your Meta Business Manager tab and click on Ads Manager on the left navigational bar.
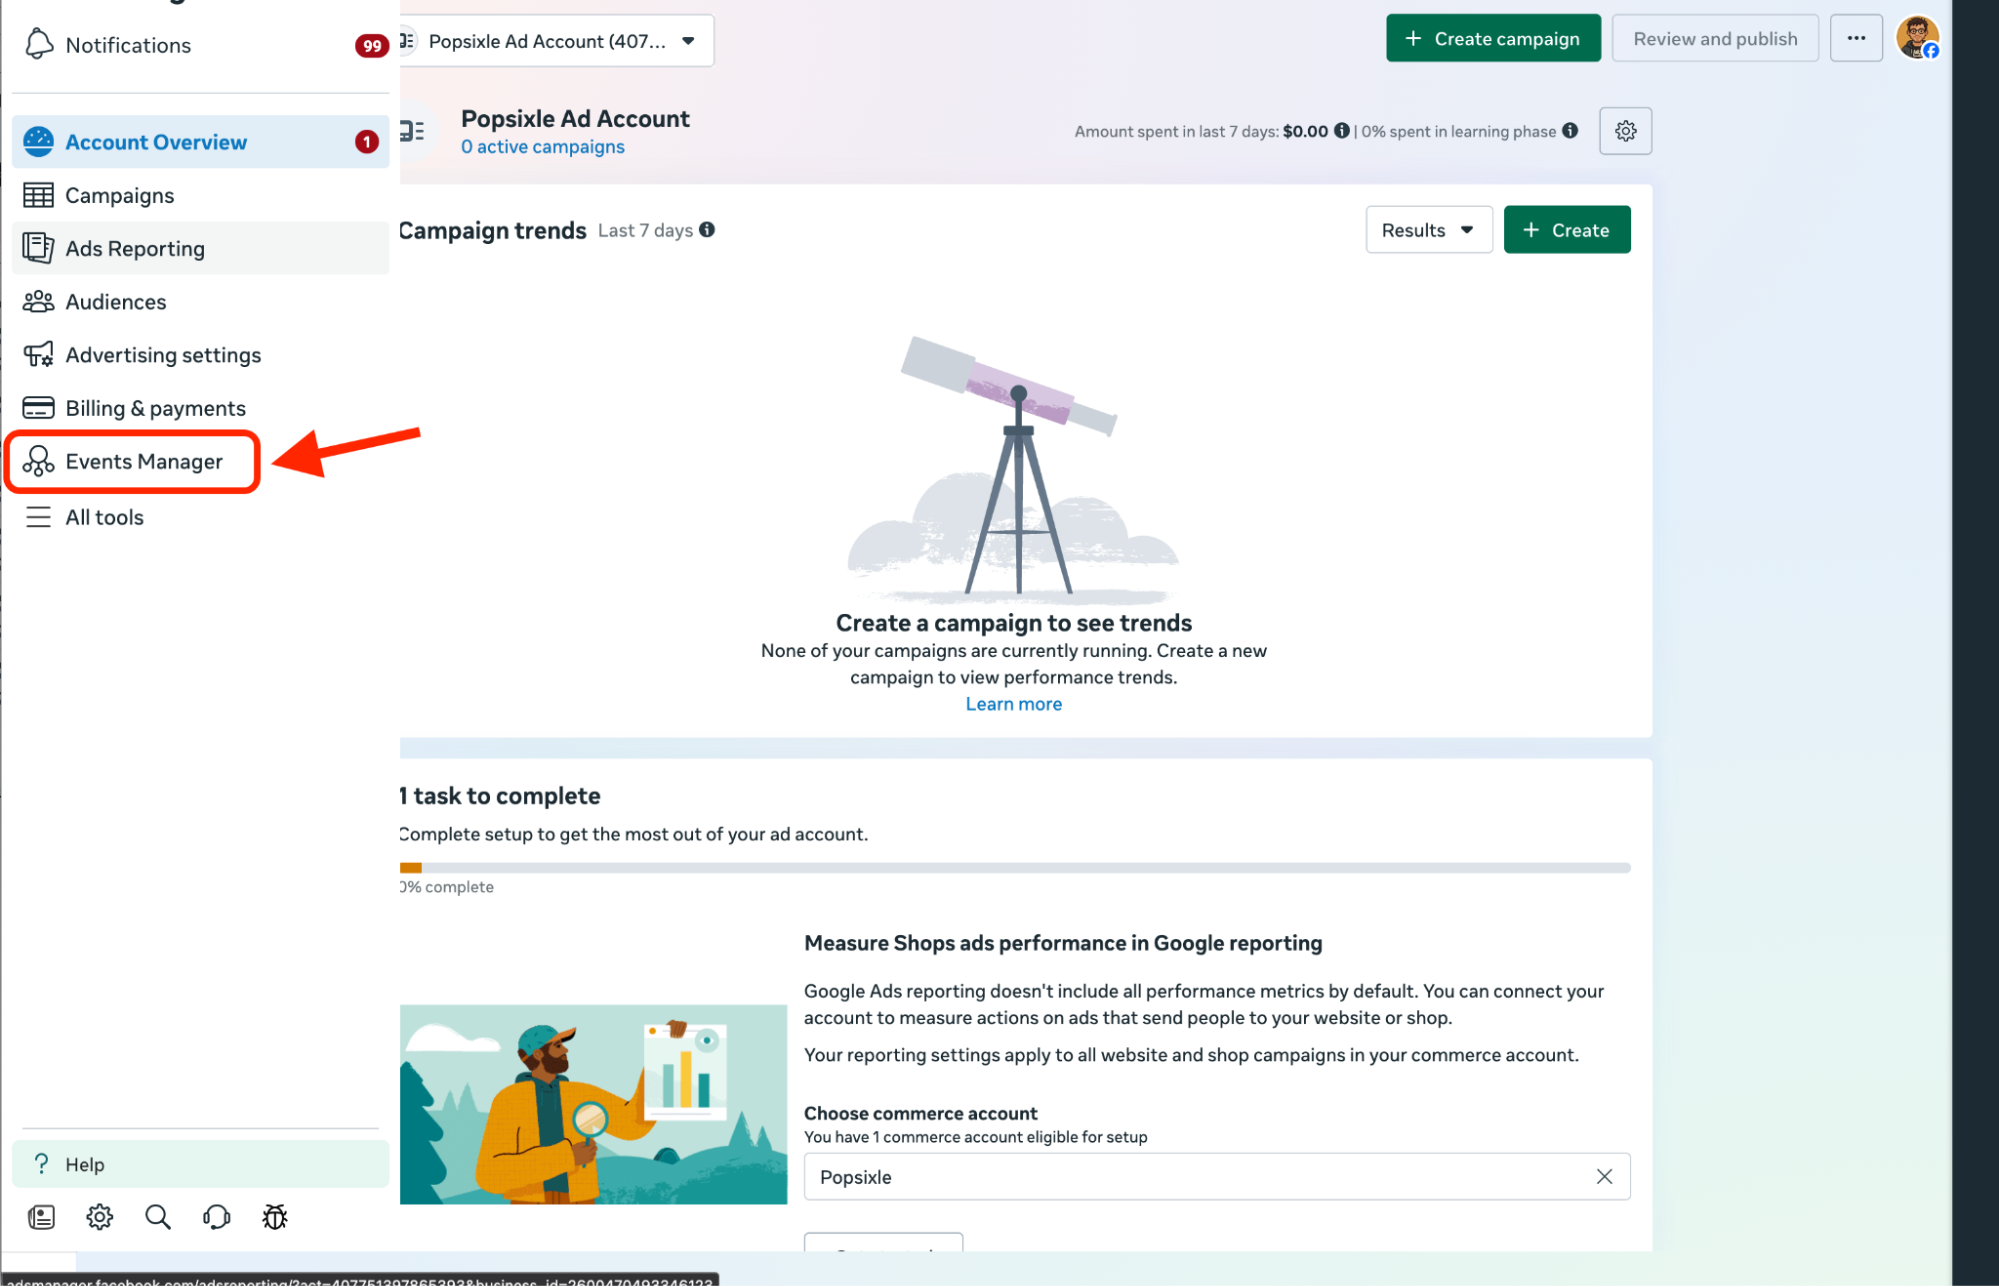
Once in the Ads Manager, from the left navigational bar, click on Events Manager.
From within the Events Manager, click on Datasets on the left panel.
Once within datasets, copy Pixel ID that you pasted into the Popsixle dashboard and paste it into the search bar. This will ensure you’ve selected the right Pixel.
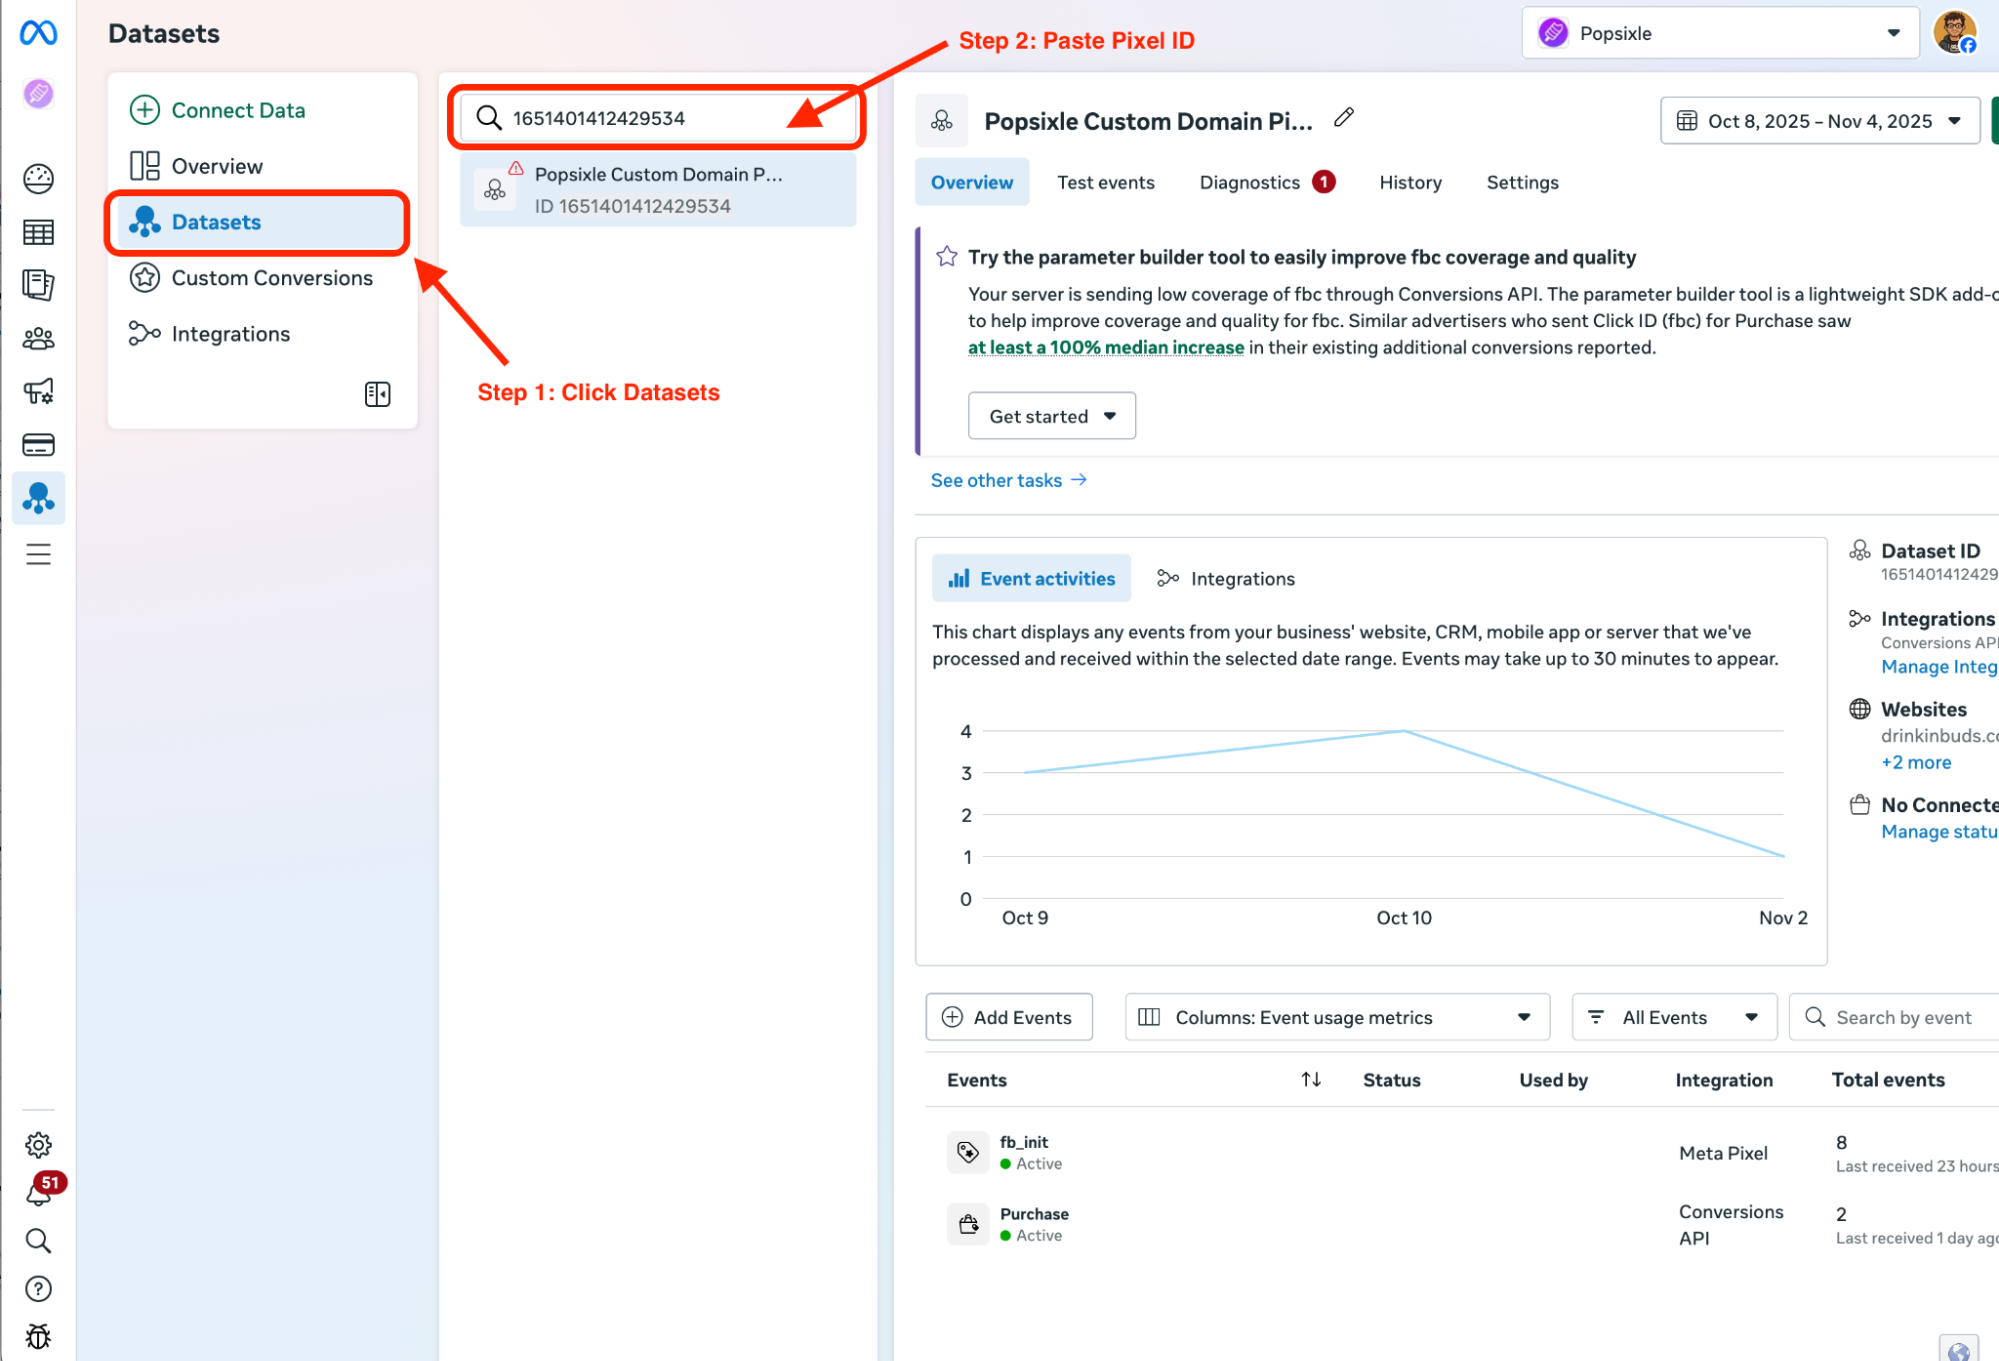
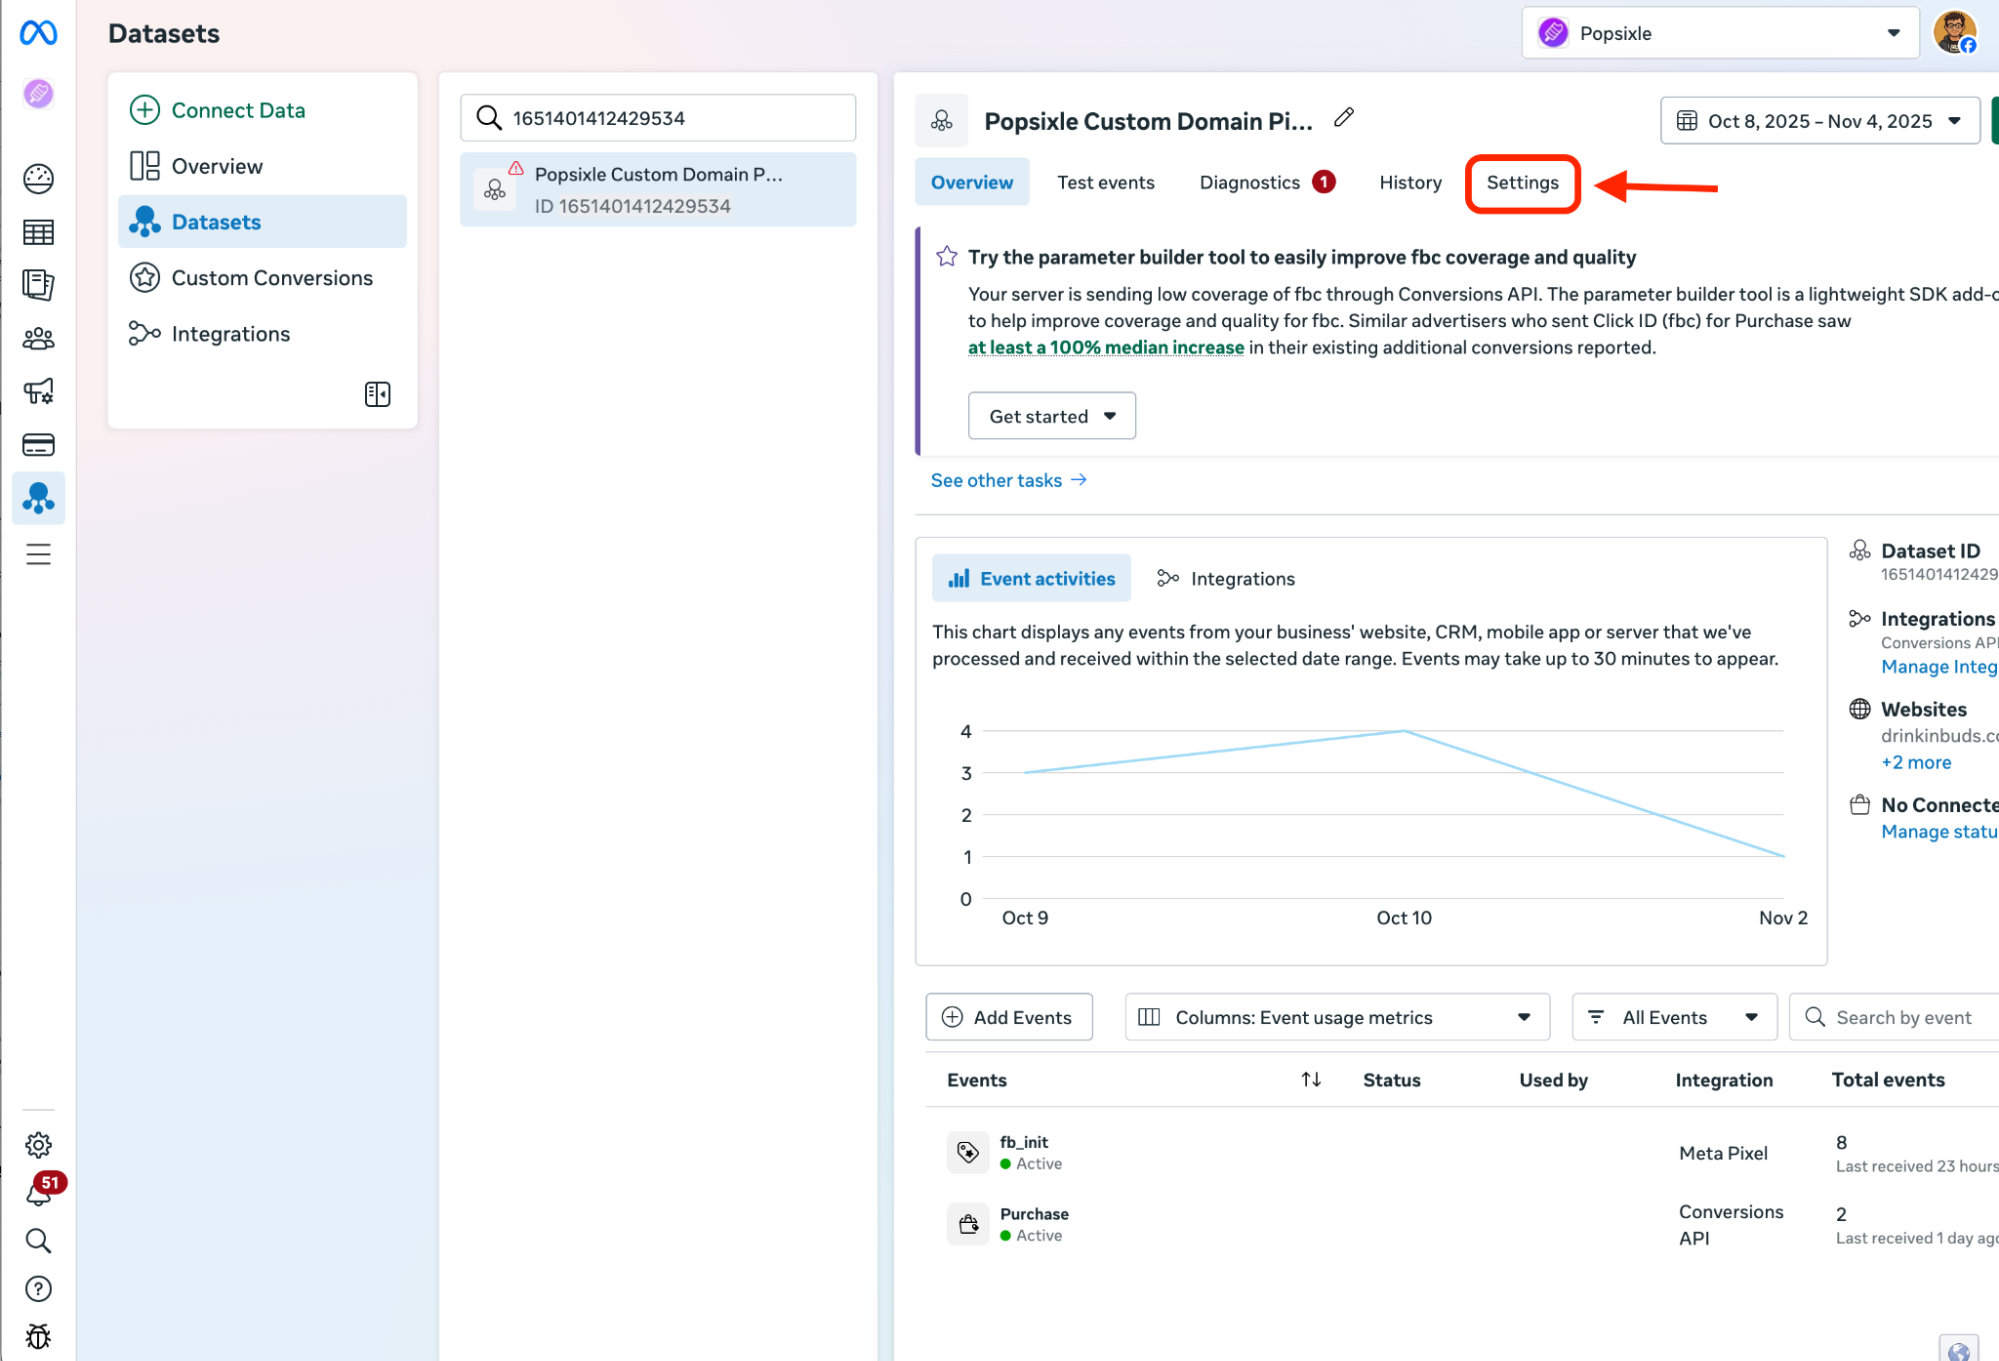
Once you’ve selected your Pixel, click Settings on the top right.
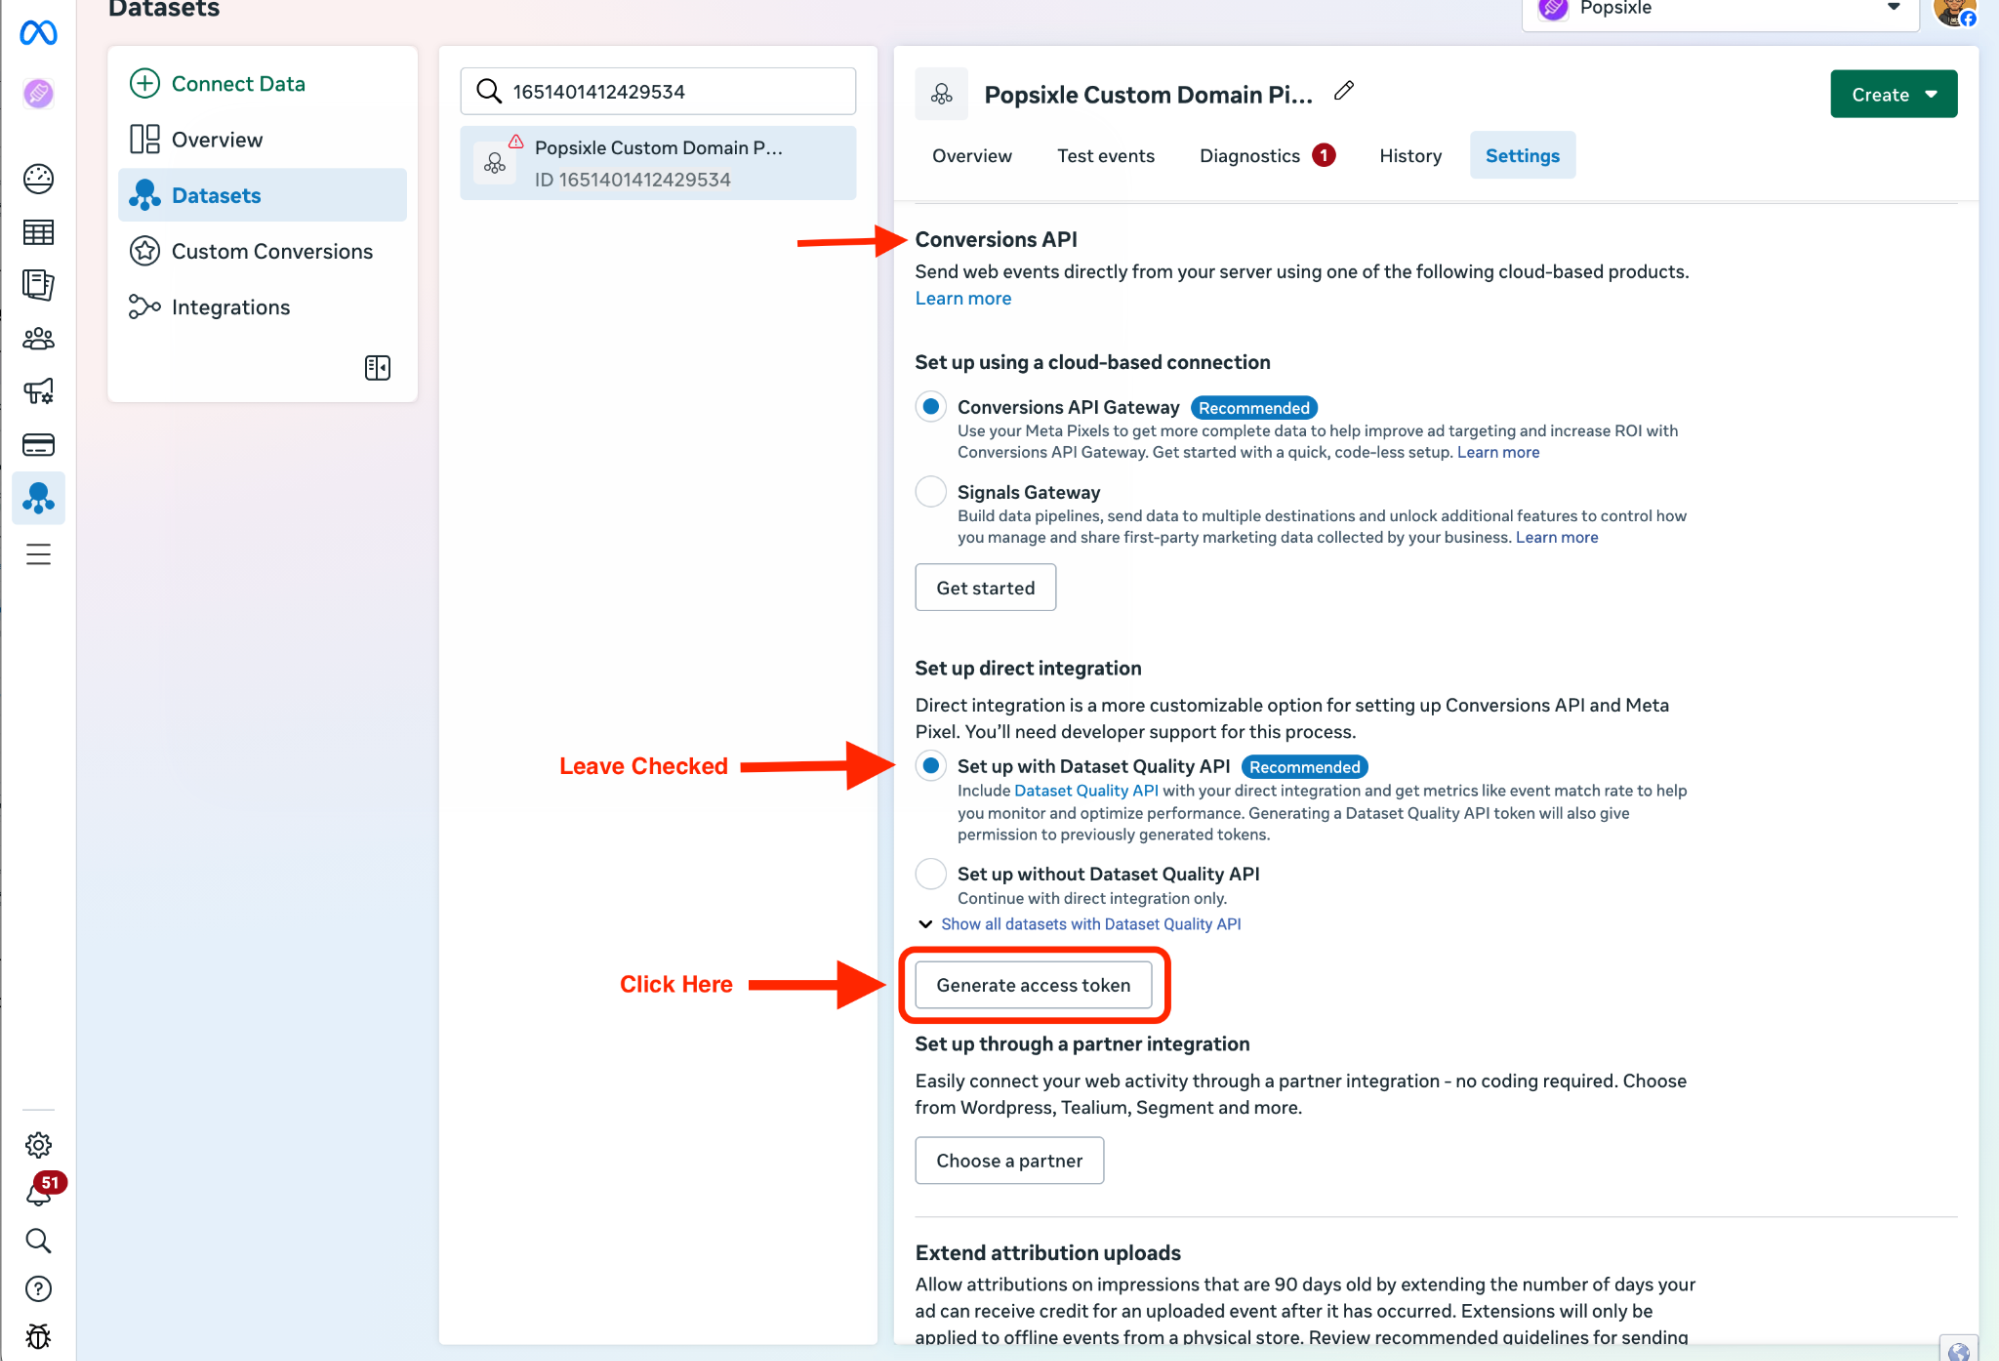
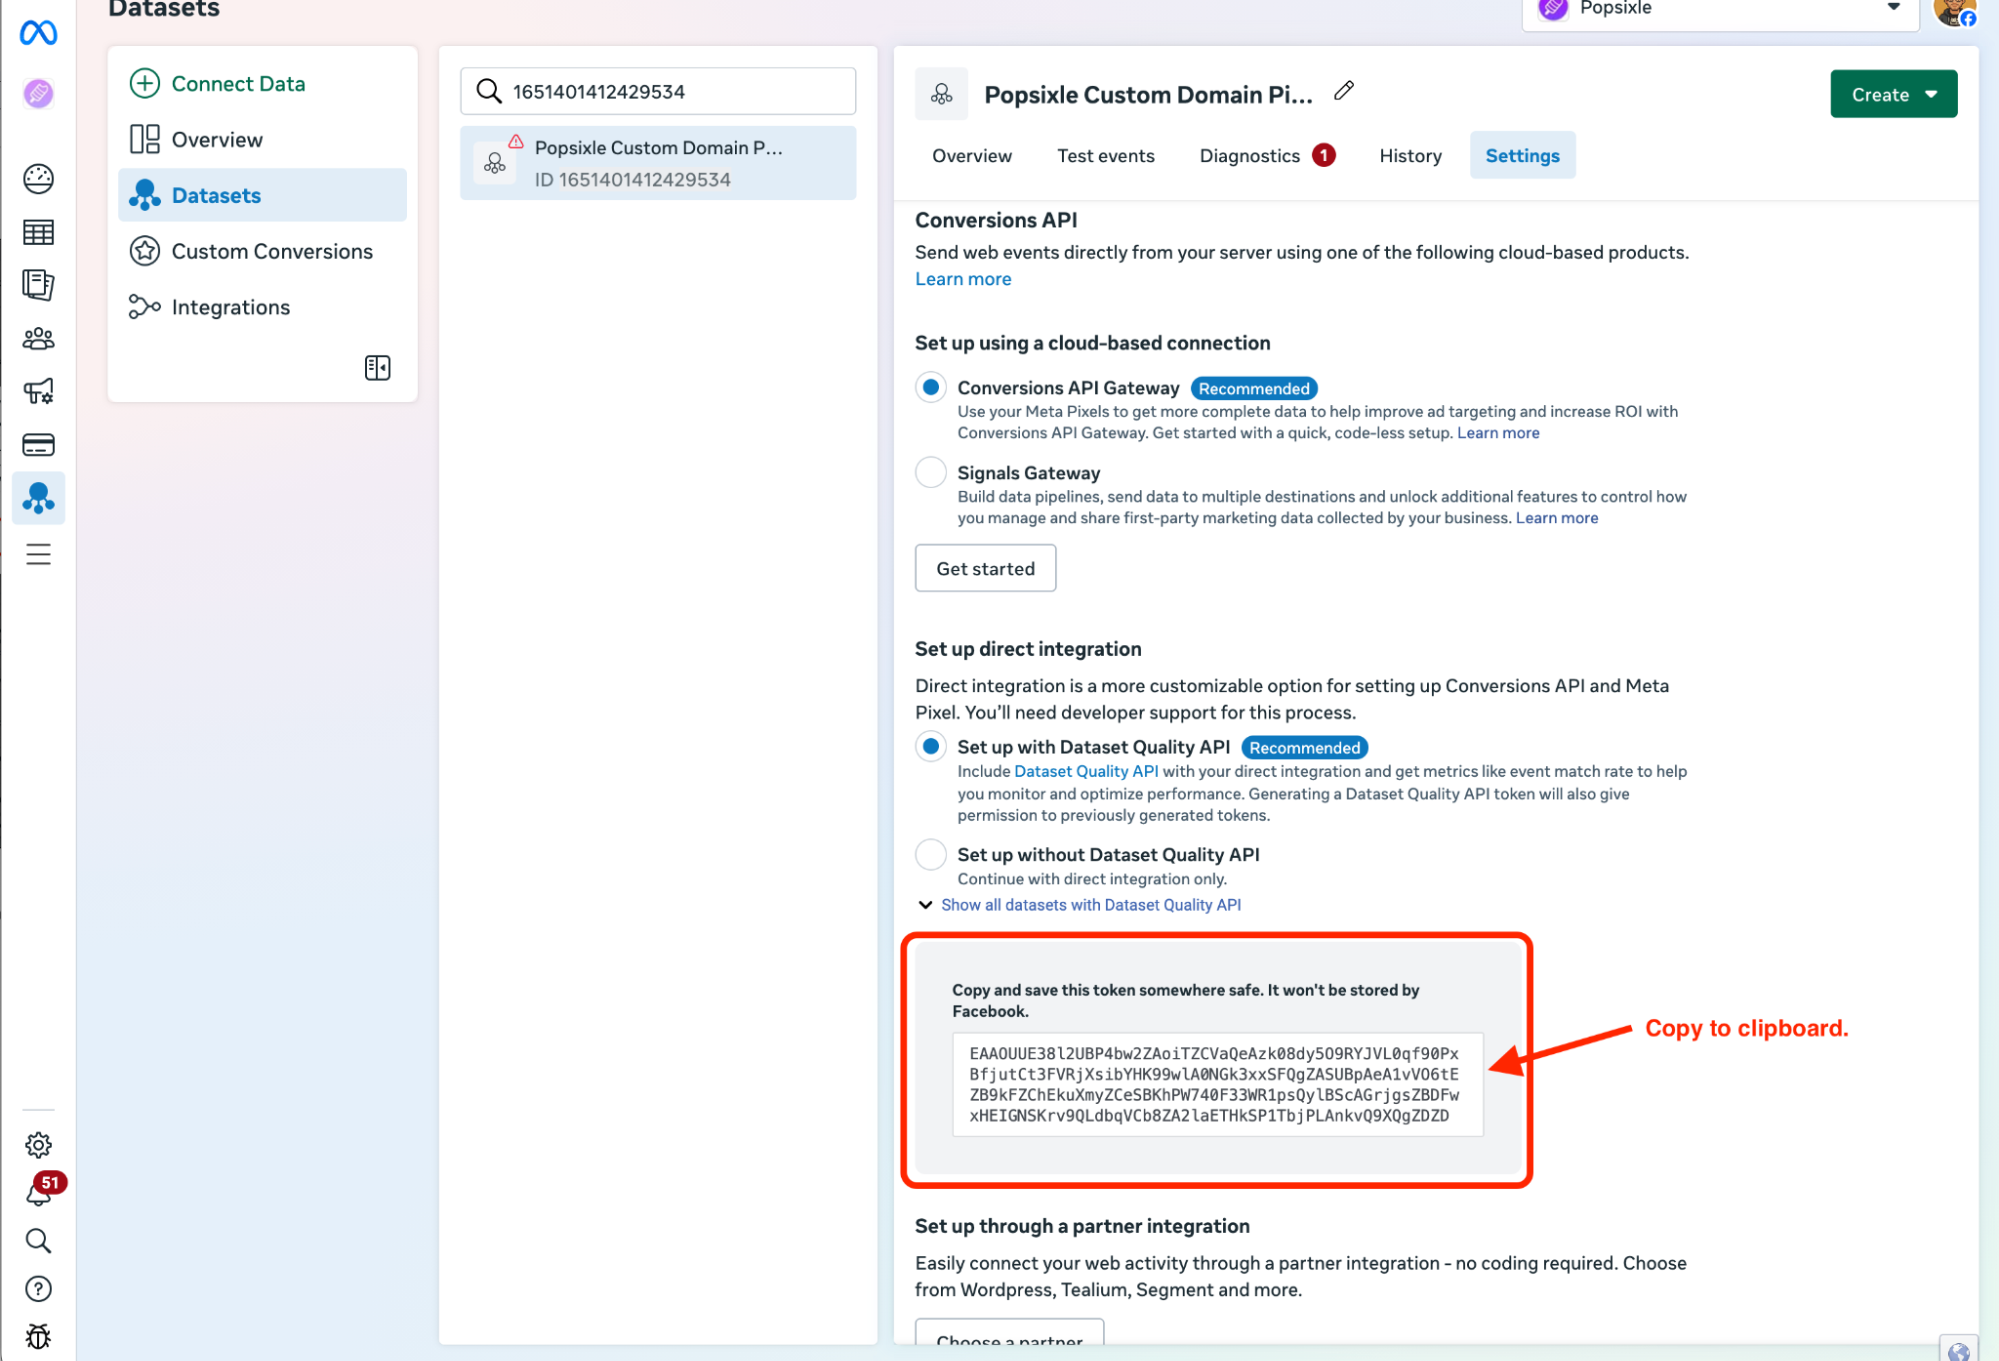
From Settings, scroll about ¾ of the way down the page until you see Conversions API. Under Set up direct integration, leave the box titled Set up with Dataset Quality API checked and click Generate access token.
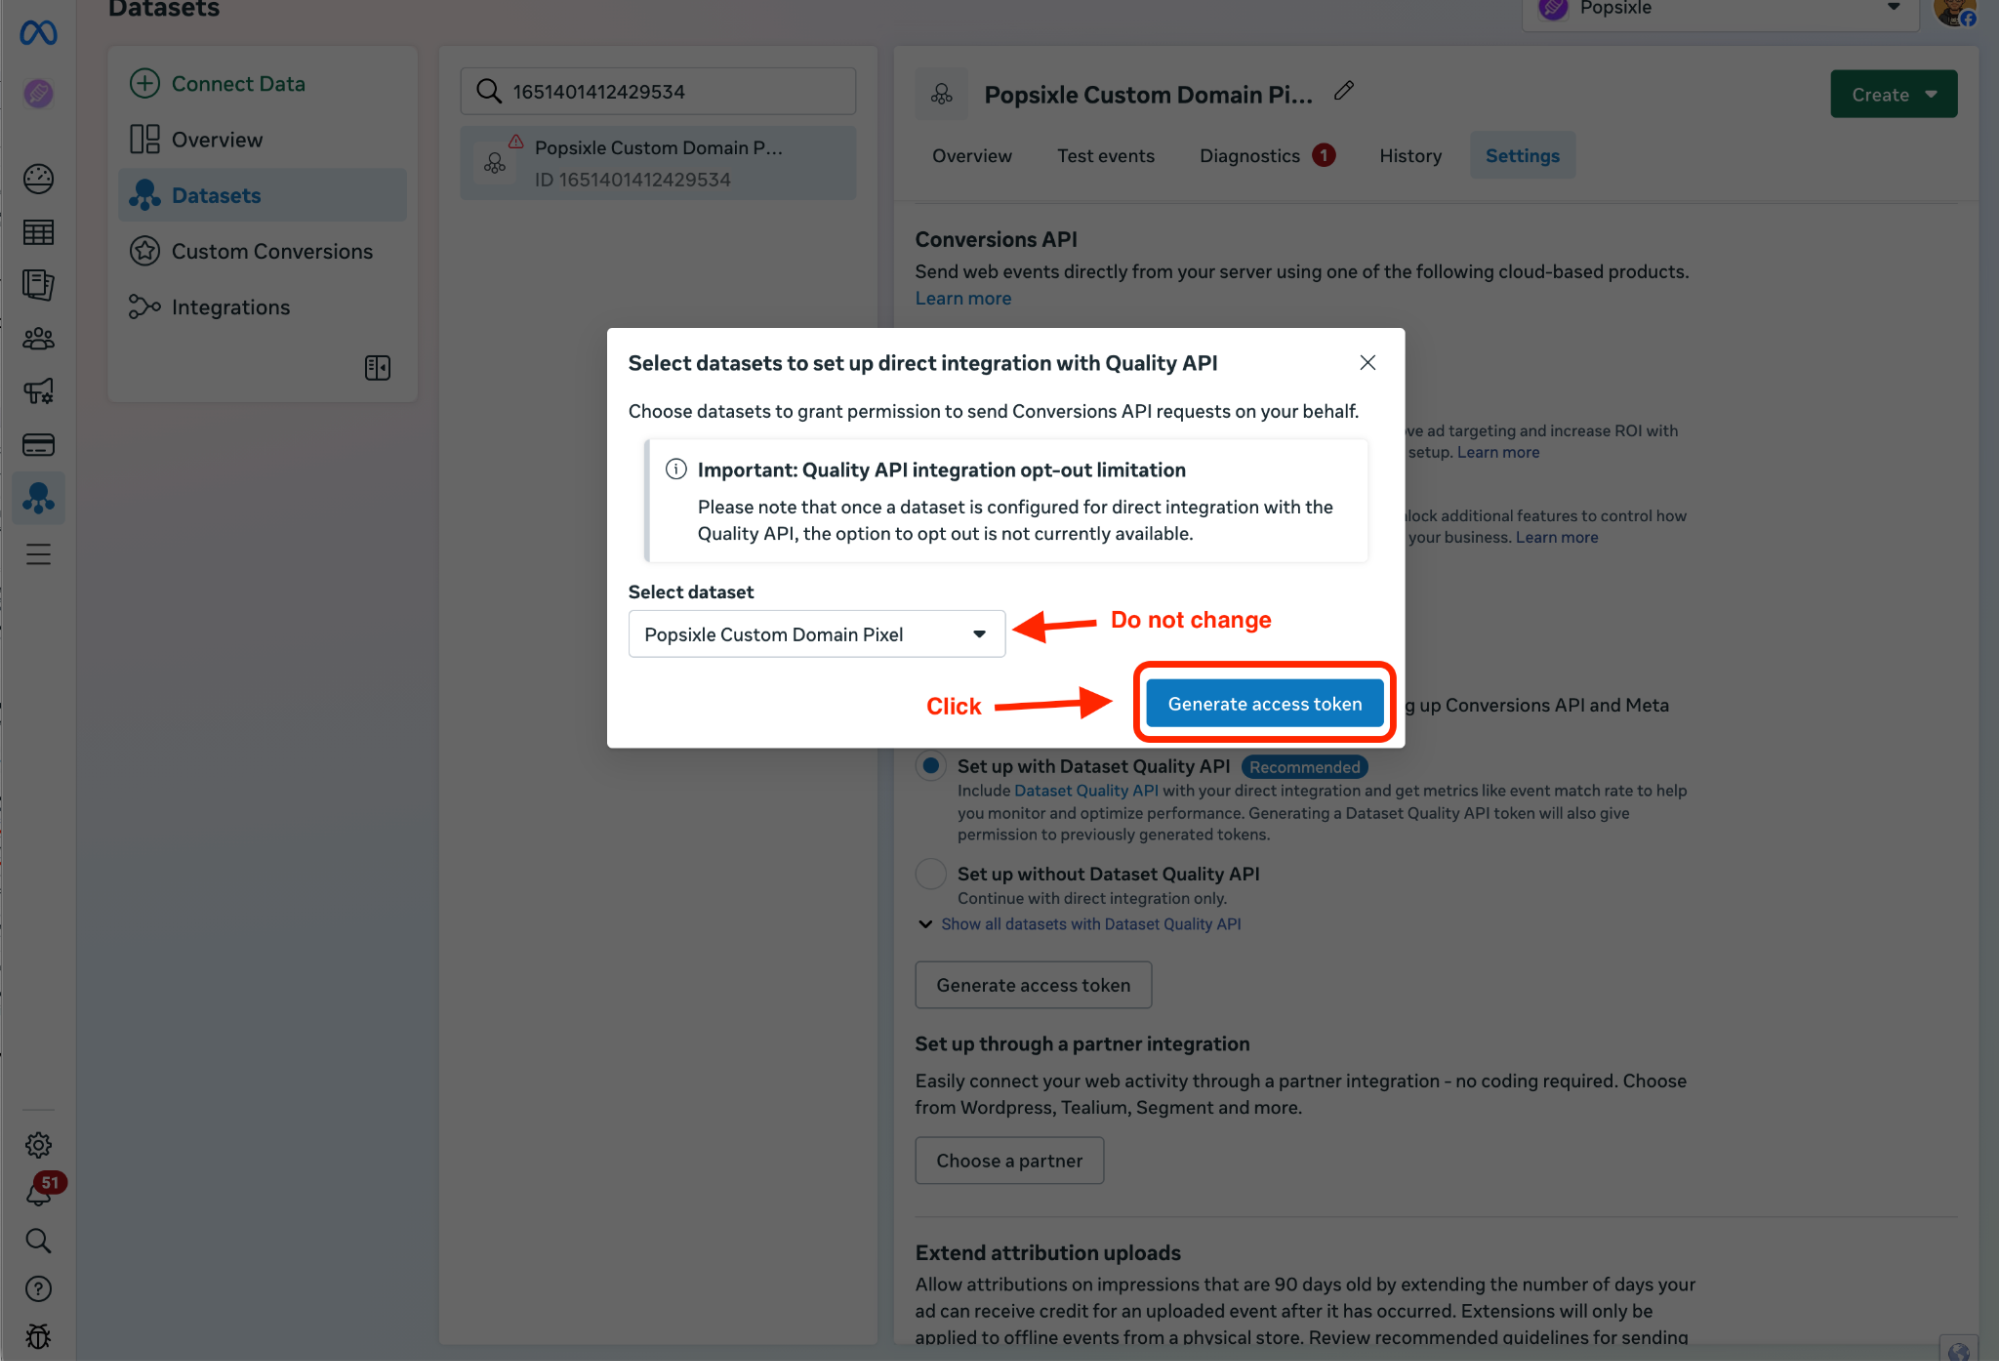
The Generate Access Token button will open a modal. Leave the dataset selection, and click the blue Generate Access Token button on the modal.
The modal will close, and you’ll be brought back to the settings page. From here, copy the newly generated token.
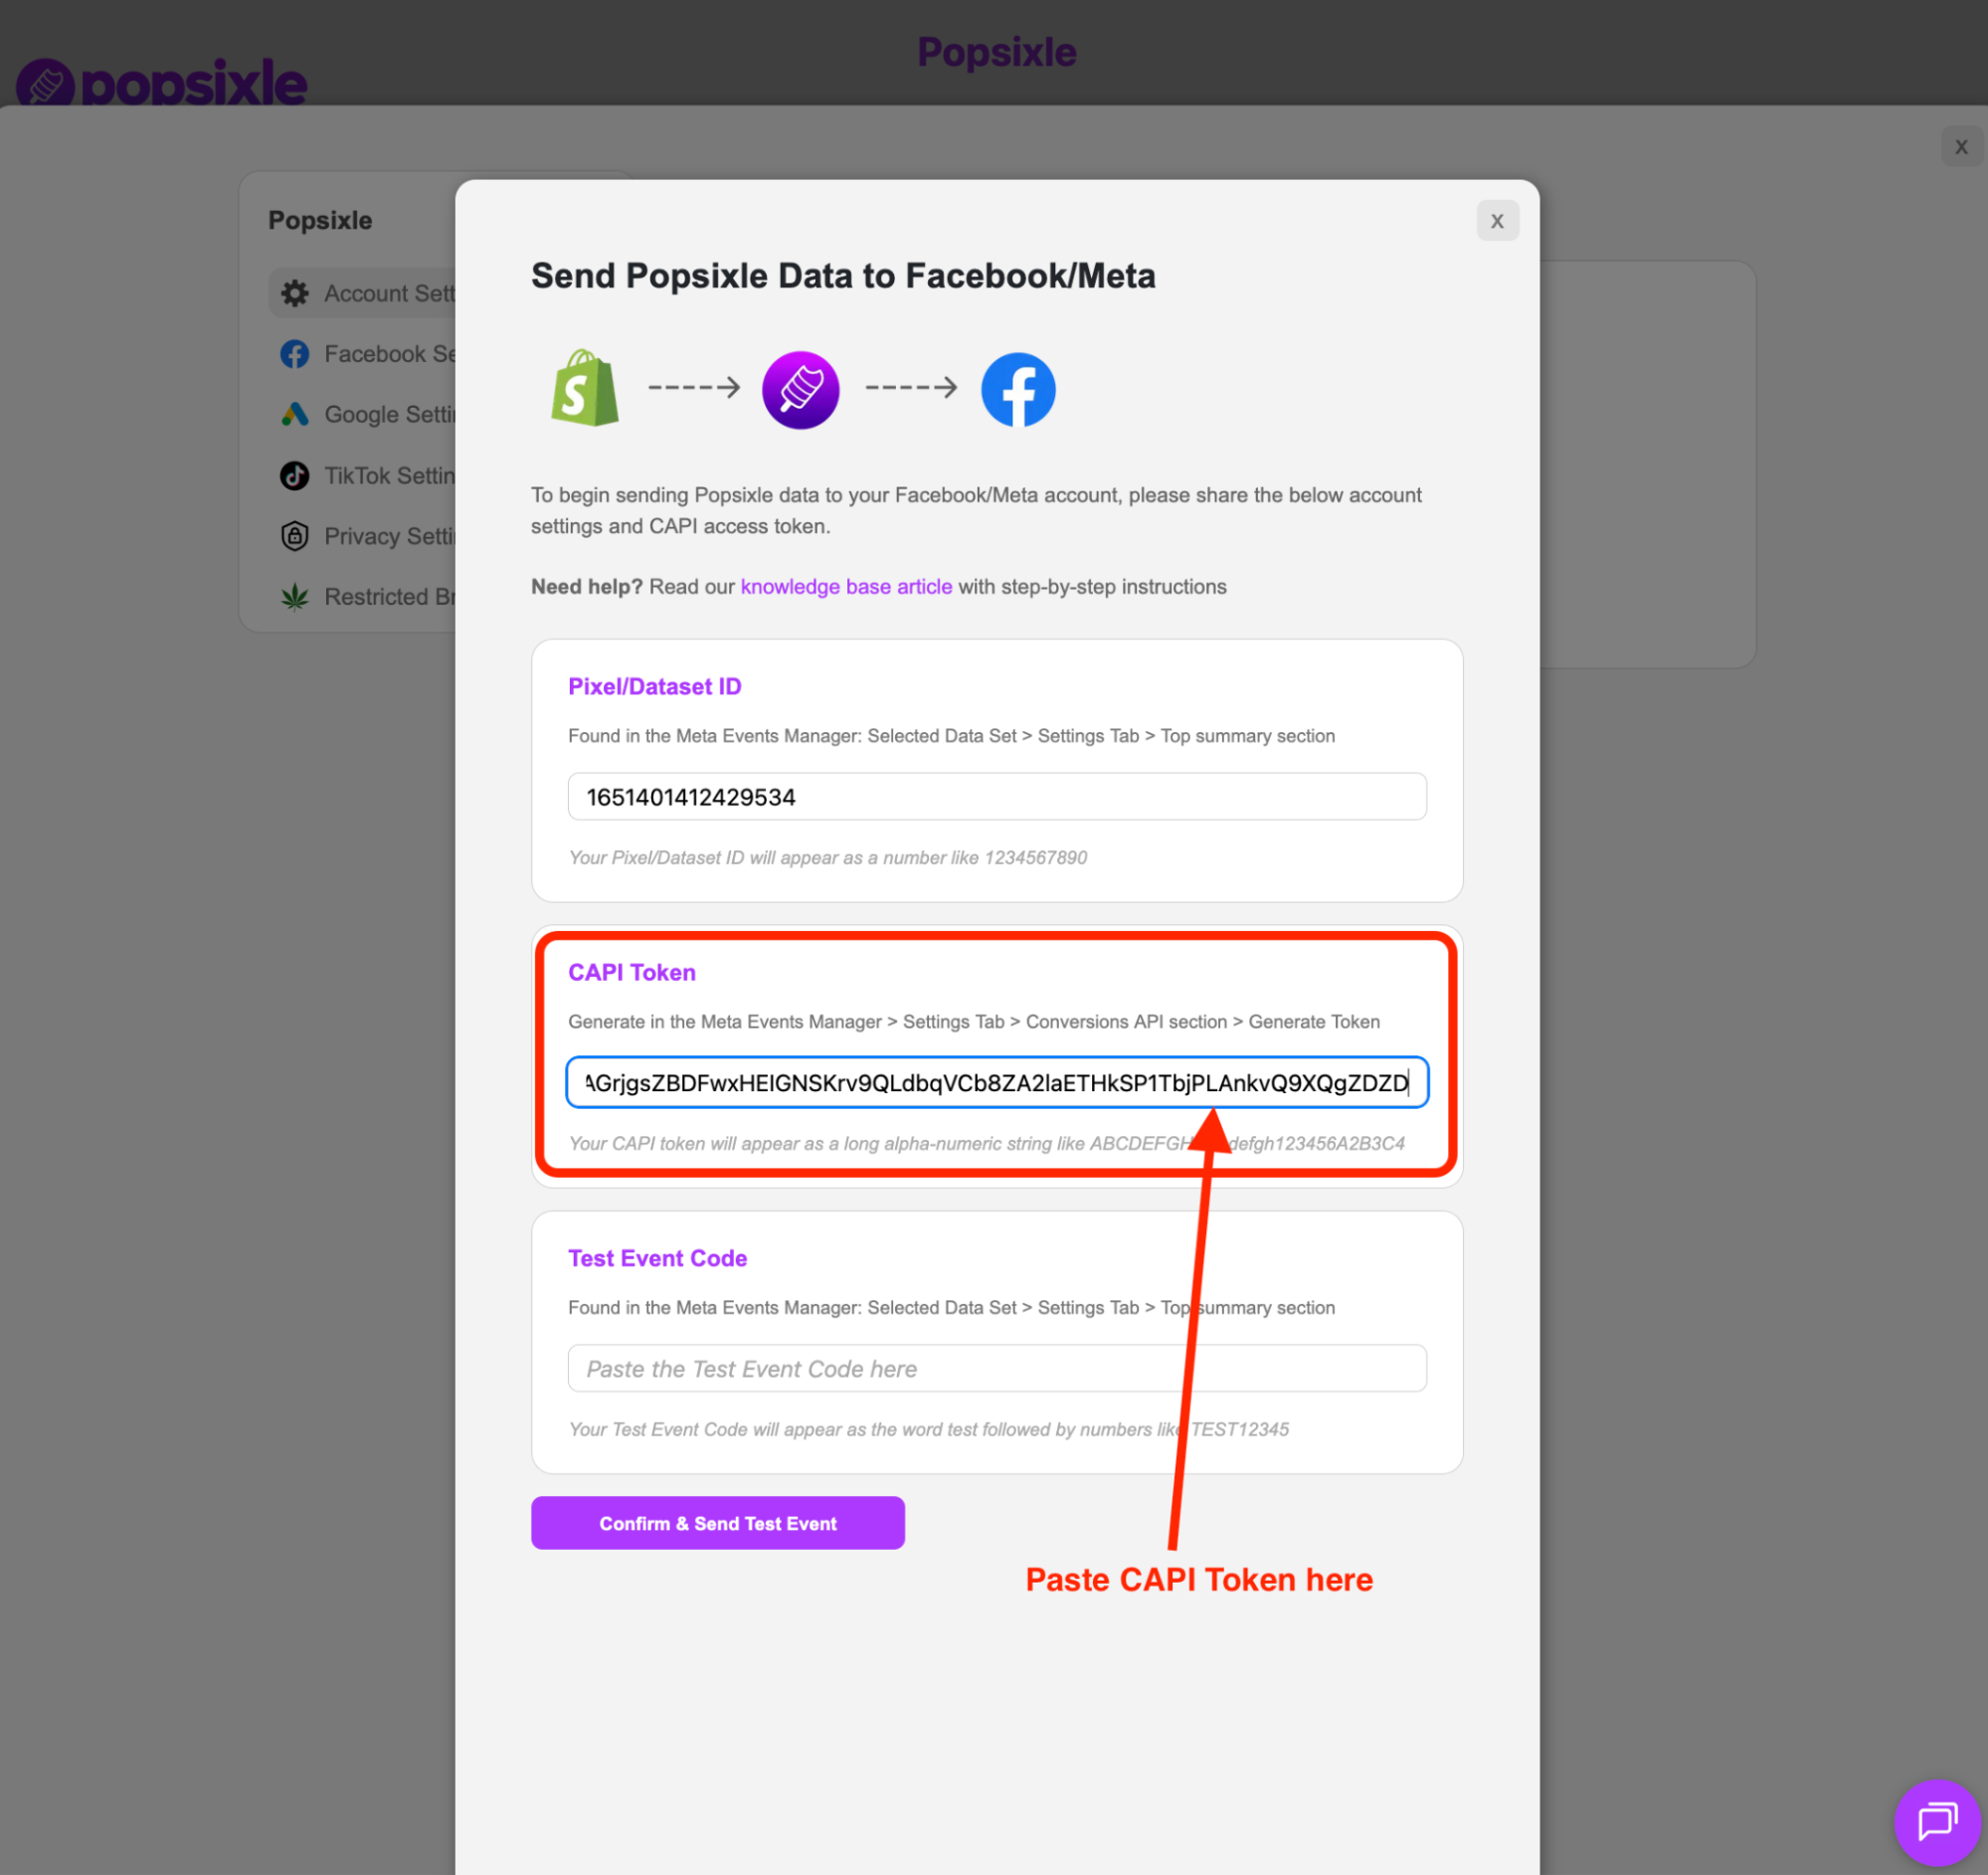
Return to your Popsixle dashboard and paste the CAPI Token into the second field.
Test Event
With your CAPI Token entered, we can now send a test event and we’ll be all set! Lets go get a test event code.
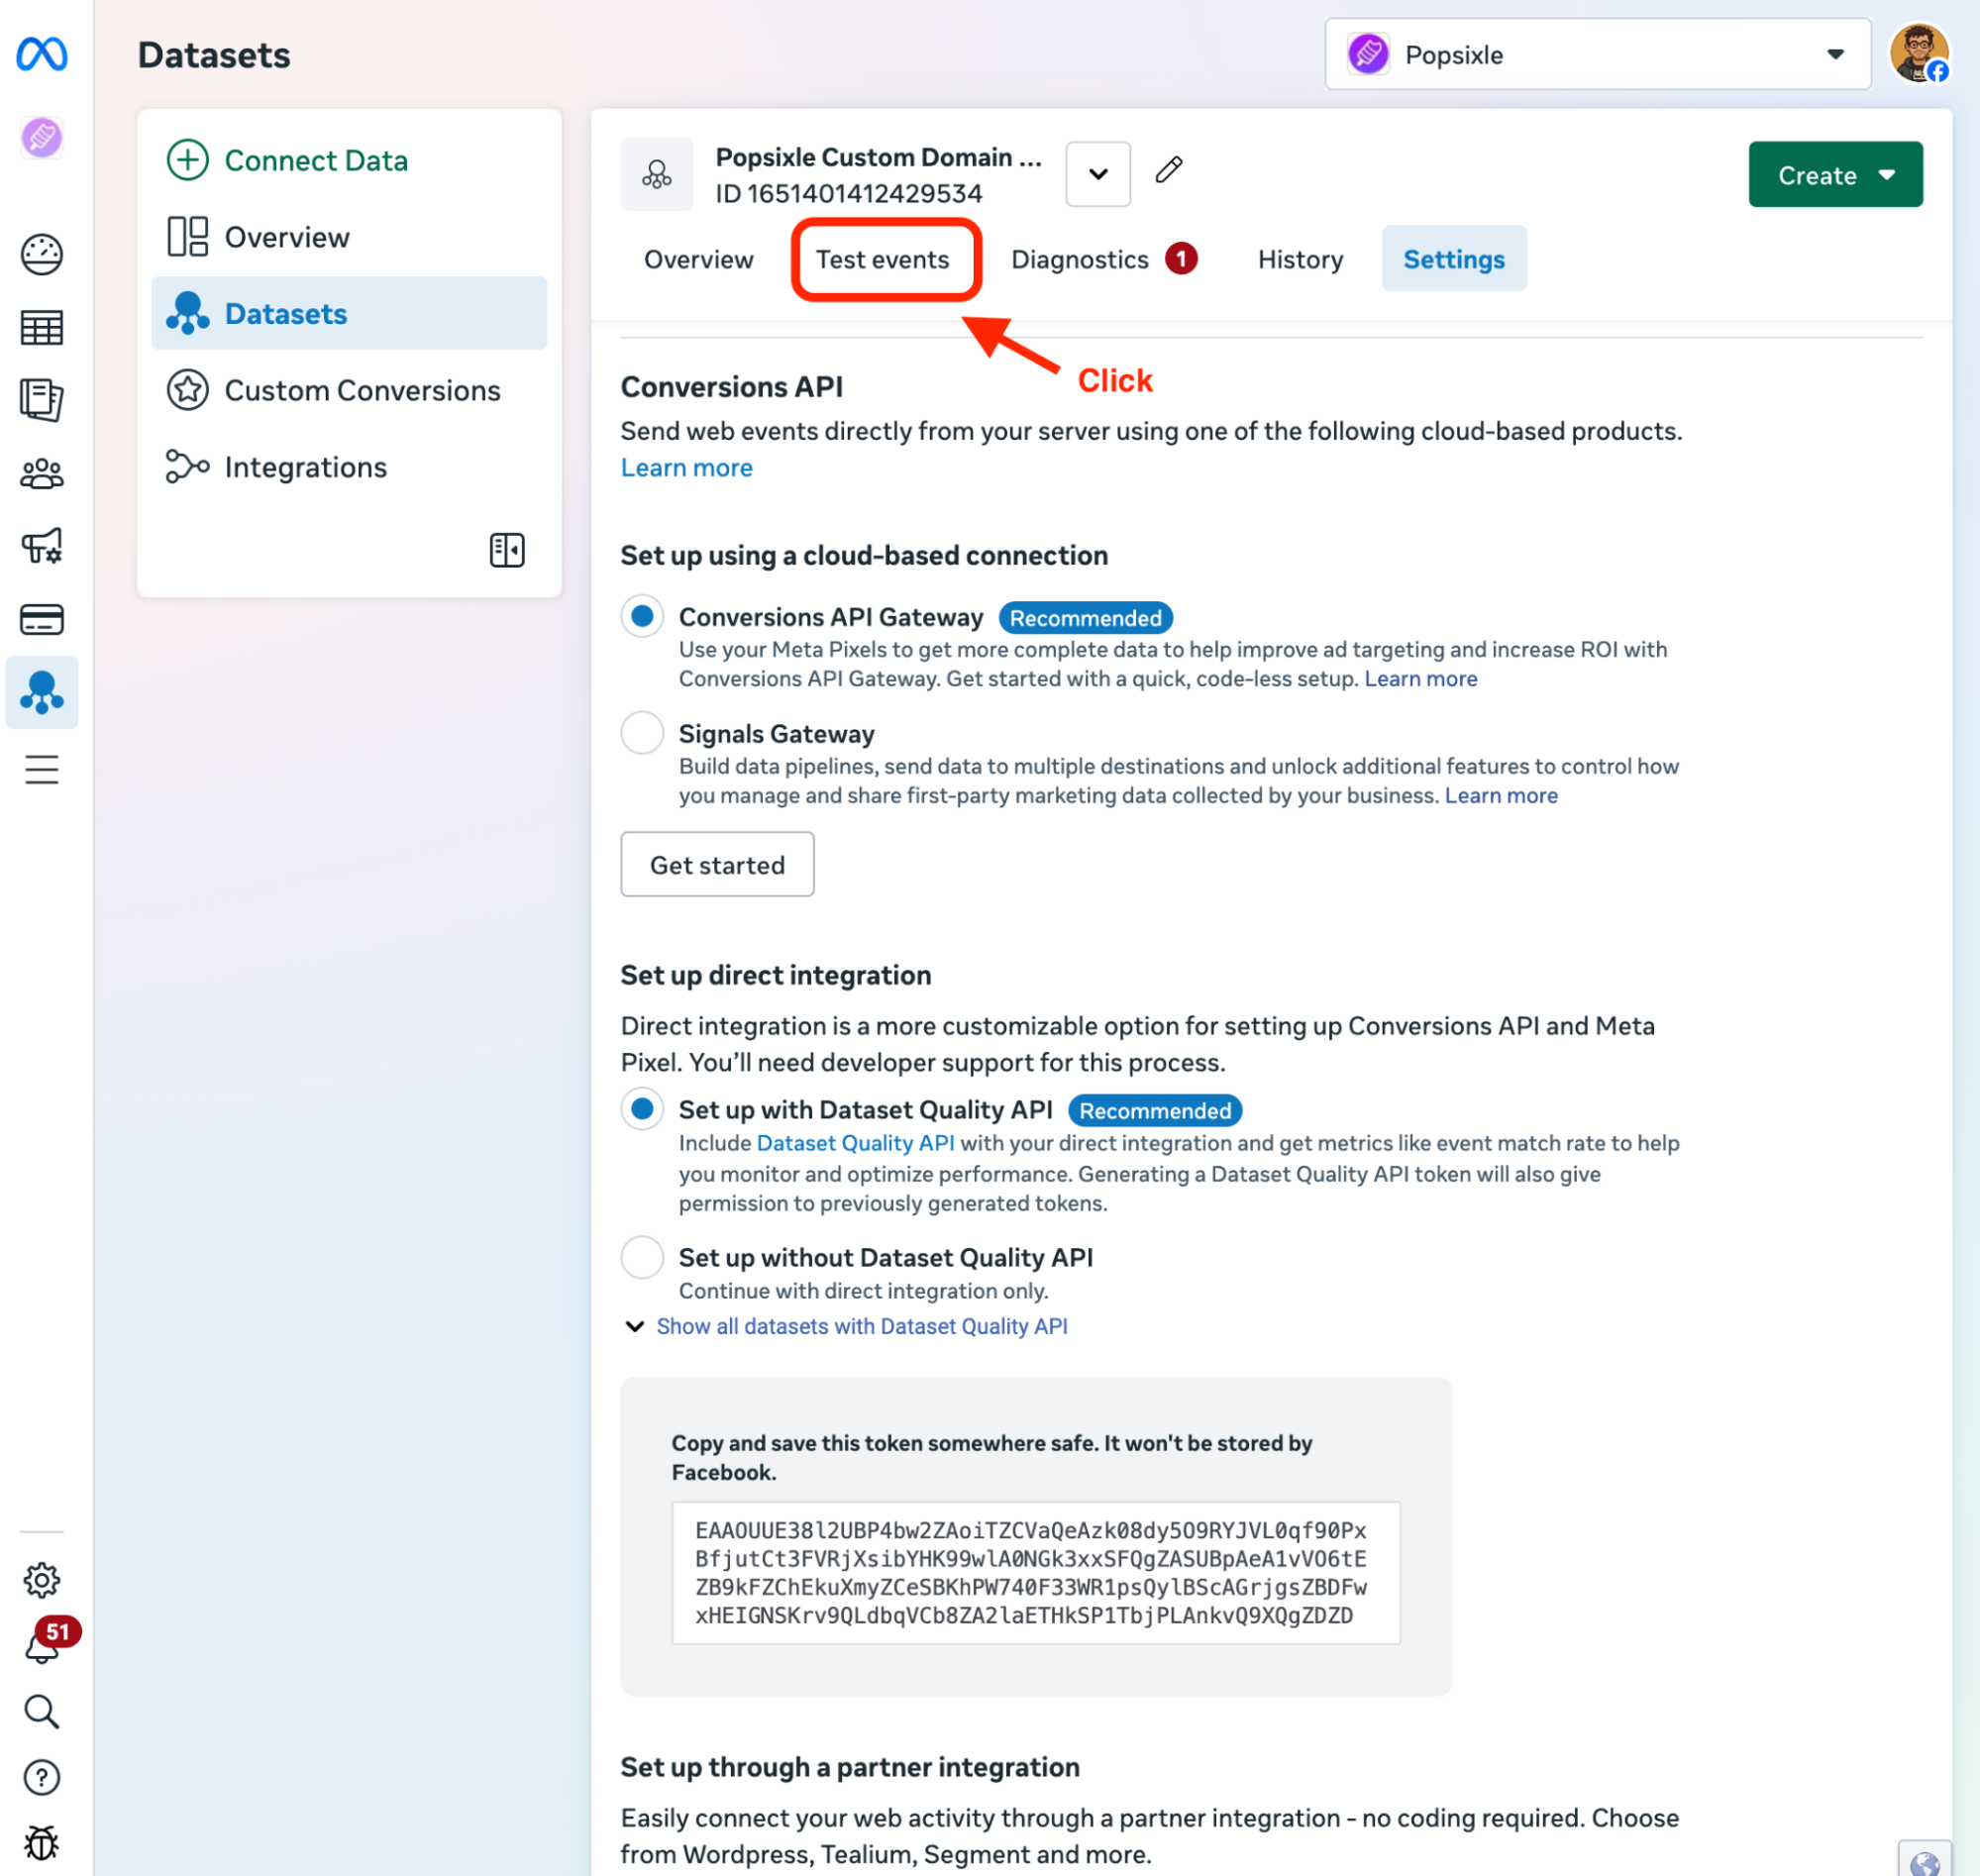
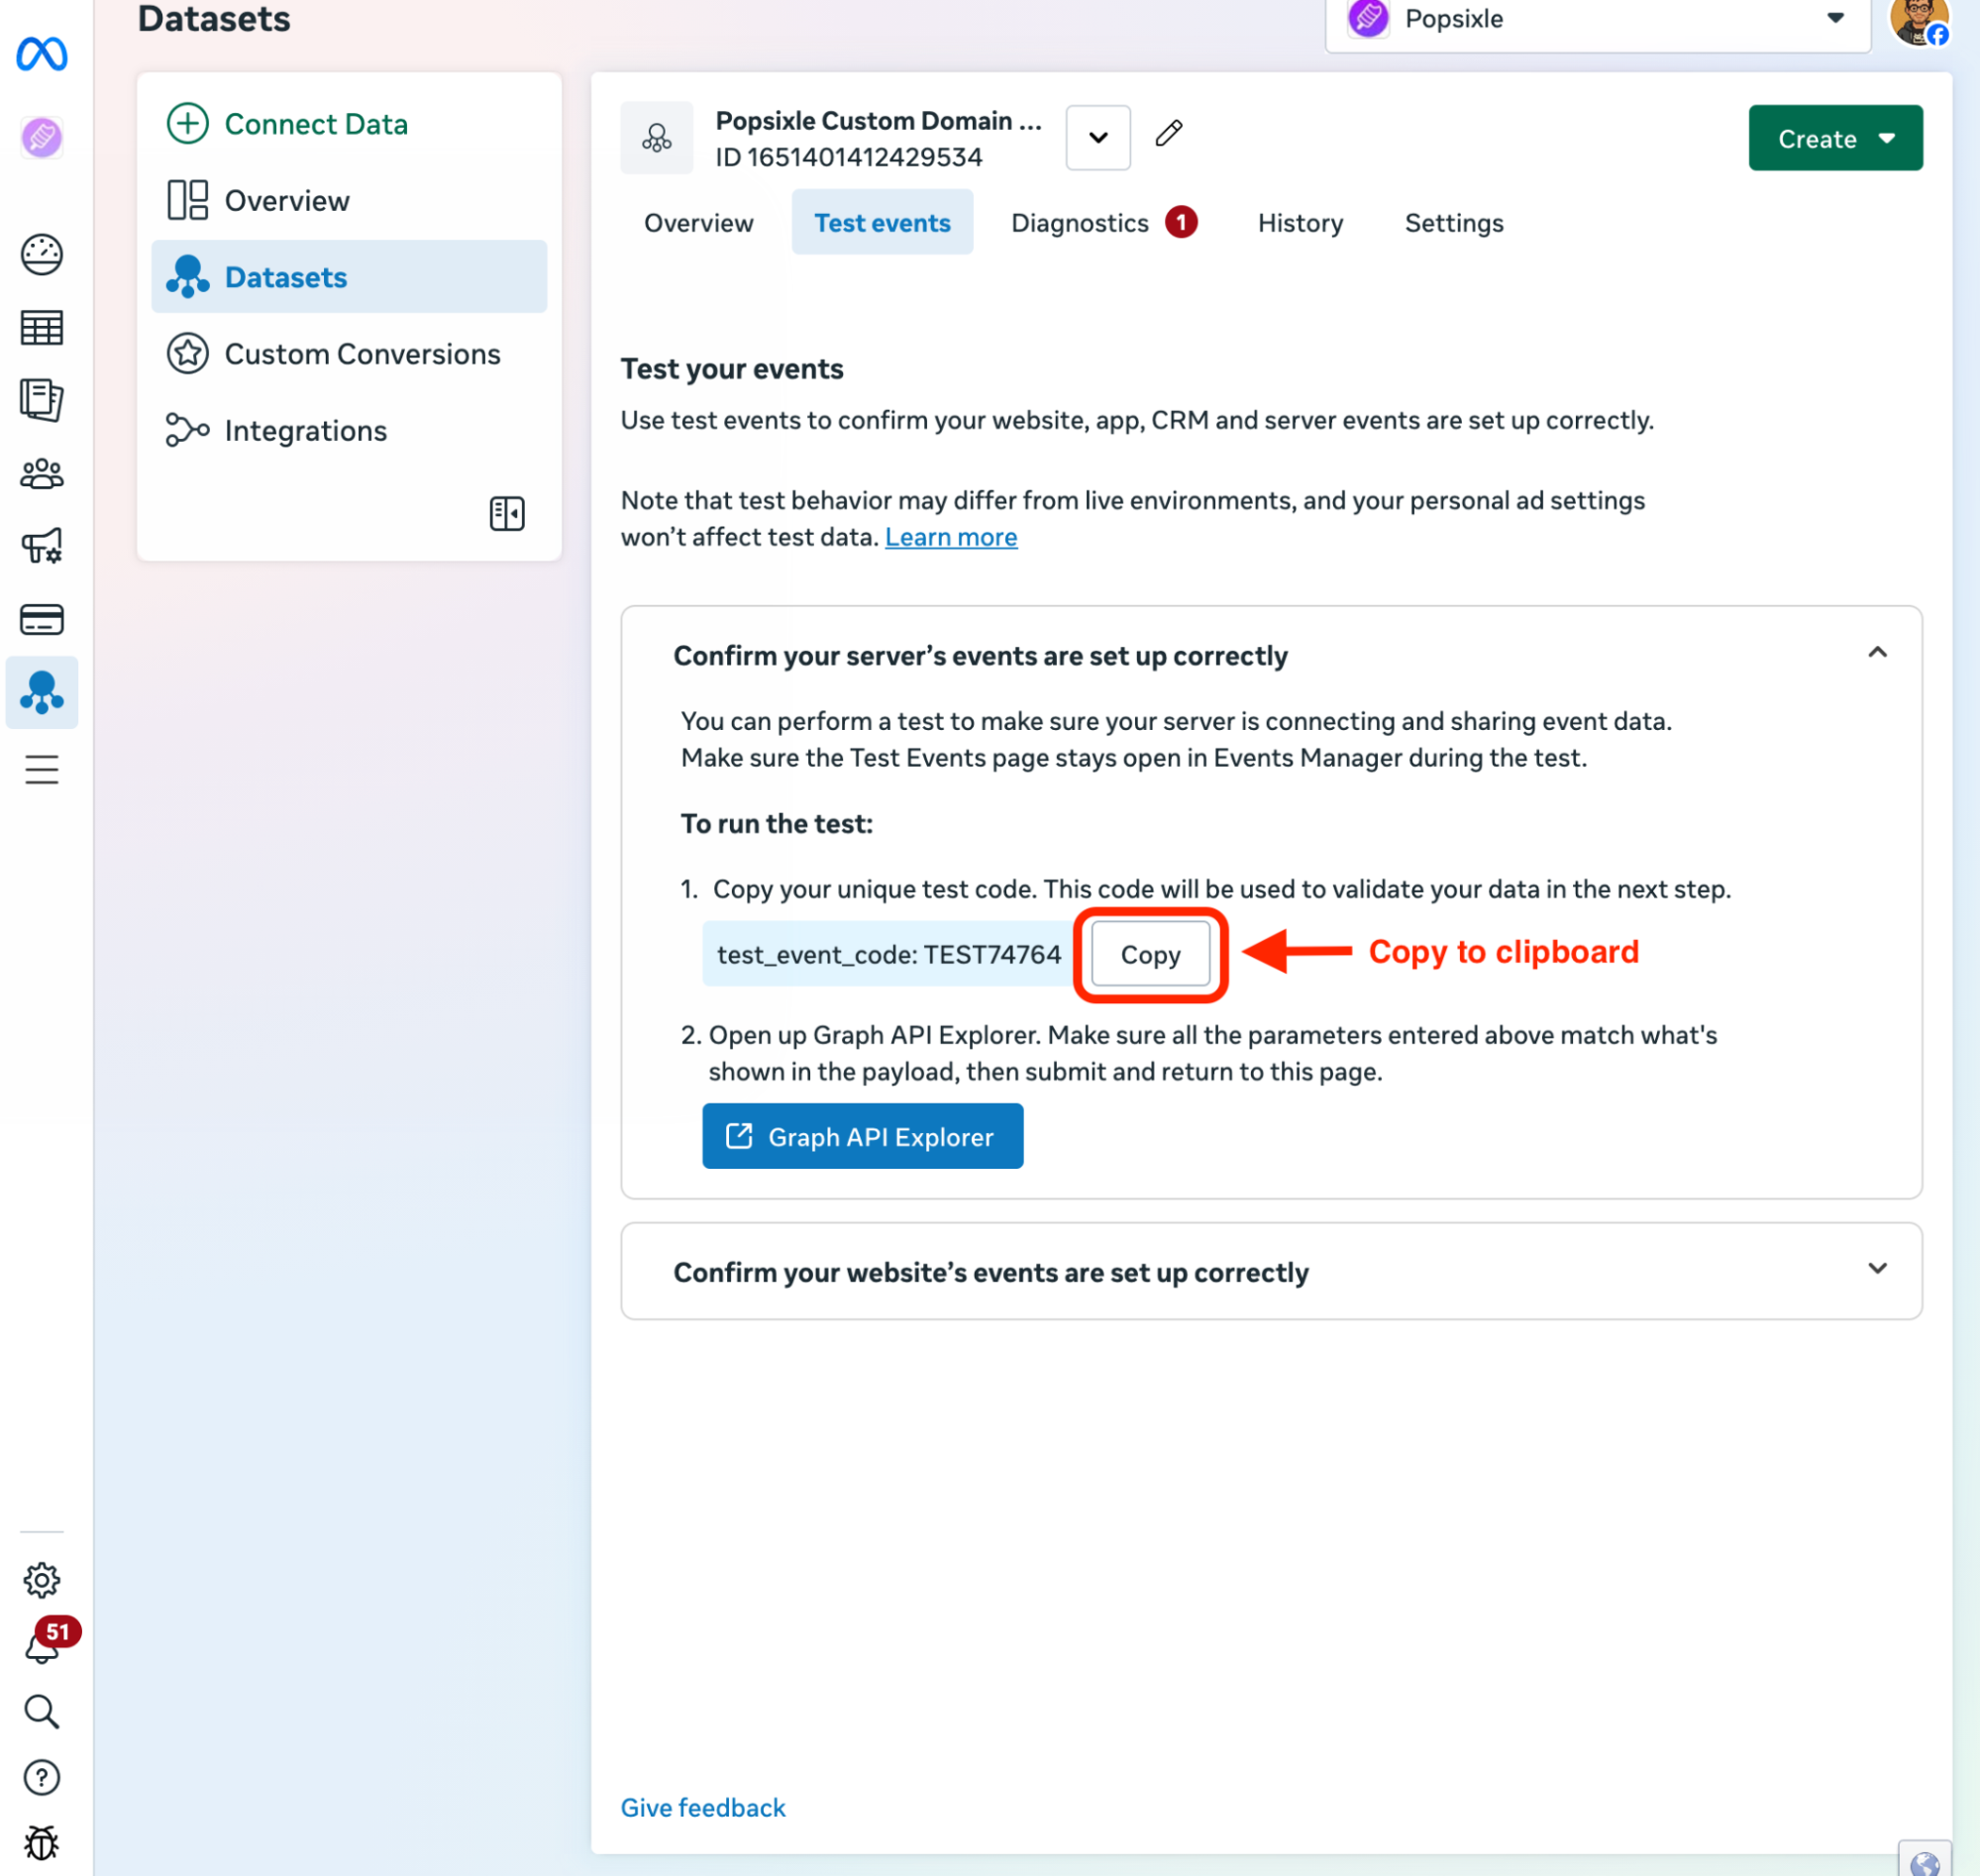
Return to your Meta Business Manager tab and click Test events at the top of the page.
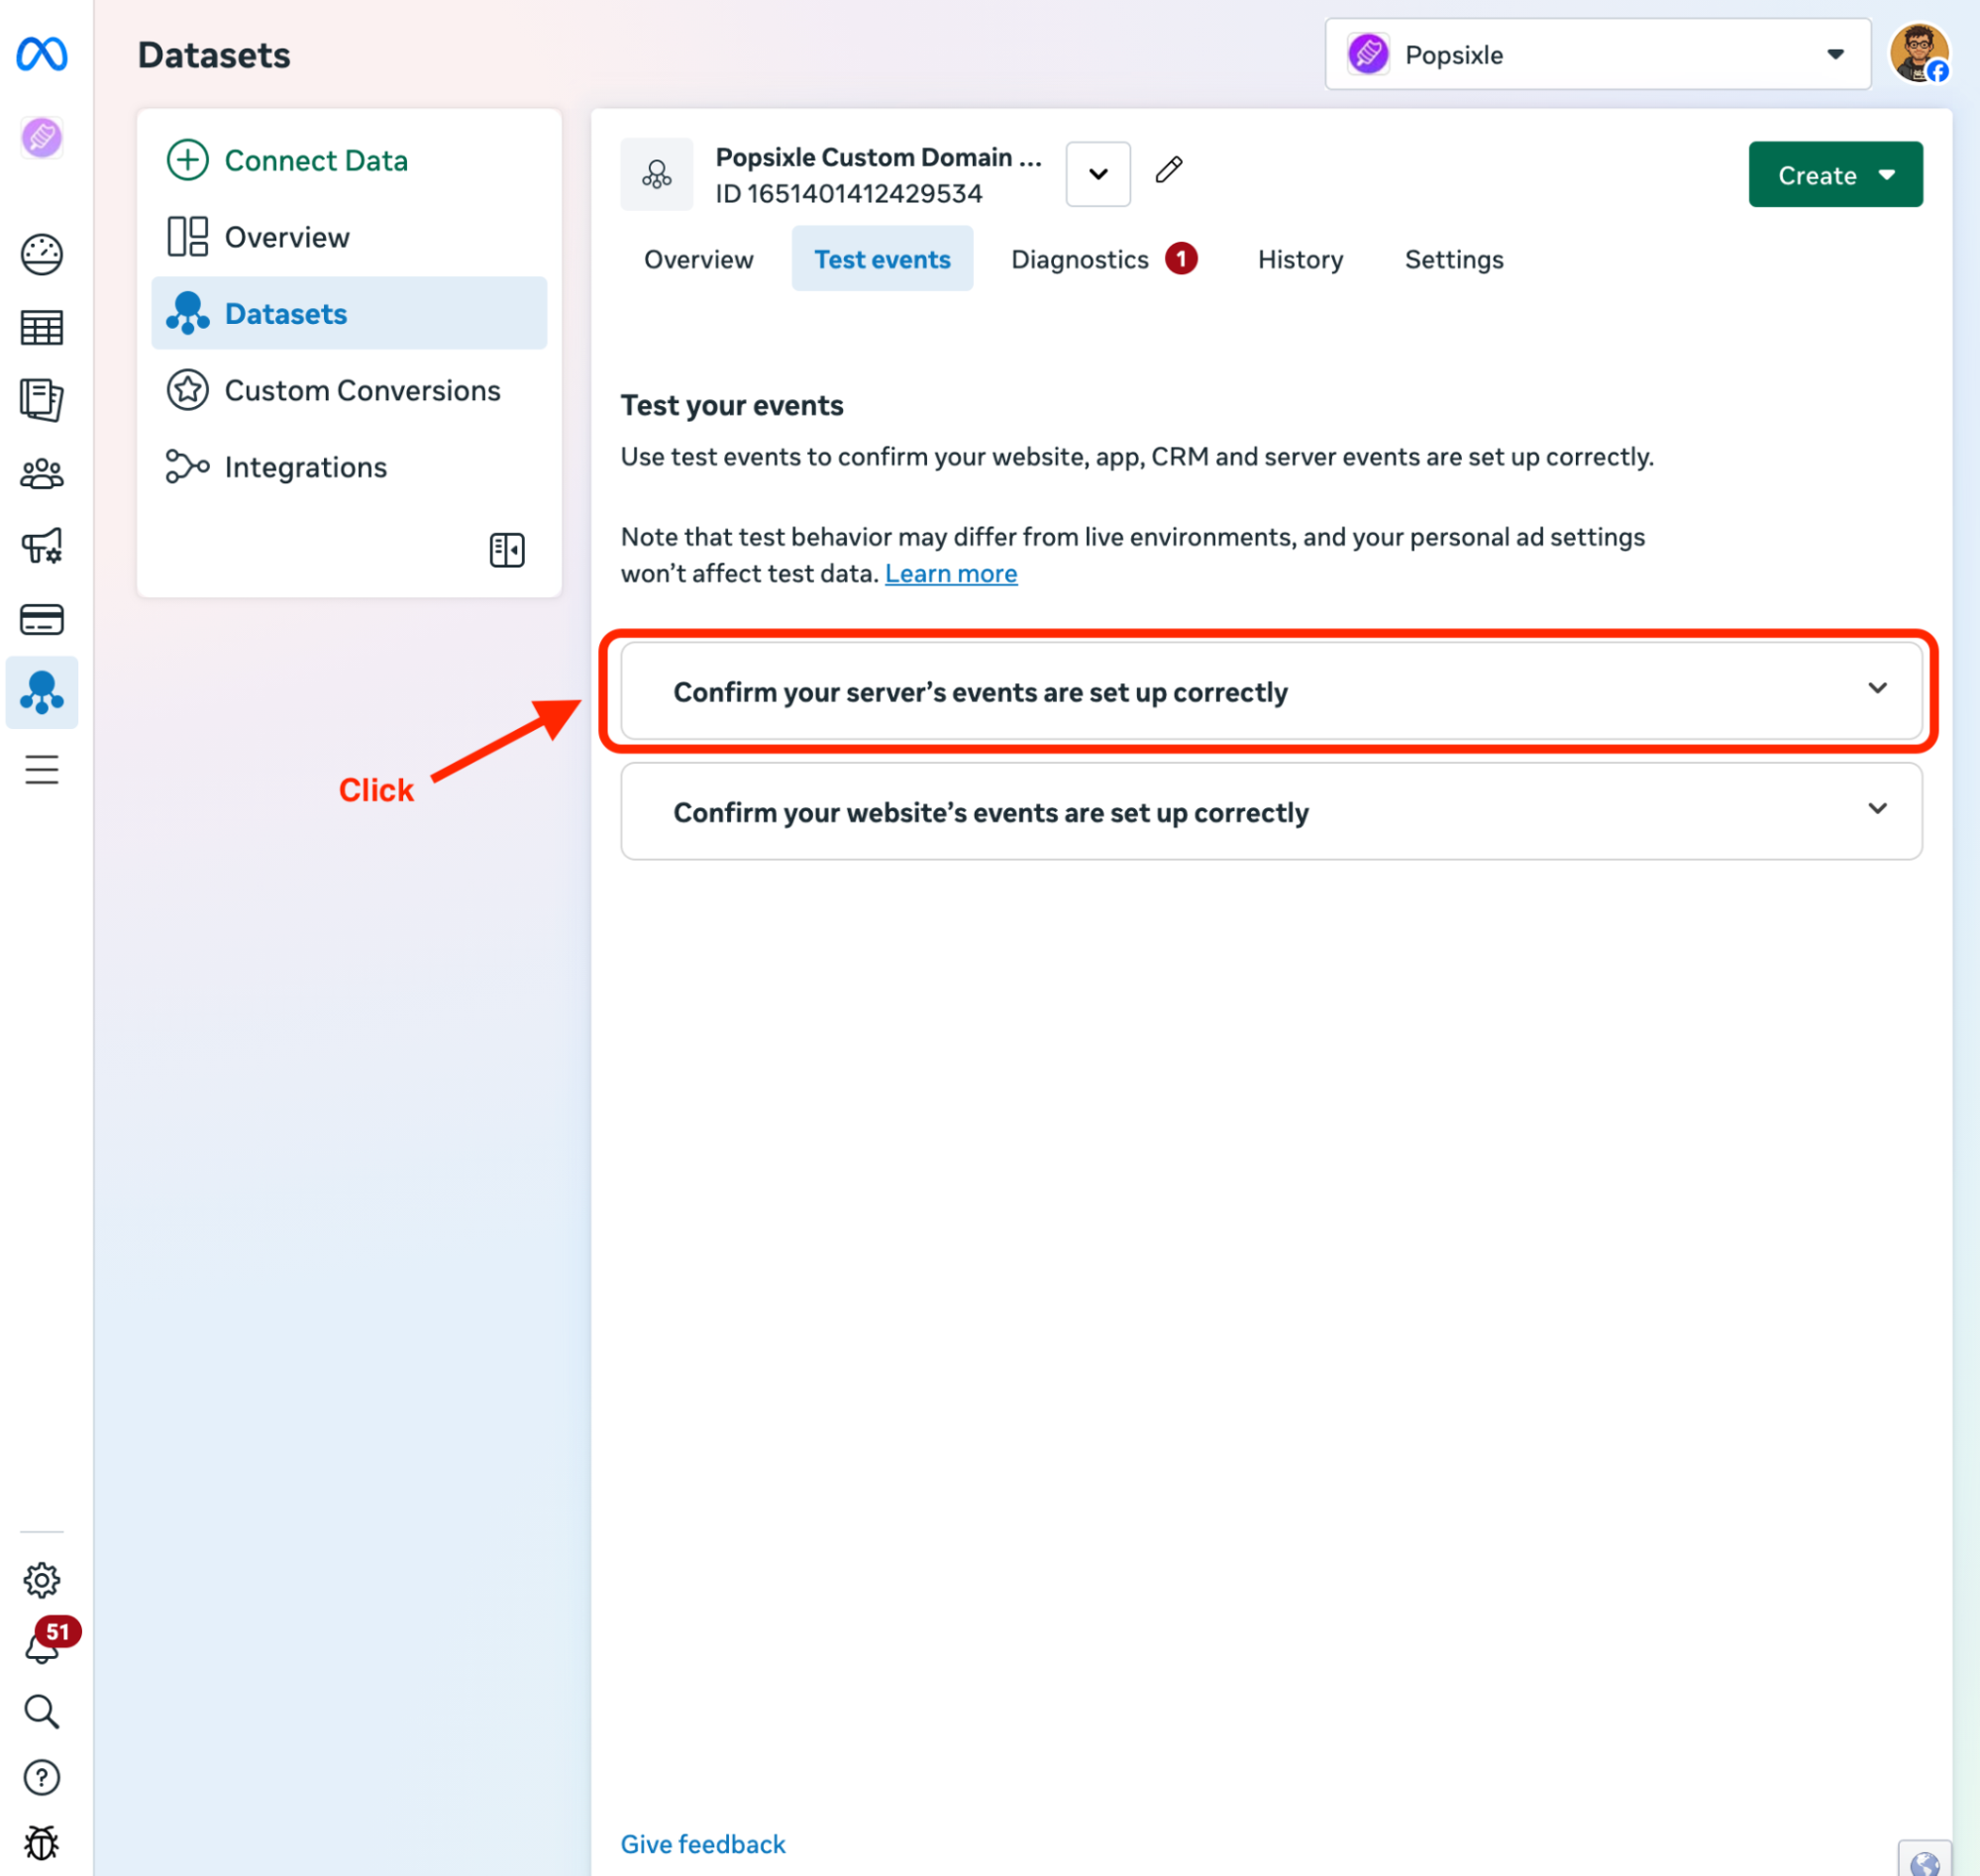
From within Test events, click on Confirm your server’s events are set up correctly.
Copy the test code in the blue text box.
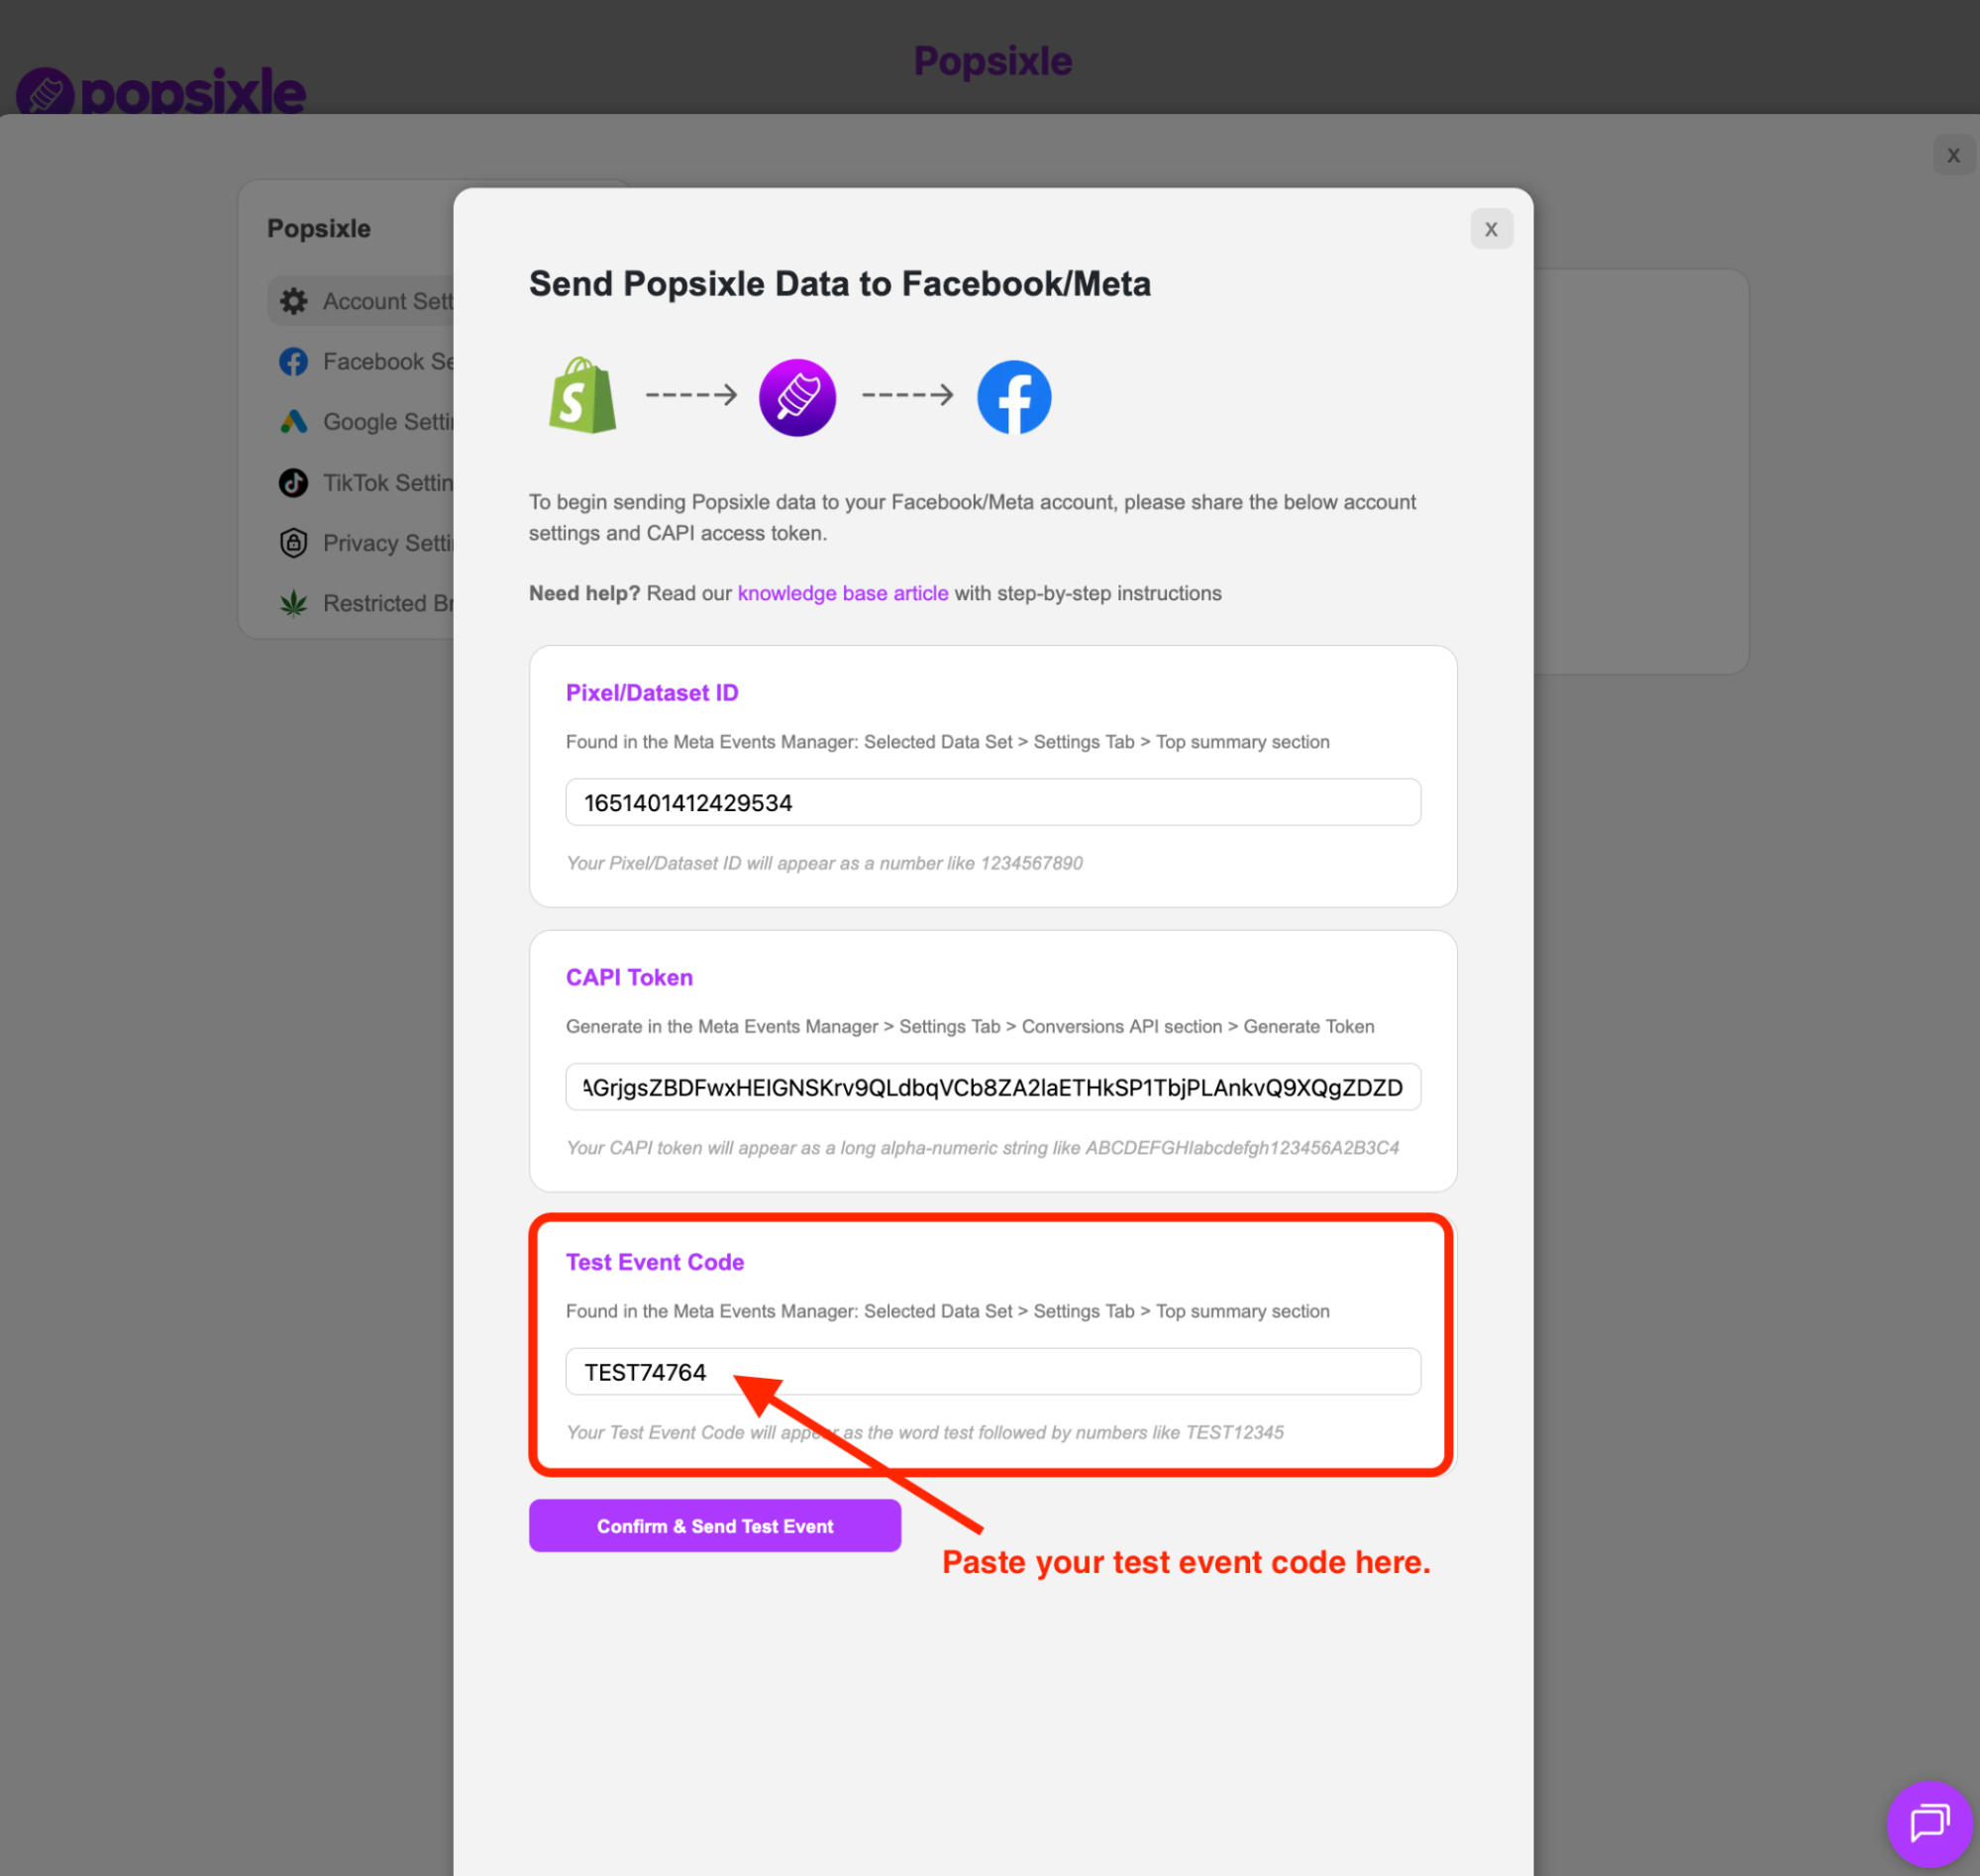
Return to your Popsixle dashboard and paste the Test Event Code in the third field.
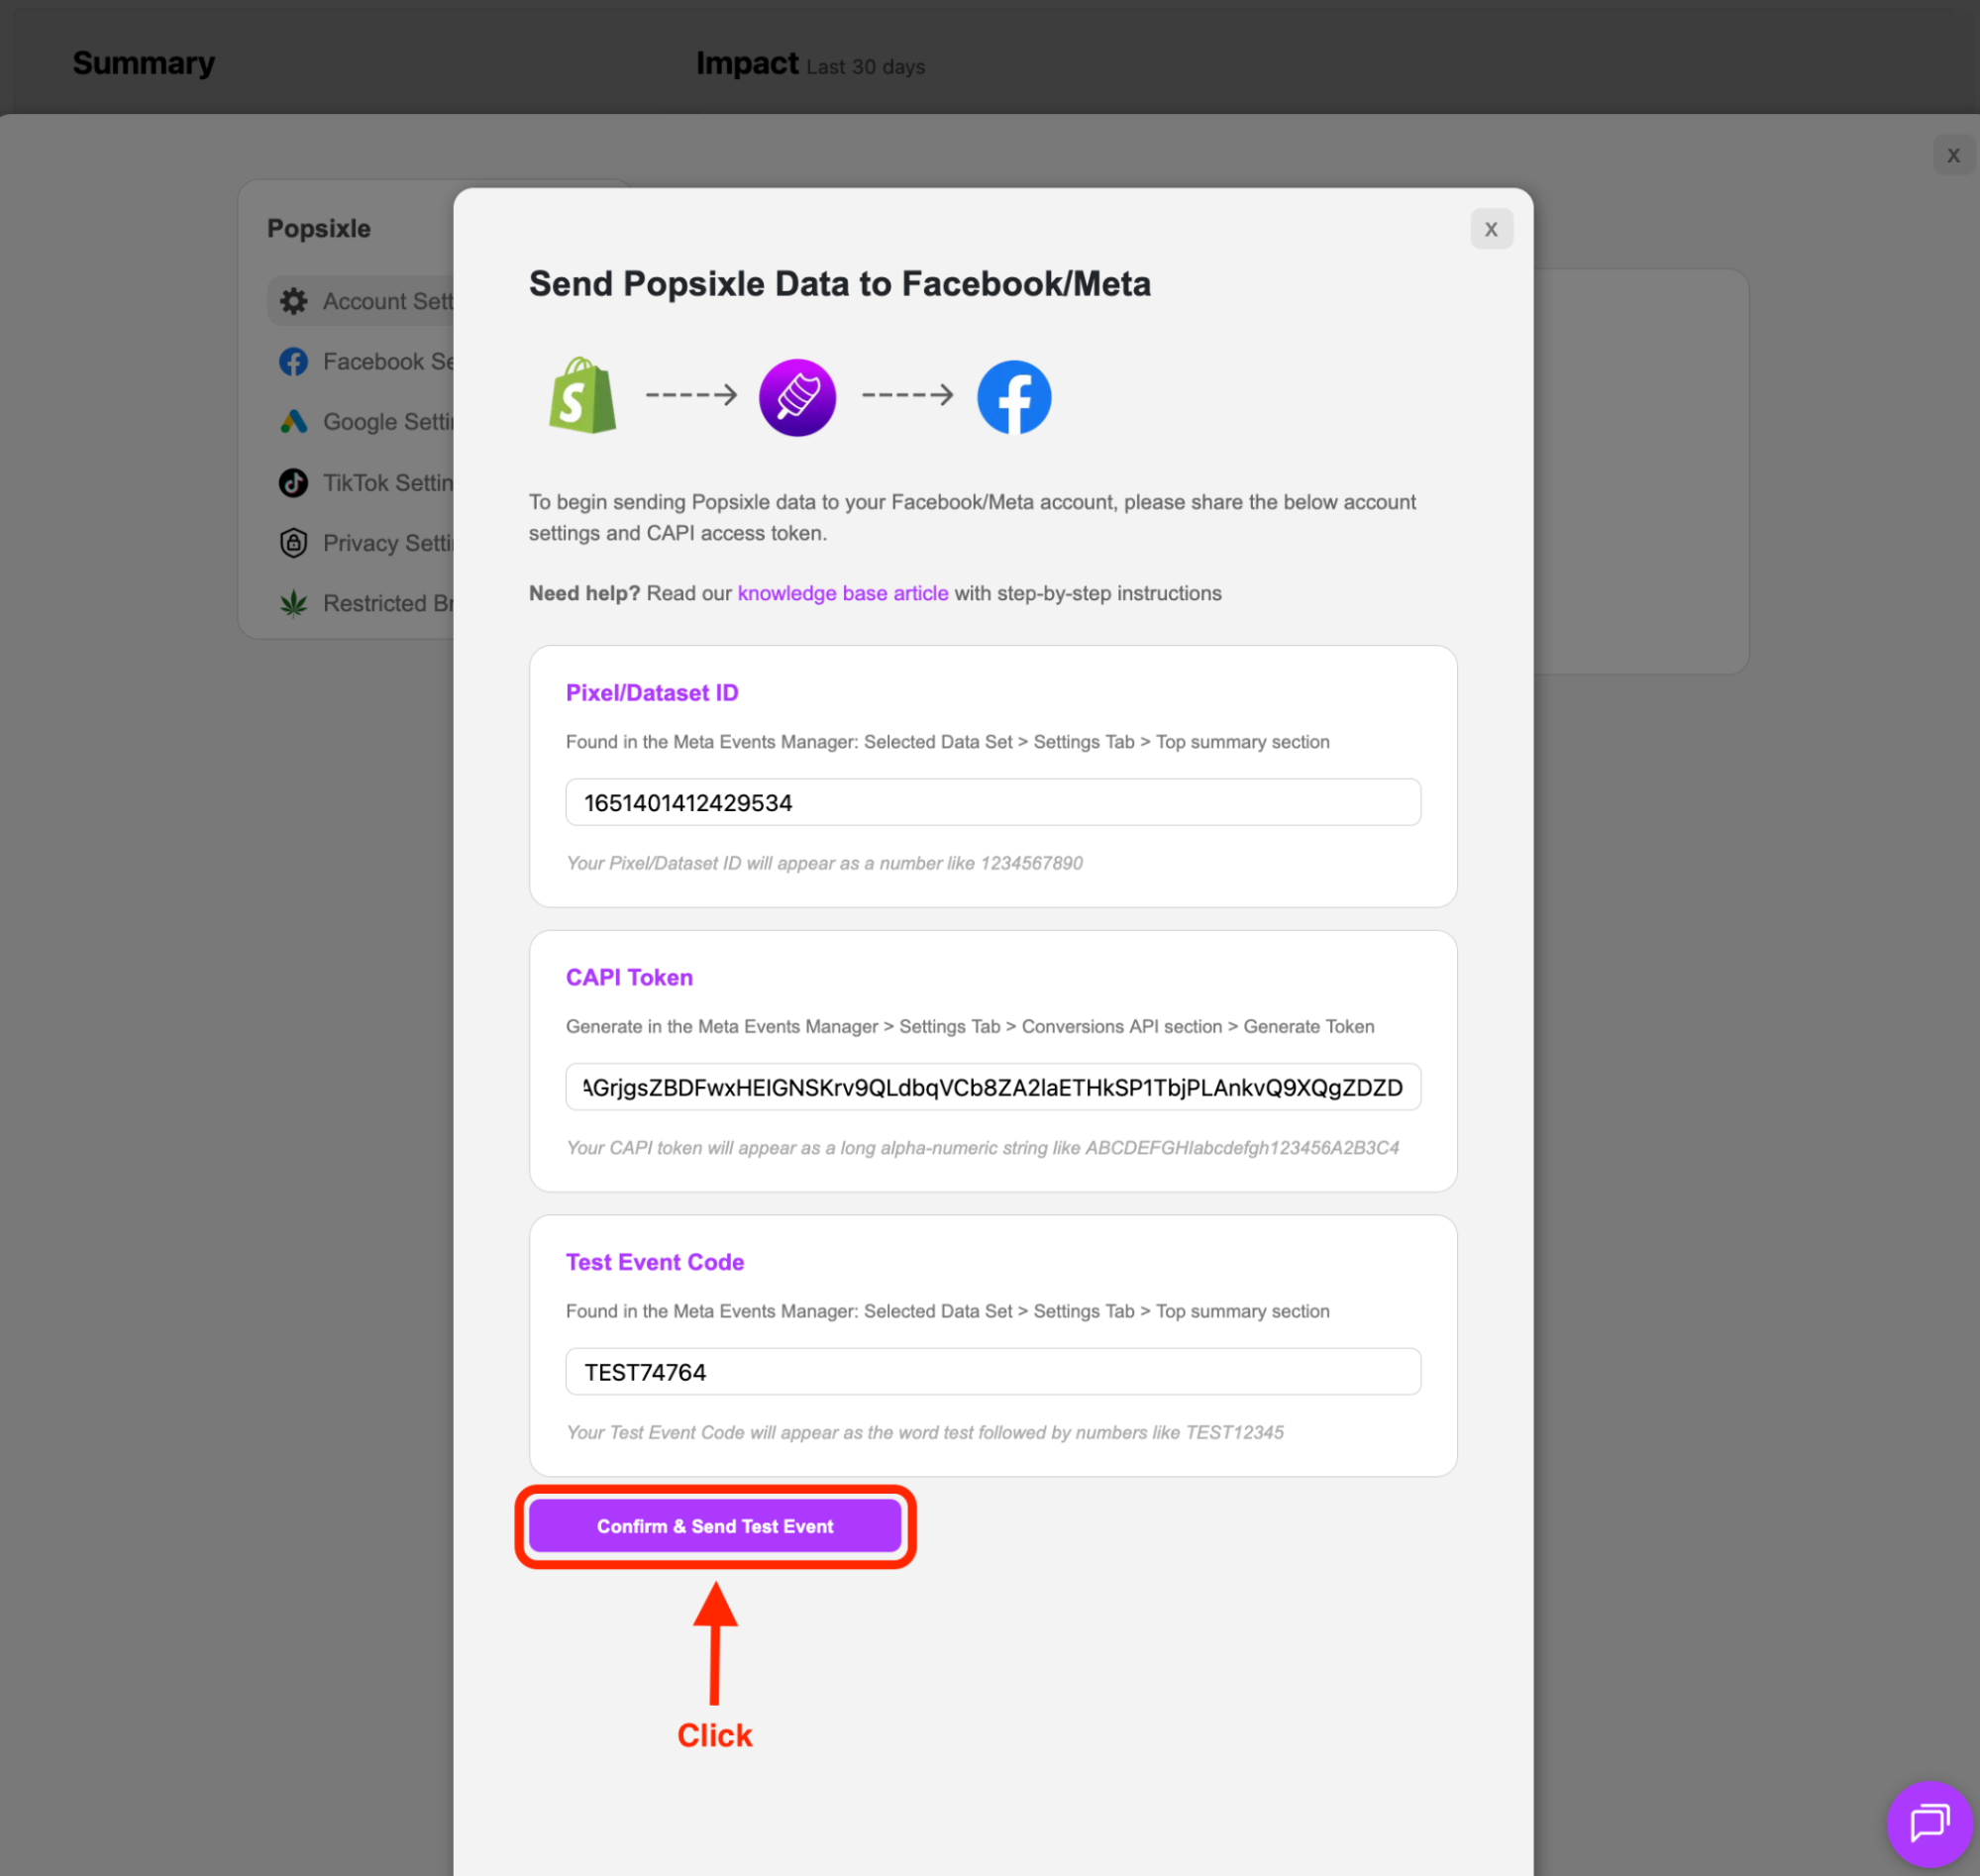
Now, click the Confirm & Send Test Event button.
If the event test was successful, you’ll be redirected to a modal that explains our final step.
Disable Shopify Data Sharing
The last step is turning off Shopify’s native data sharing so that only Popsixle’s enhanced data is being shared with Meta.
To disable this, you’ll first need to return to your Shopify Admin homepage and click on Sales Channels.
This will open a drop down from the search bar, click App and sales channel settings at the bottom.
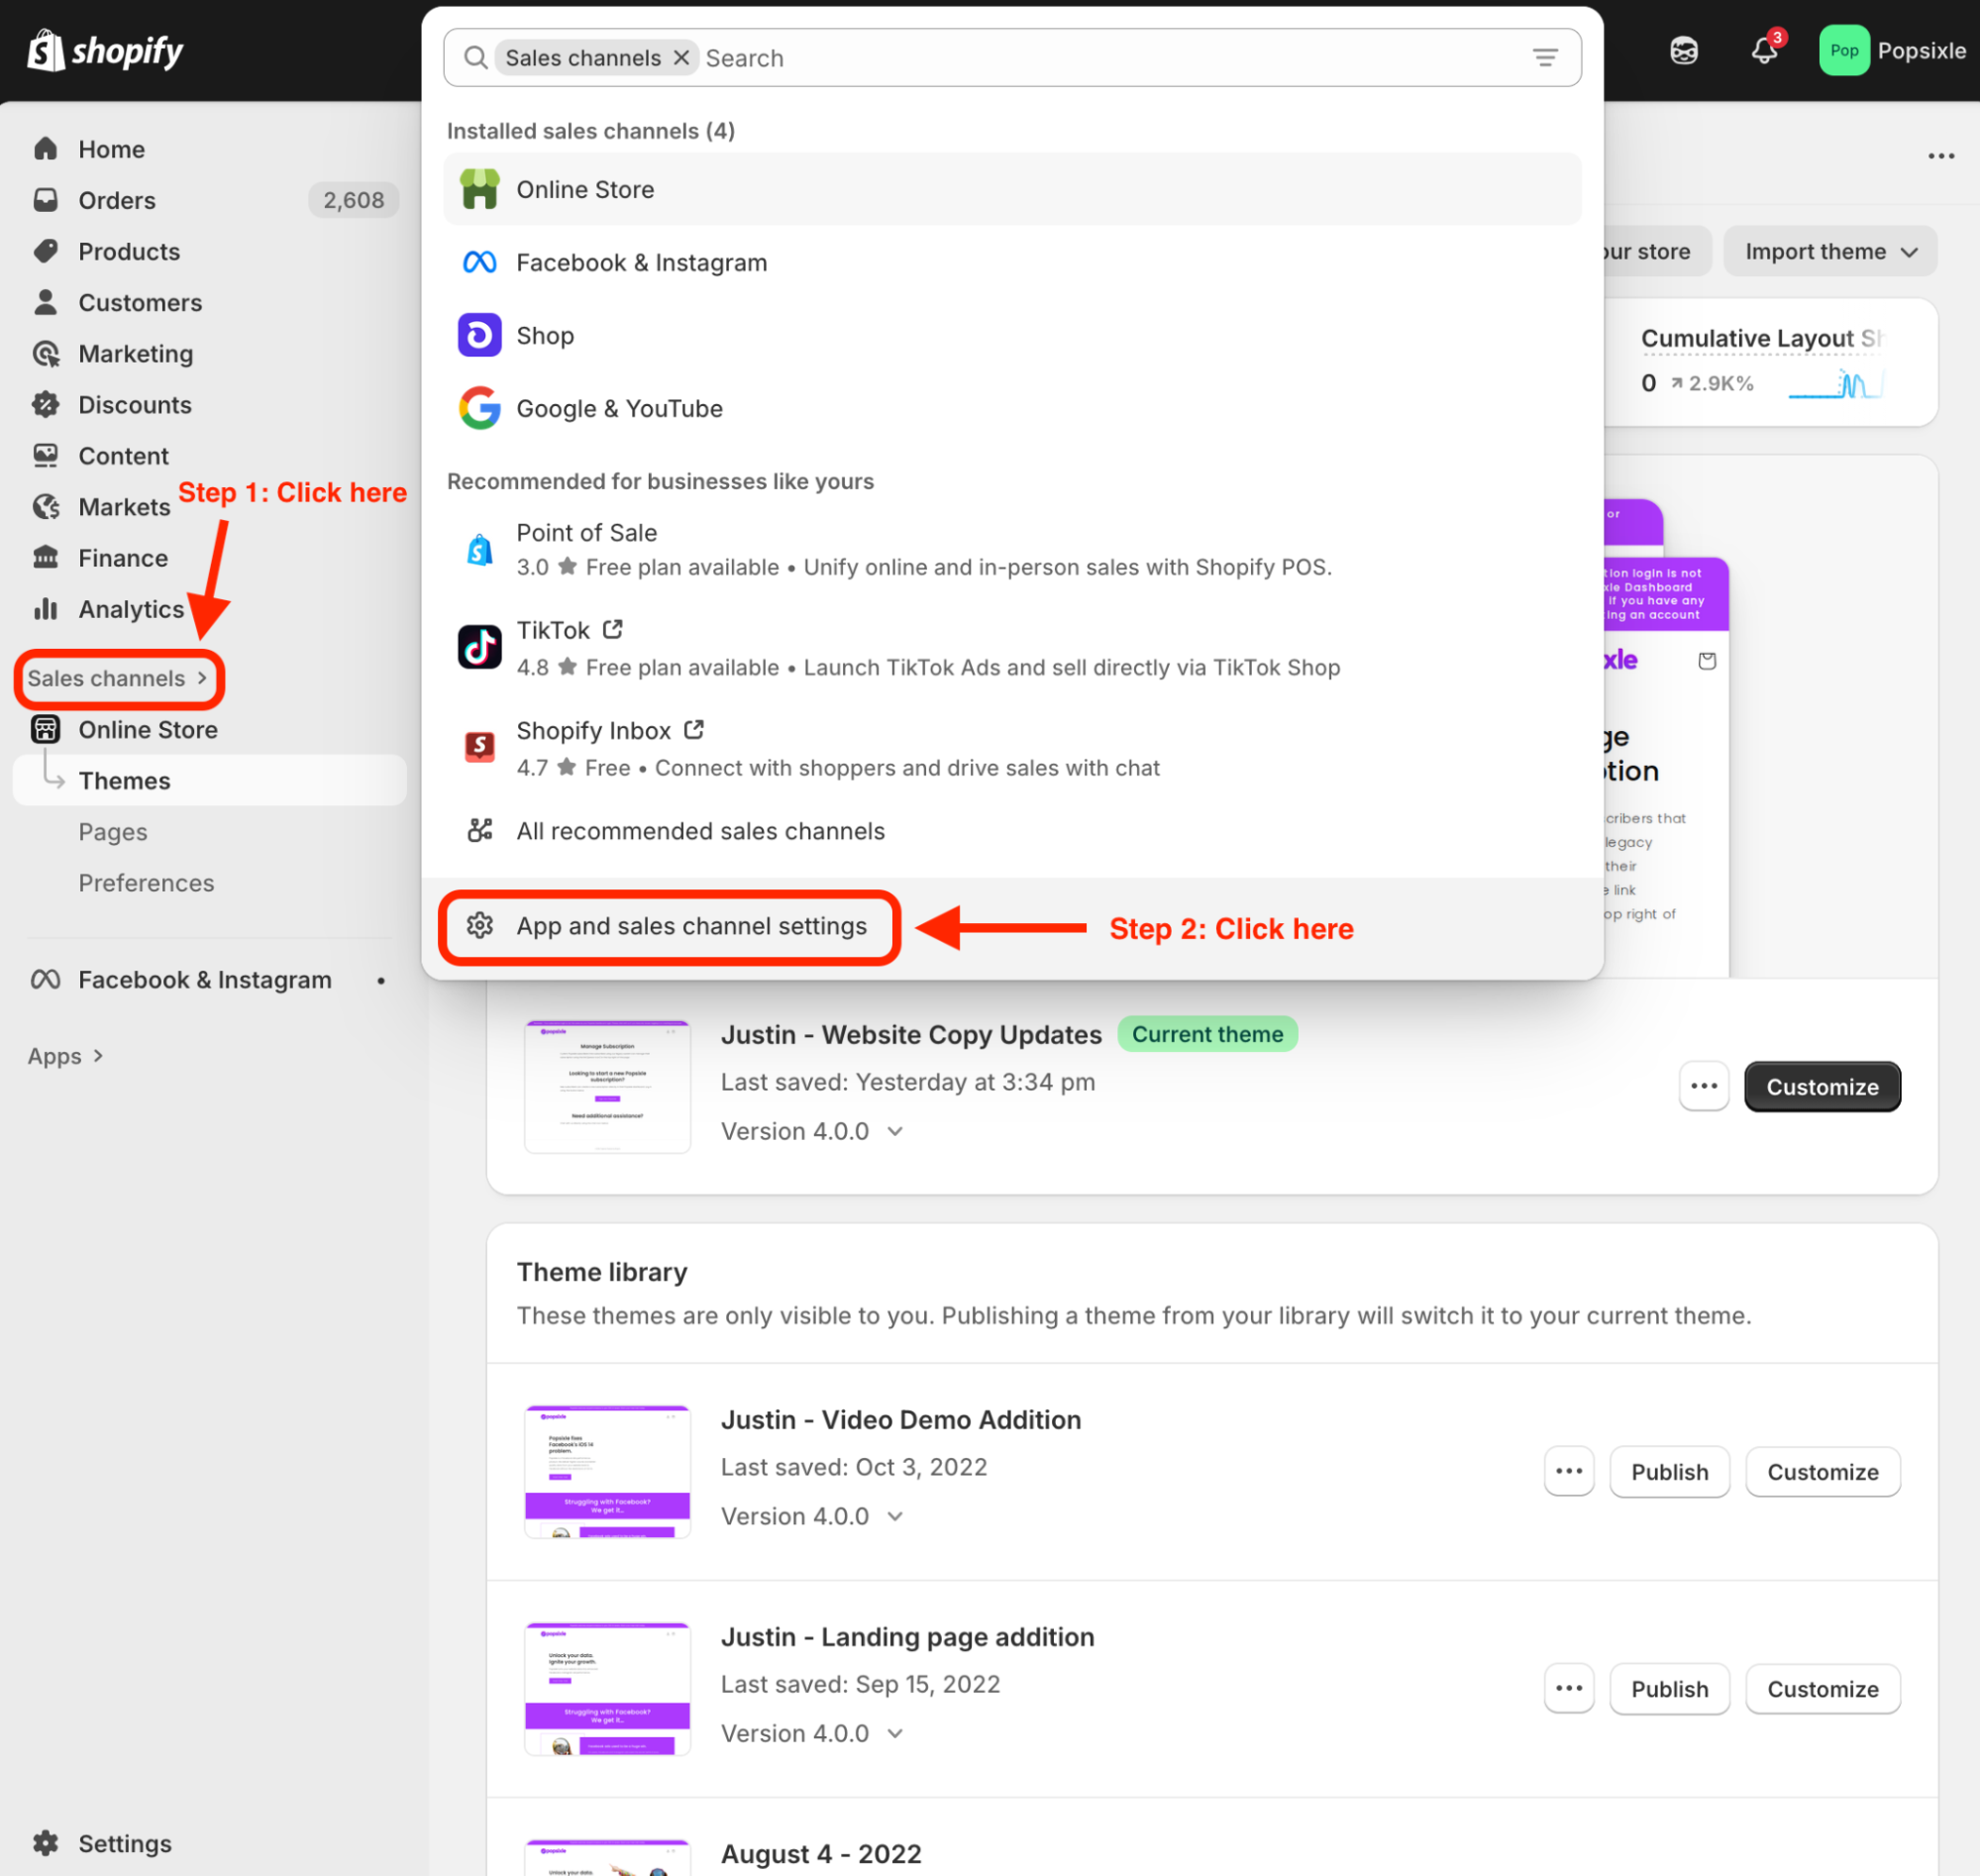
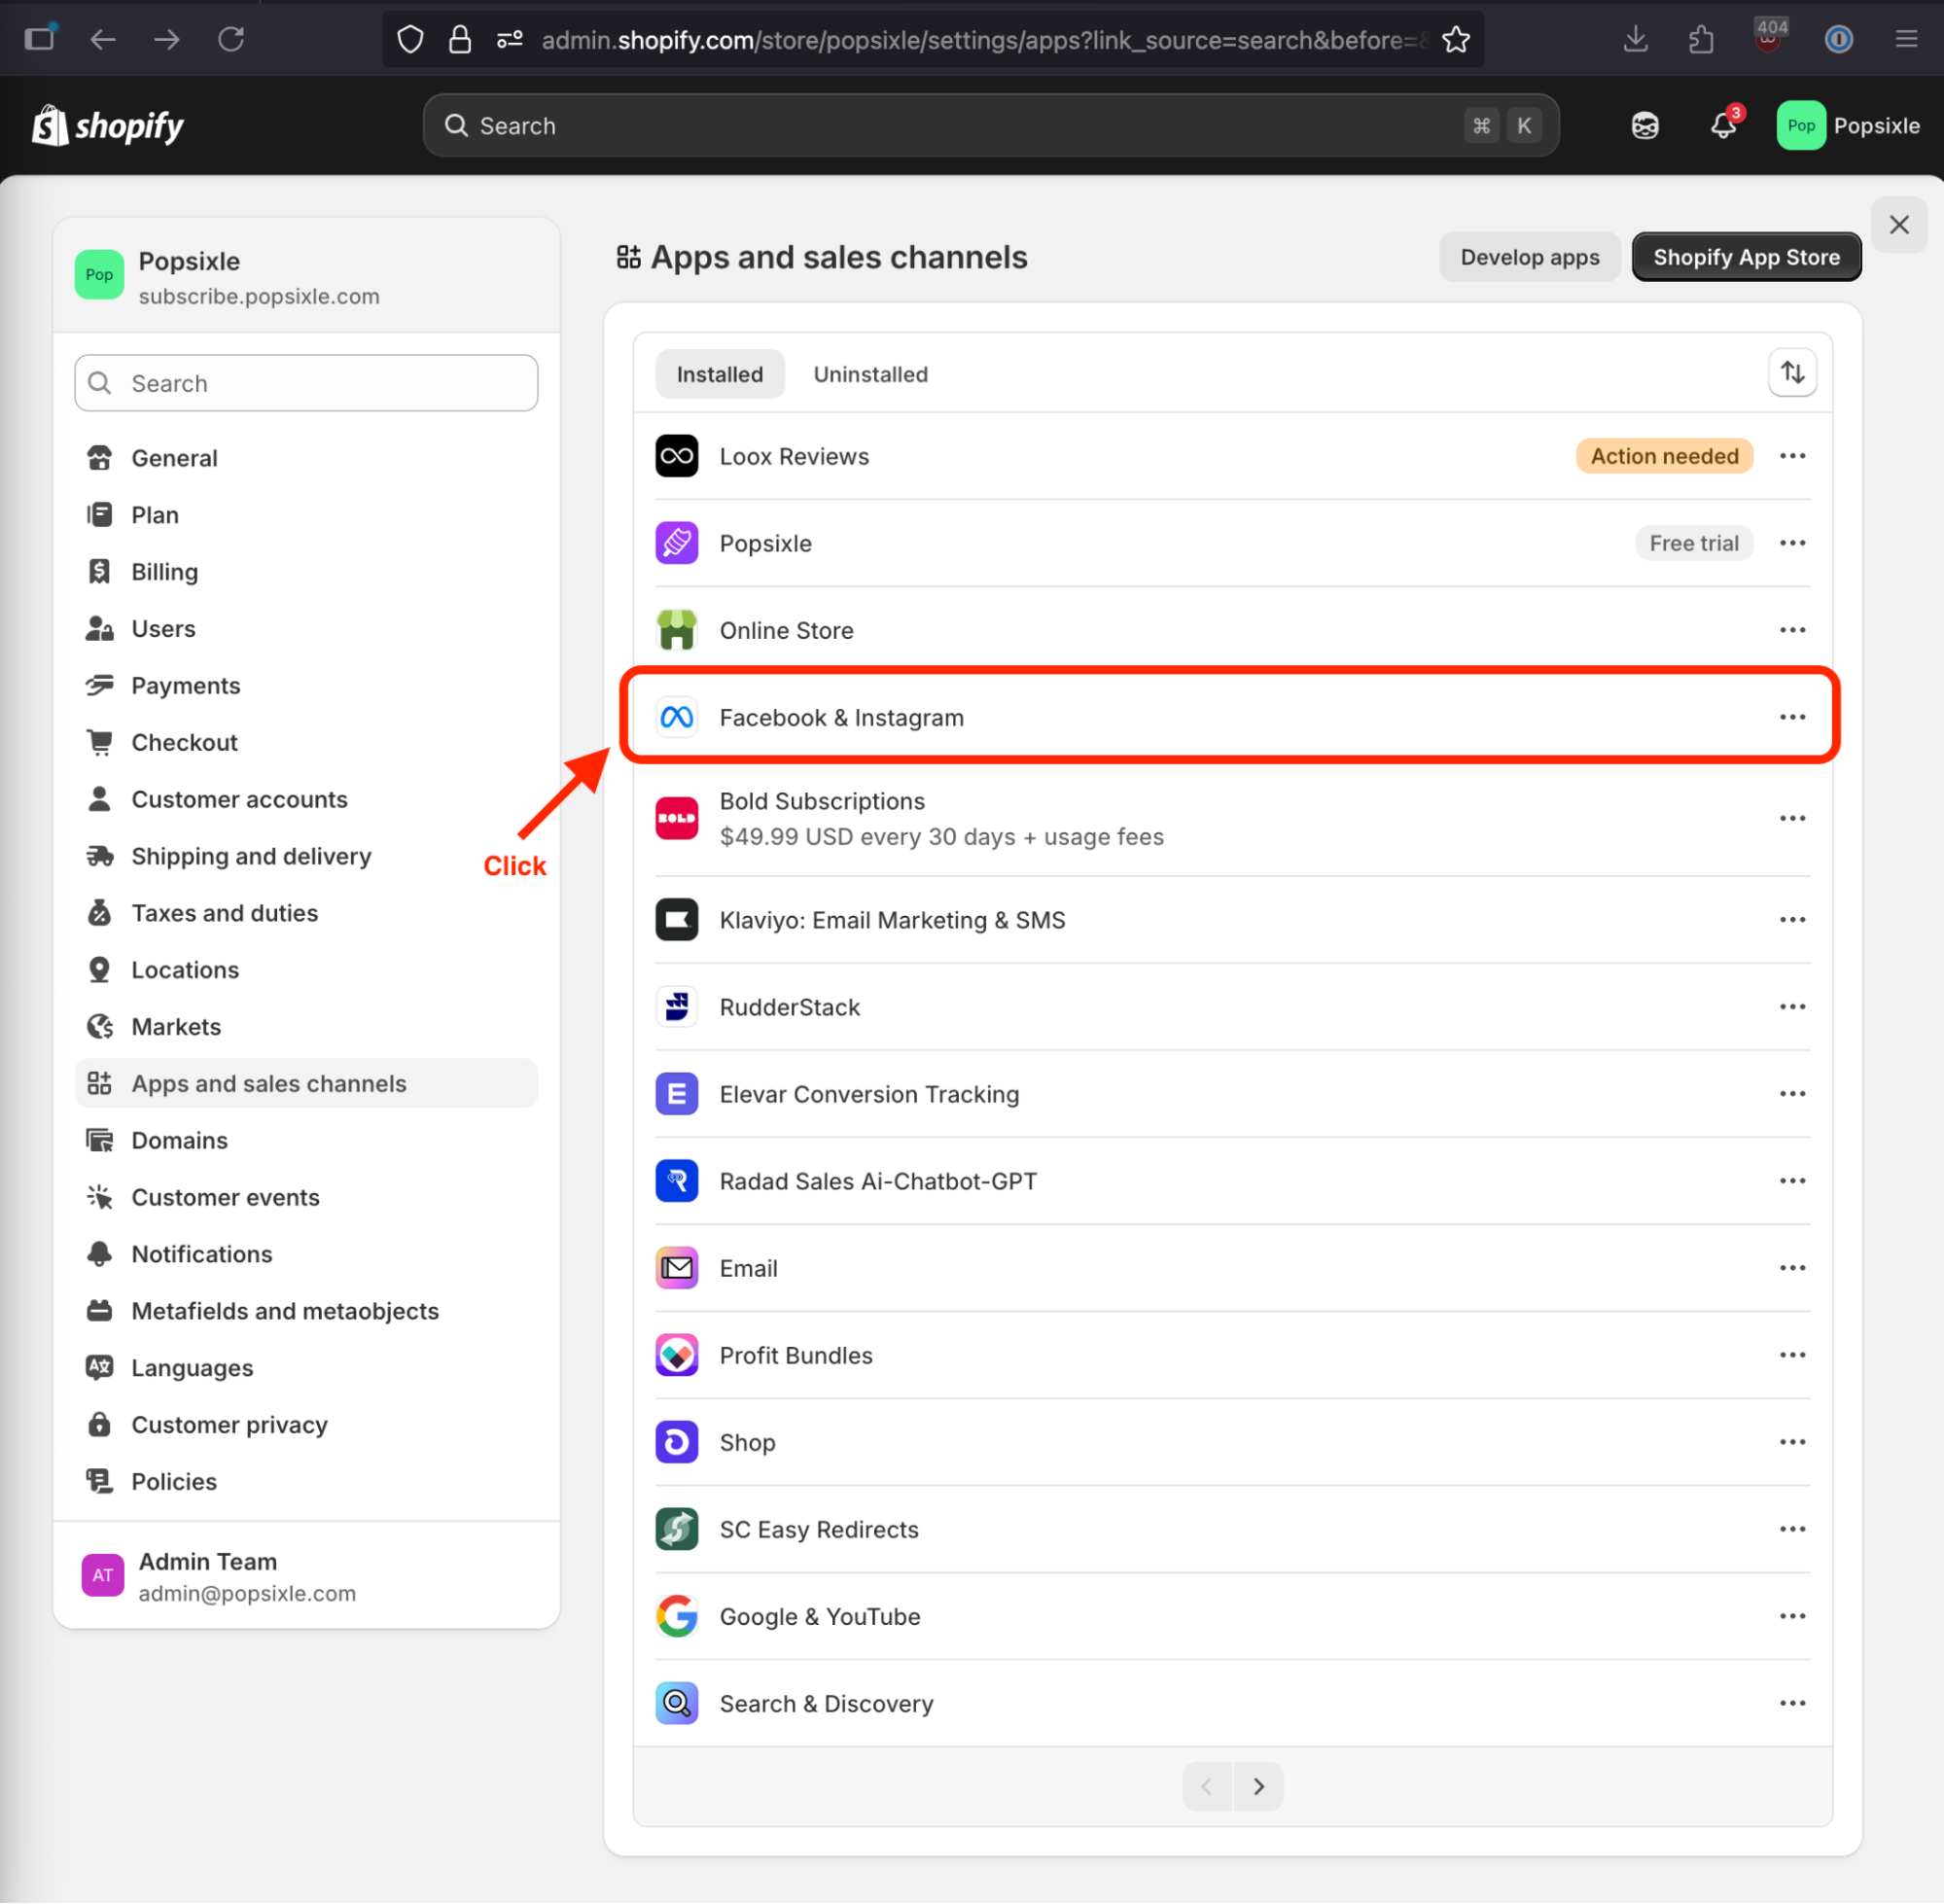
From the App and sales channel settings page, find and click Facebook & Instagram.
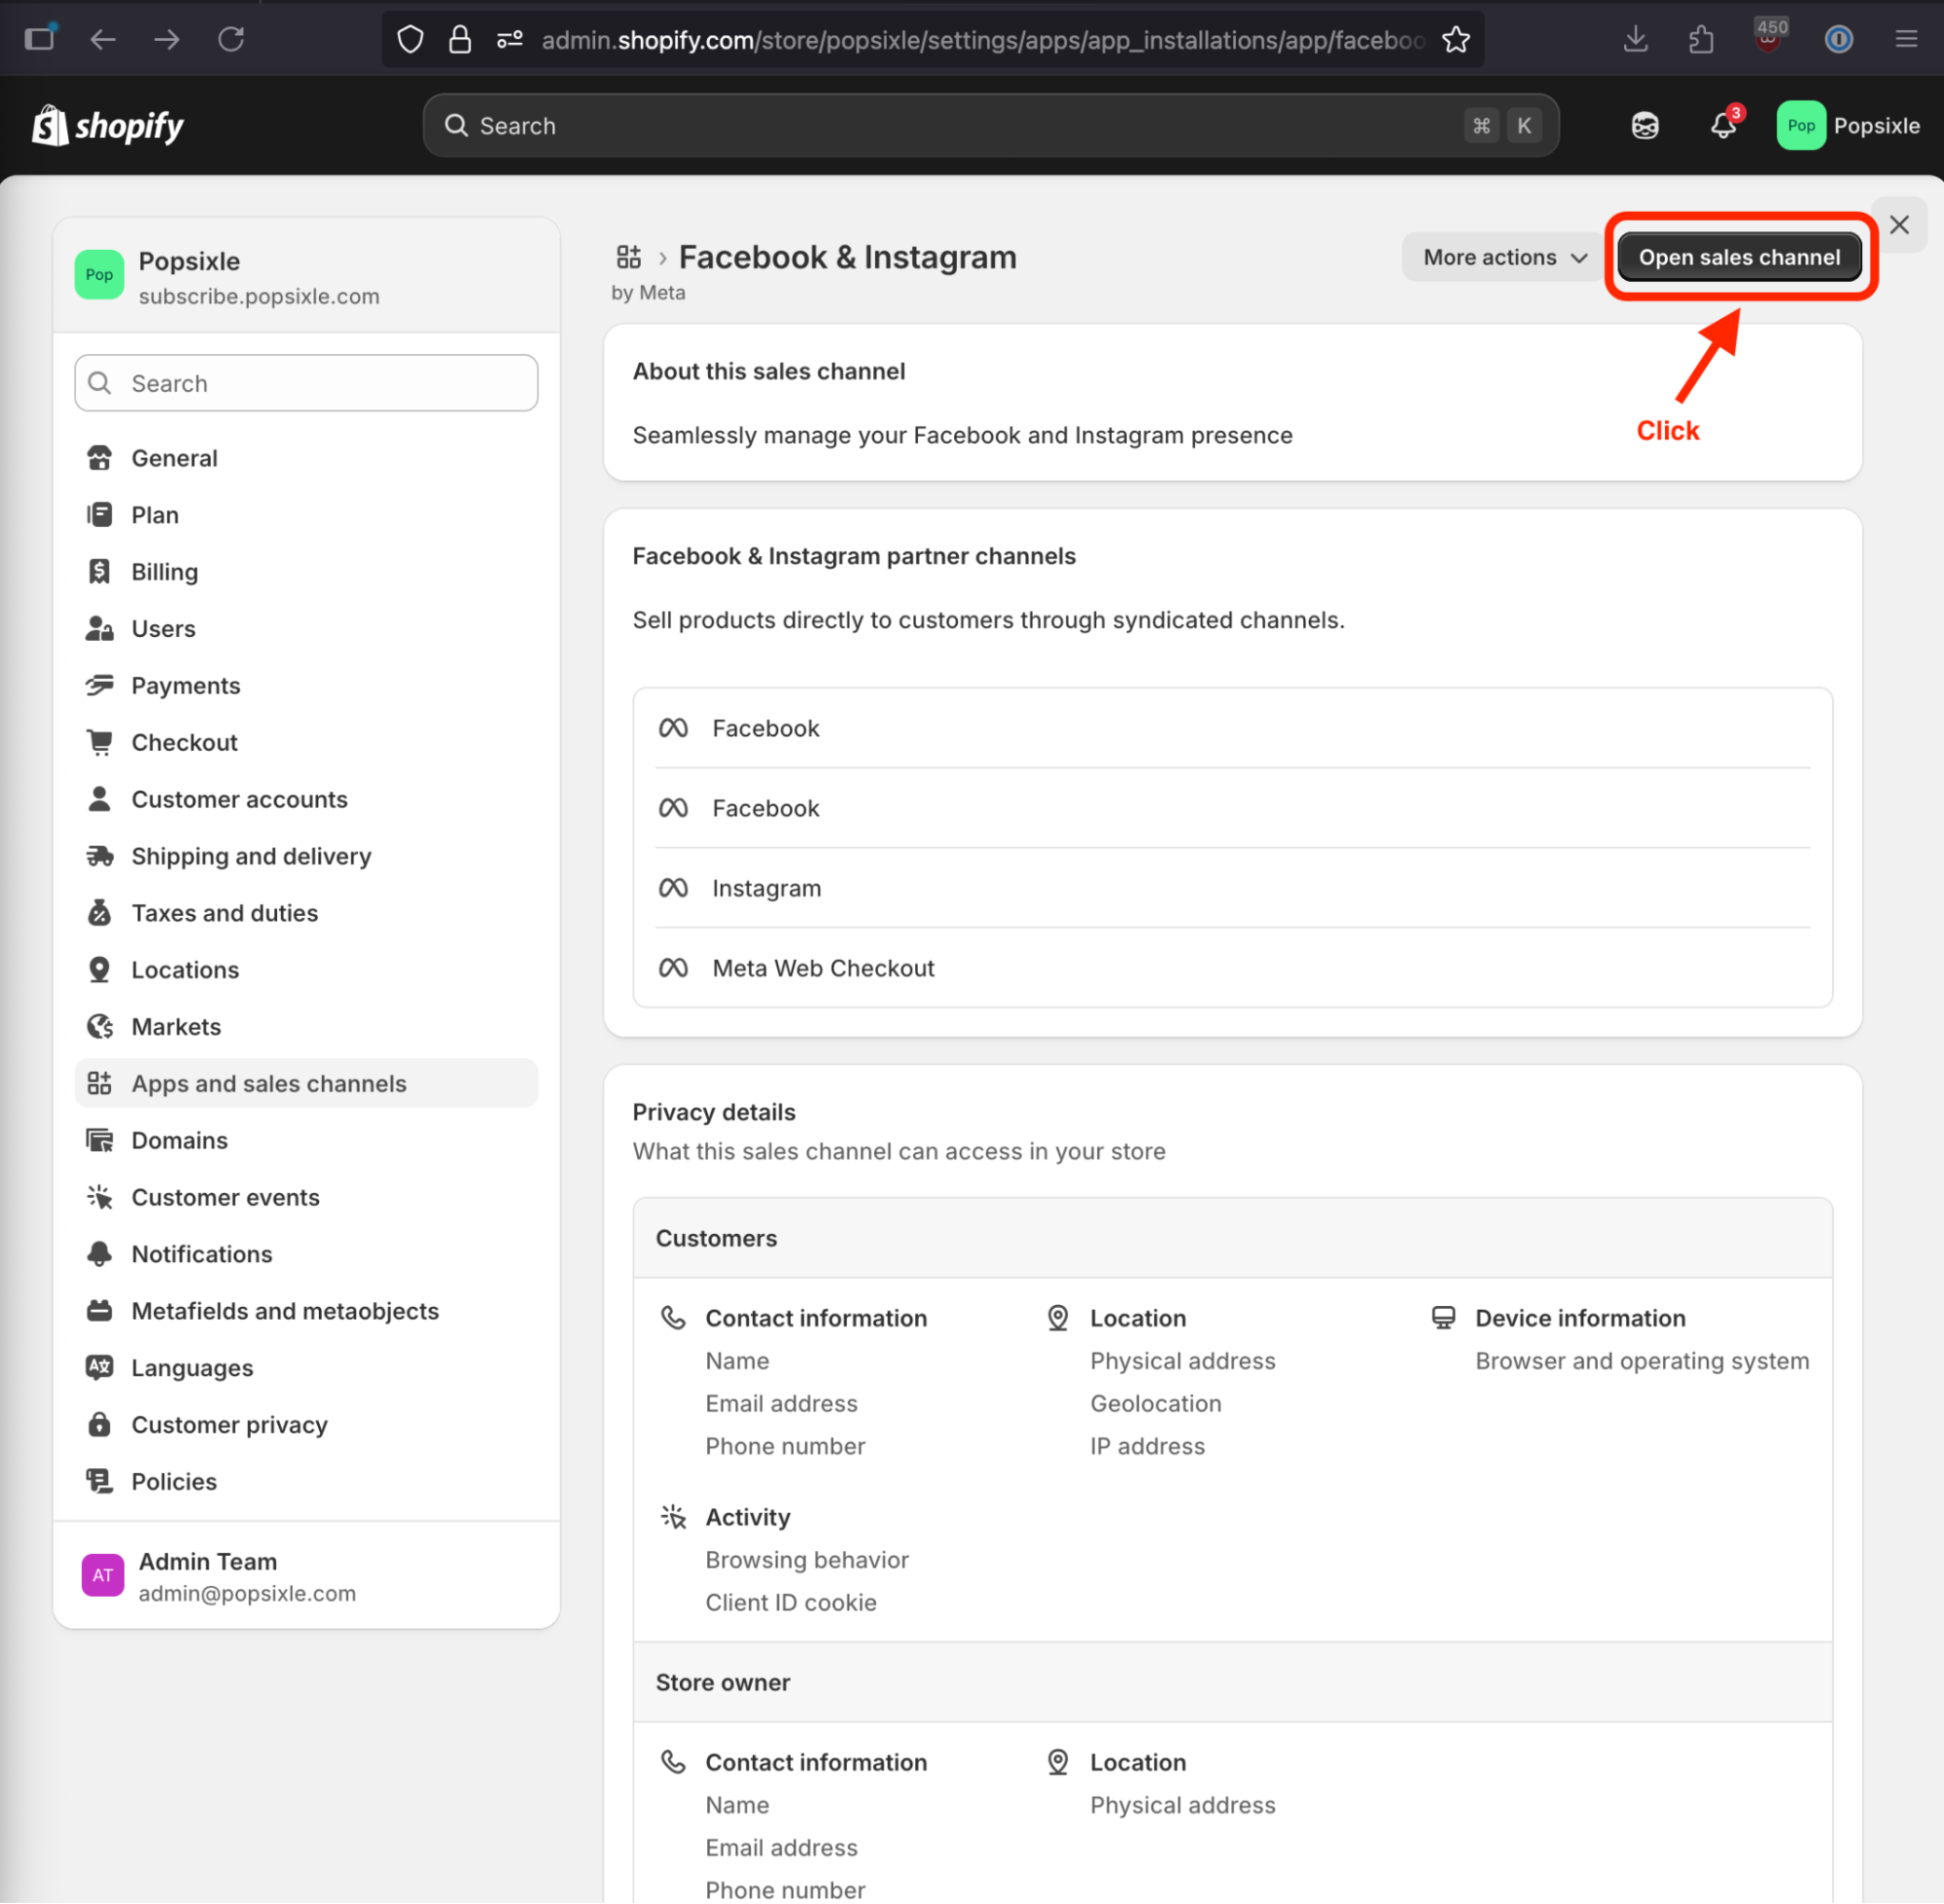
From the Facebook & Instagram page, click the black Open sales channel button on the upper right.
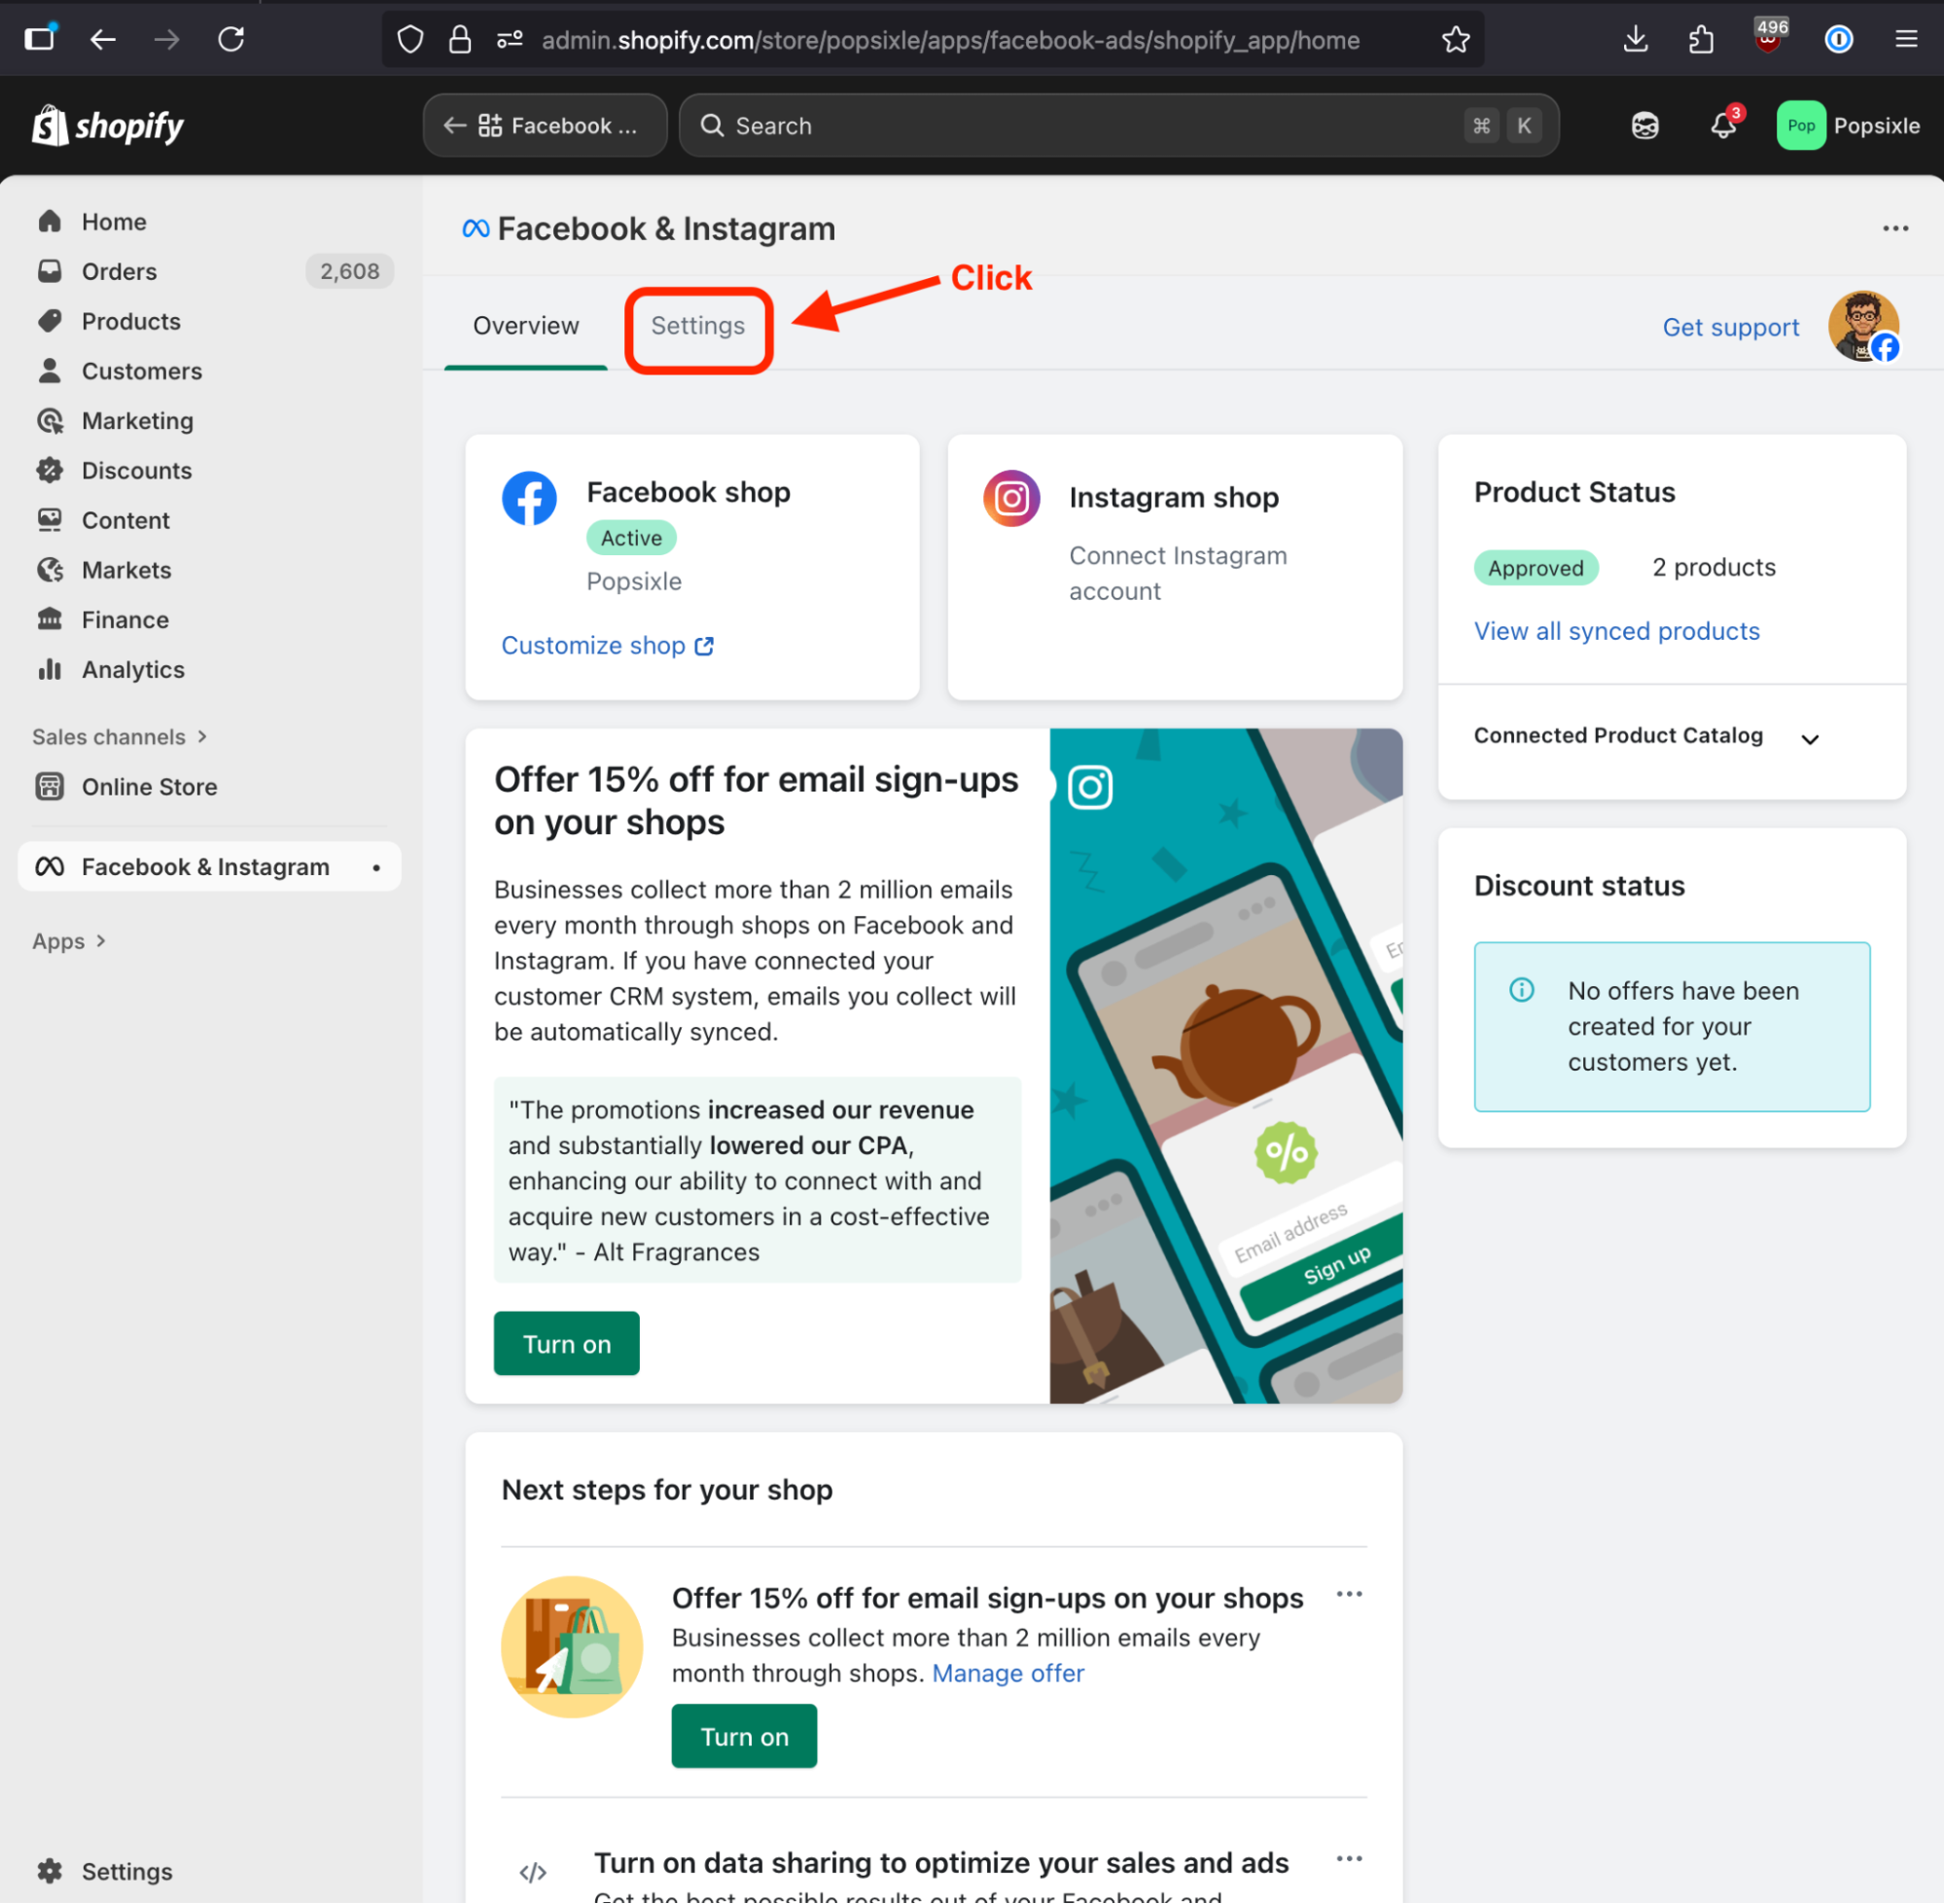
From the Facebook & Instagram sales channel page, click Settings on the top navigation bar.
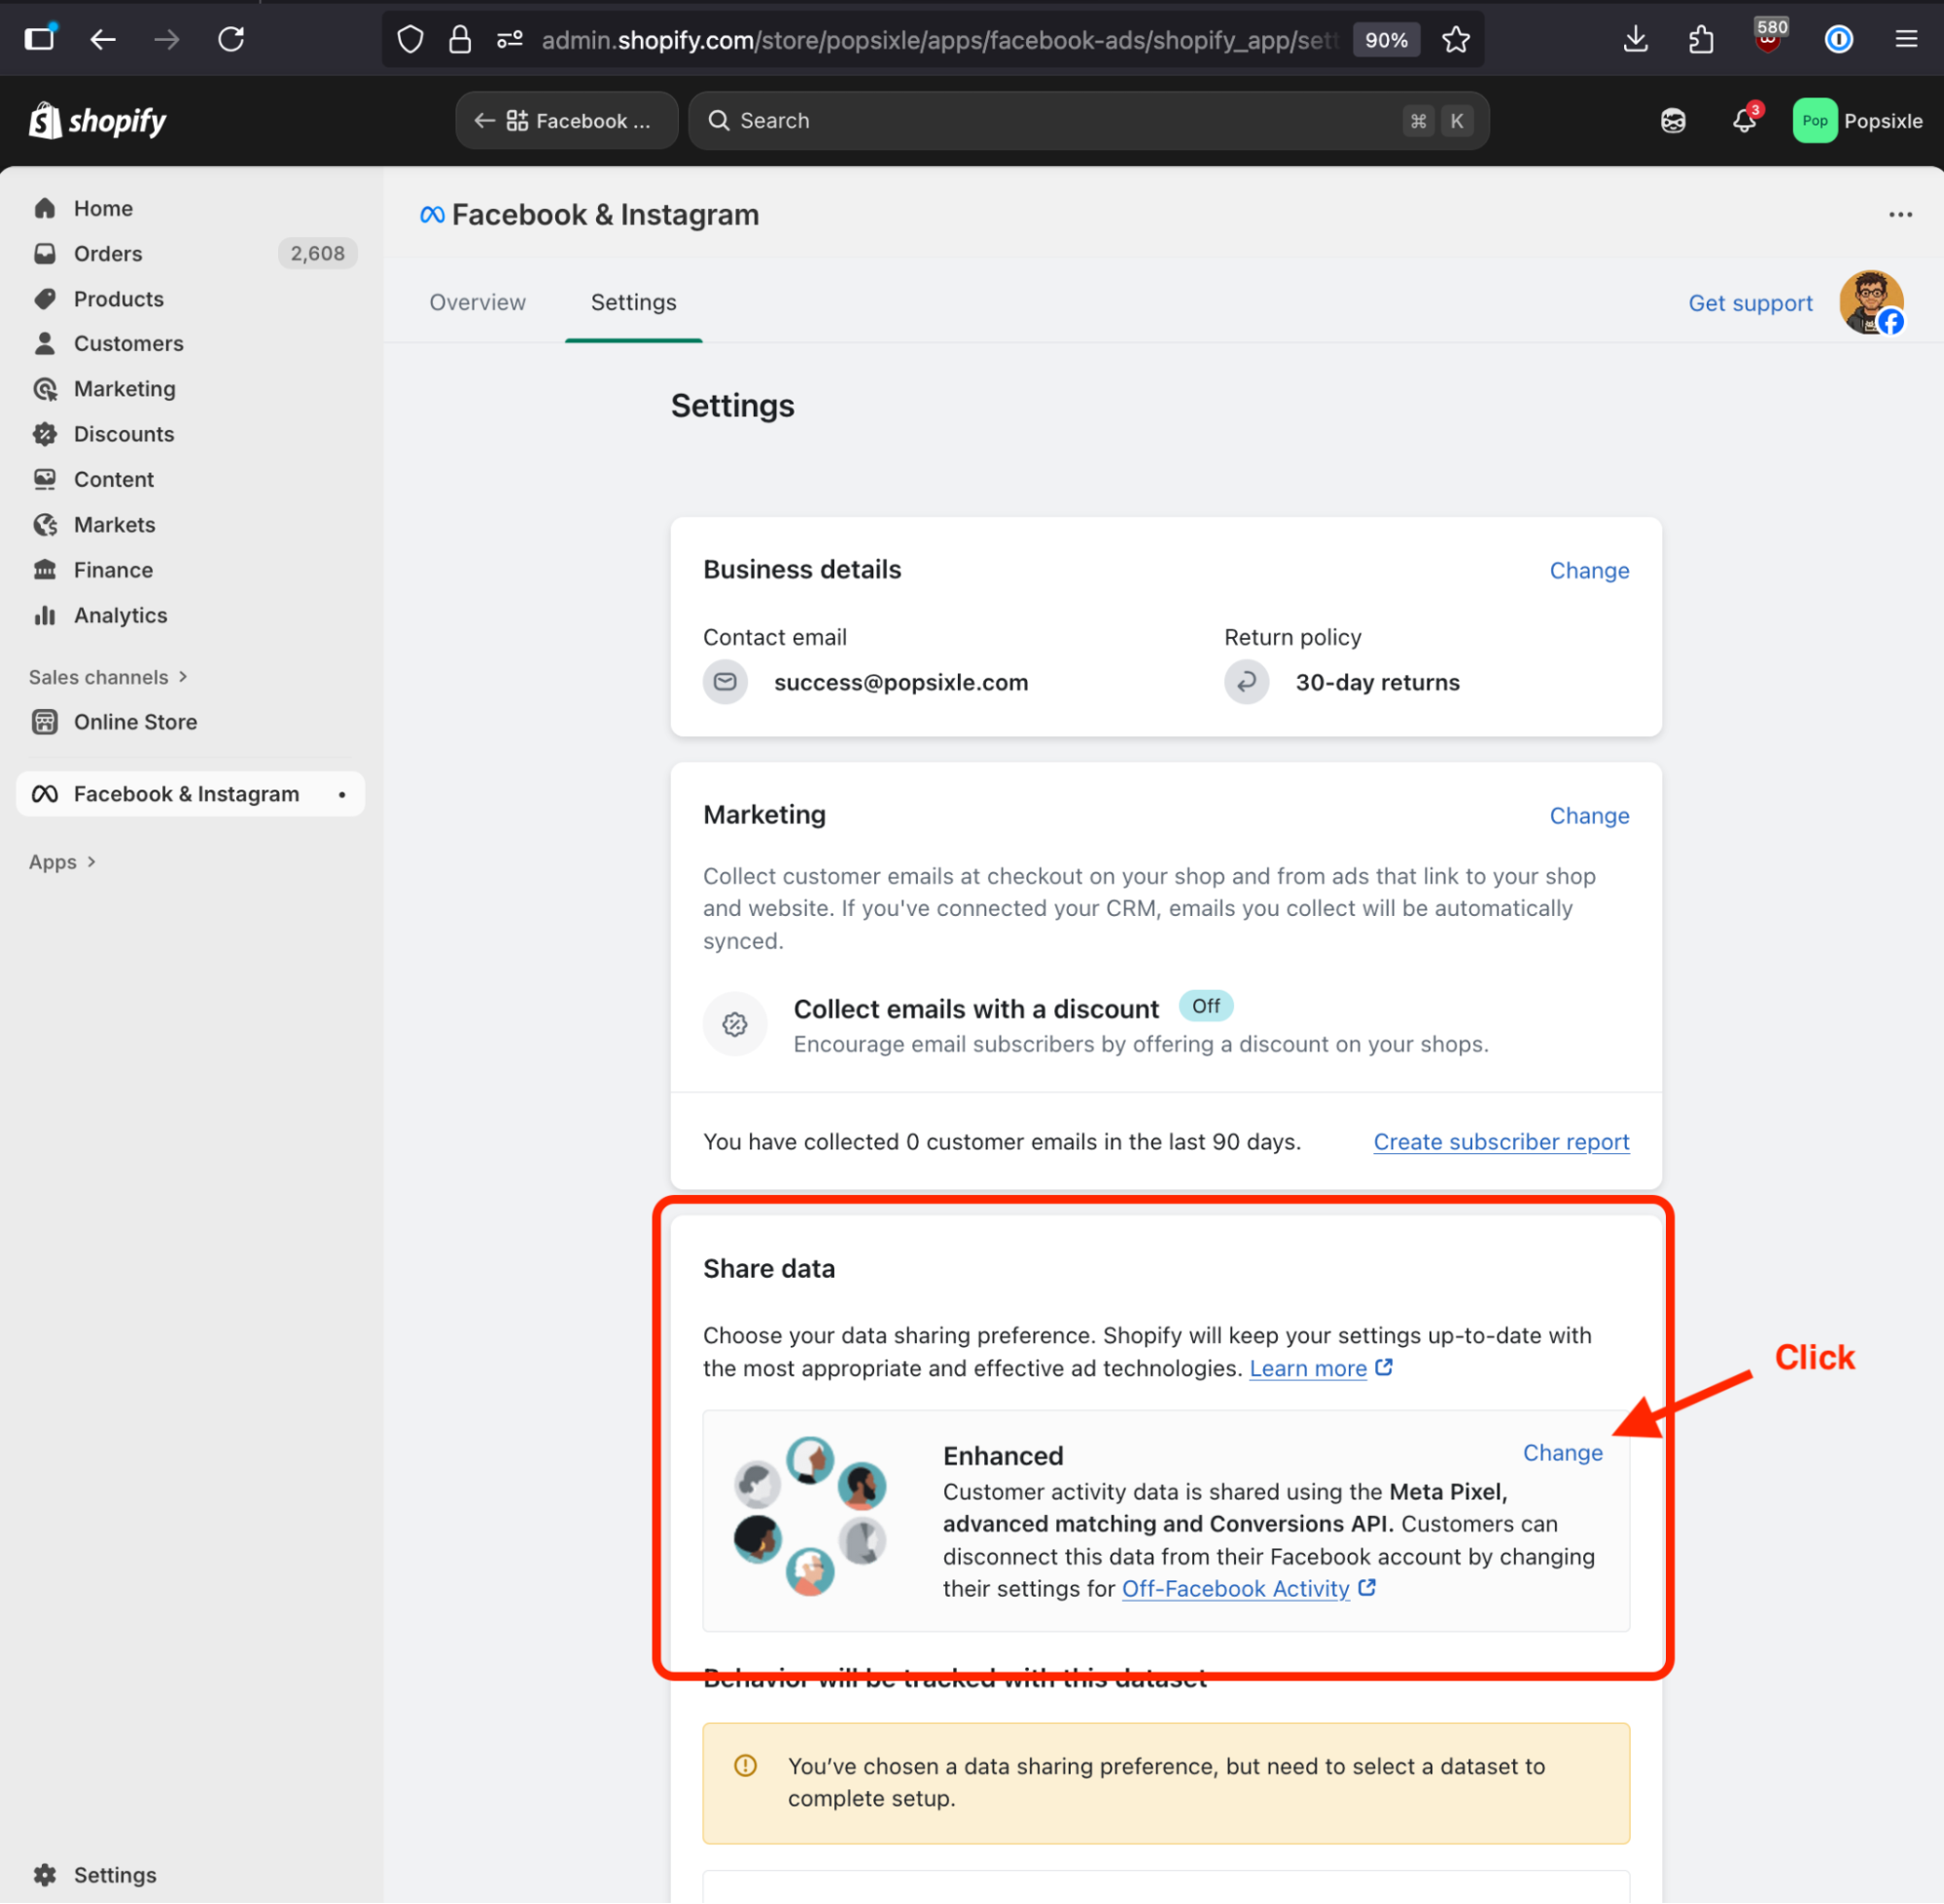
From the Settings page, scroll down to find Share data and click the blue Change button.
This will open a modal titled Manage Facebook & Instagram data sharing preference.
Find the Share data toggle on the top of the modal and click it to disable data sharing.
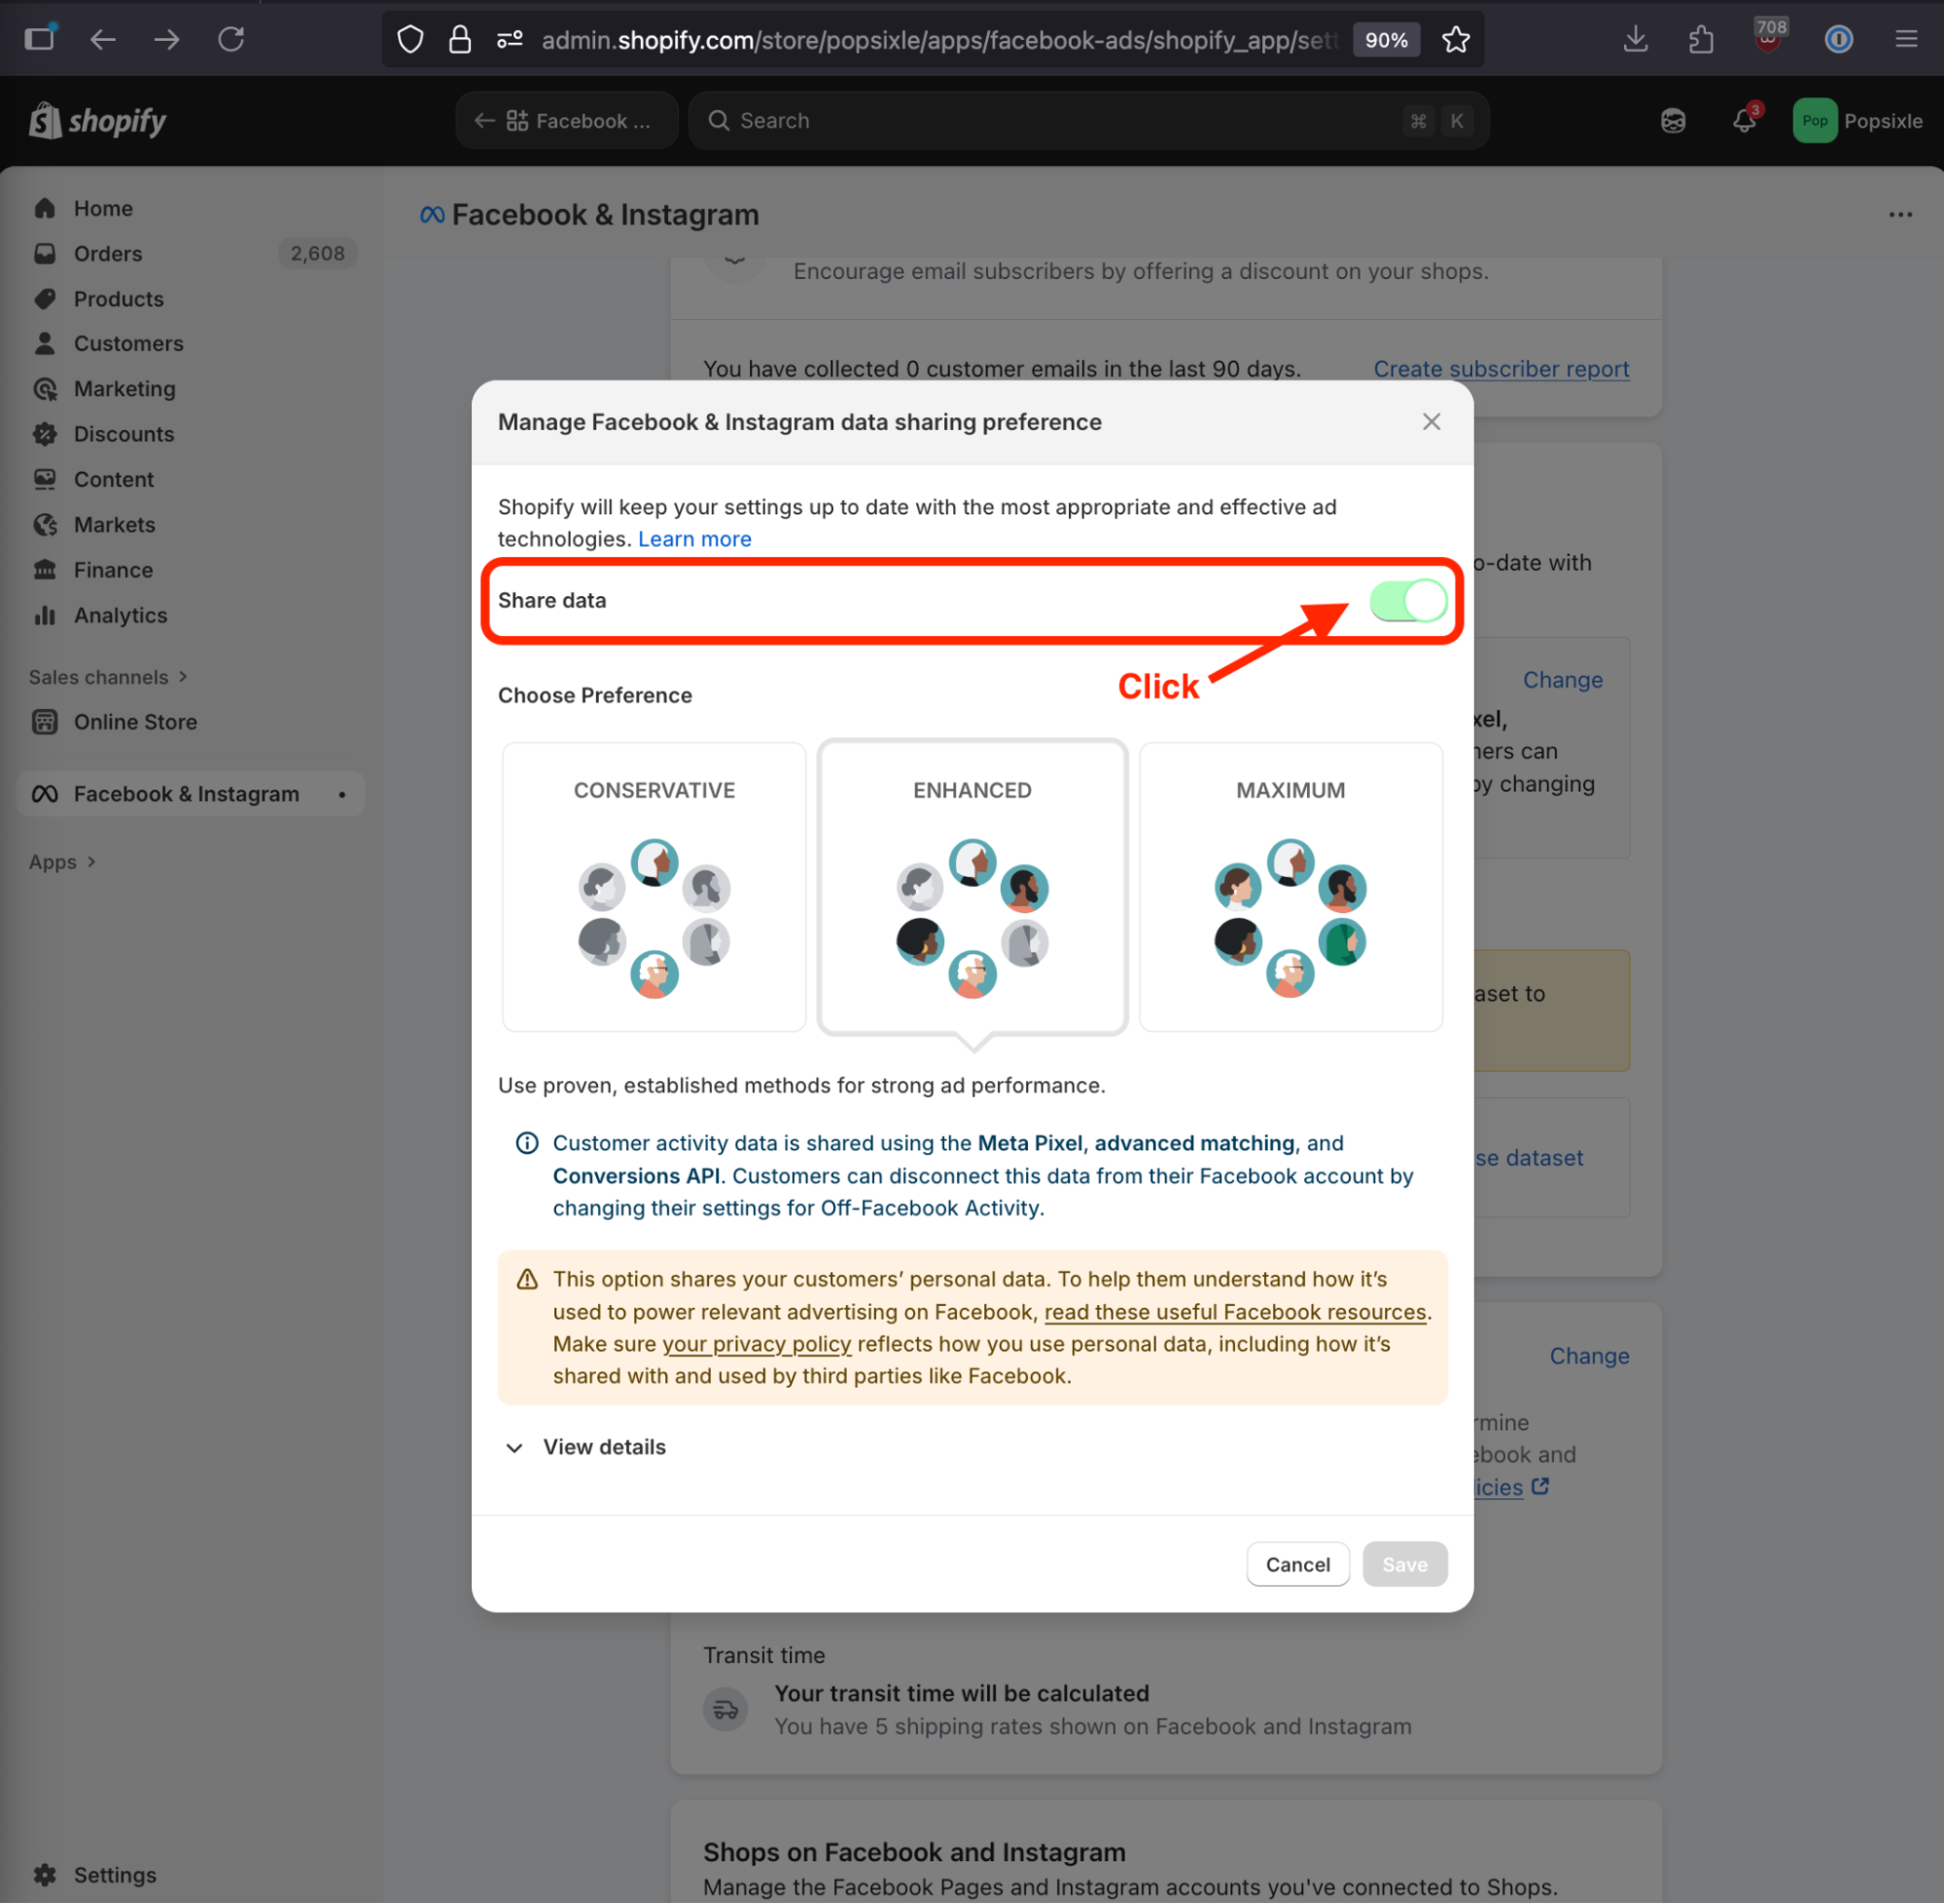
Once you’ve disabled the Share data toggle, click Save.
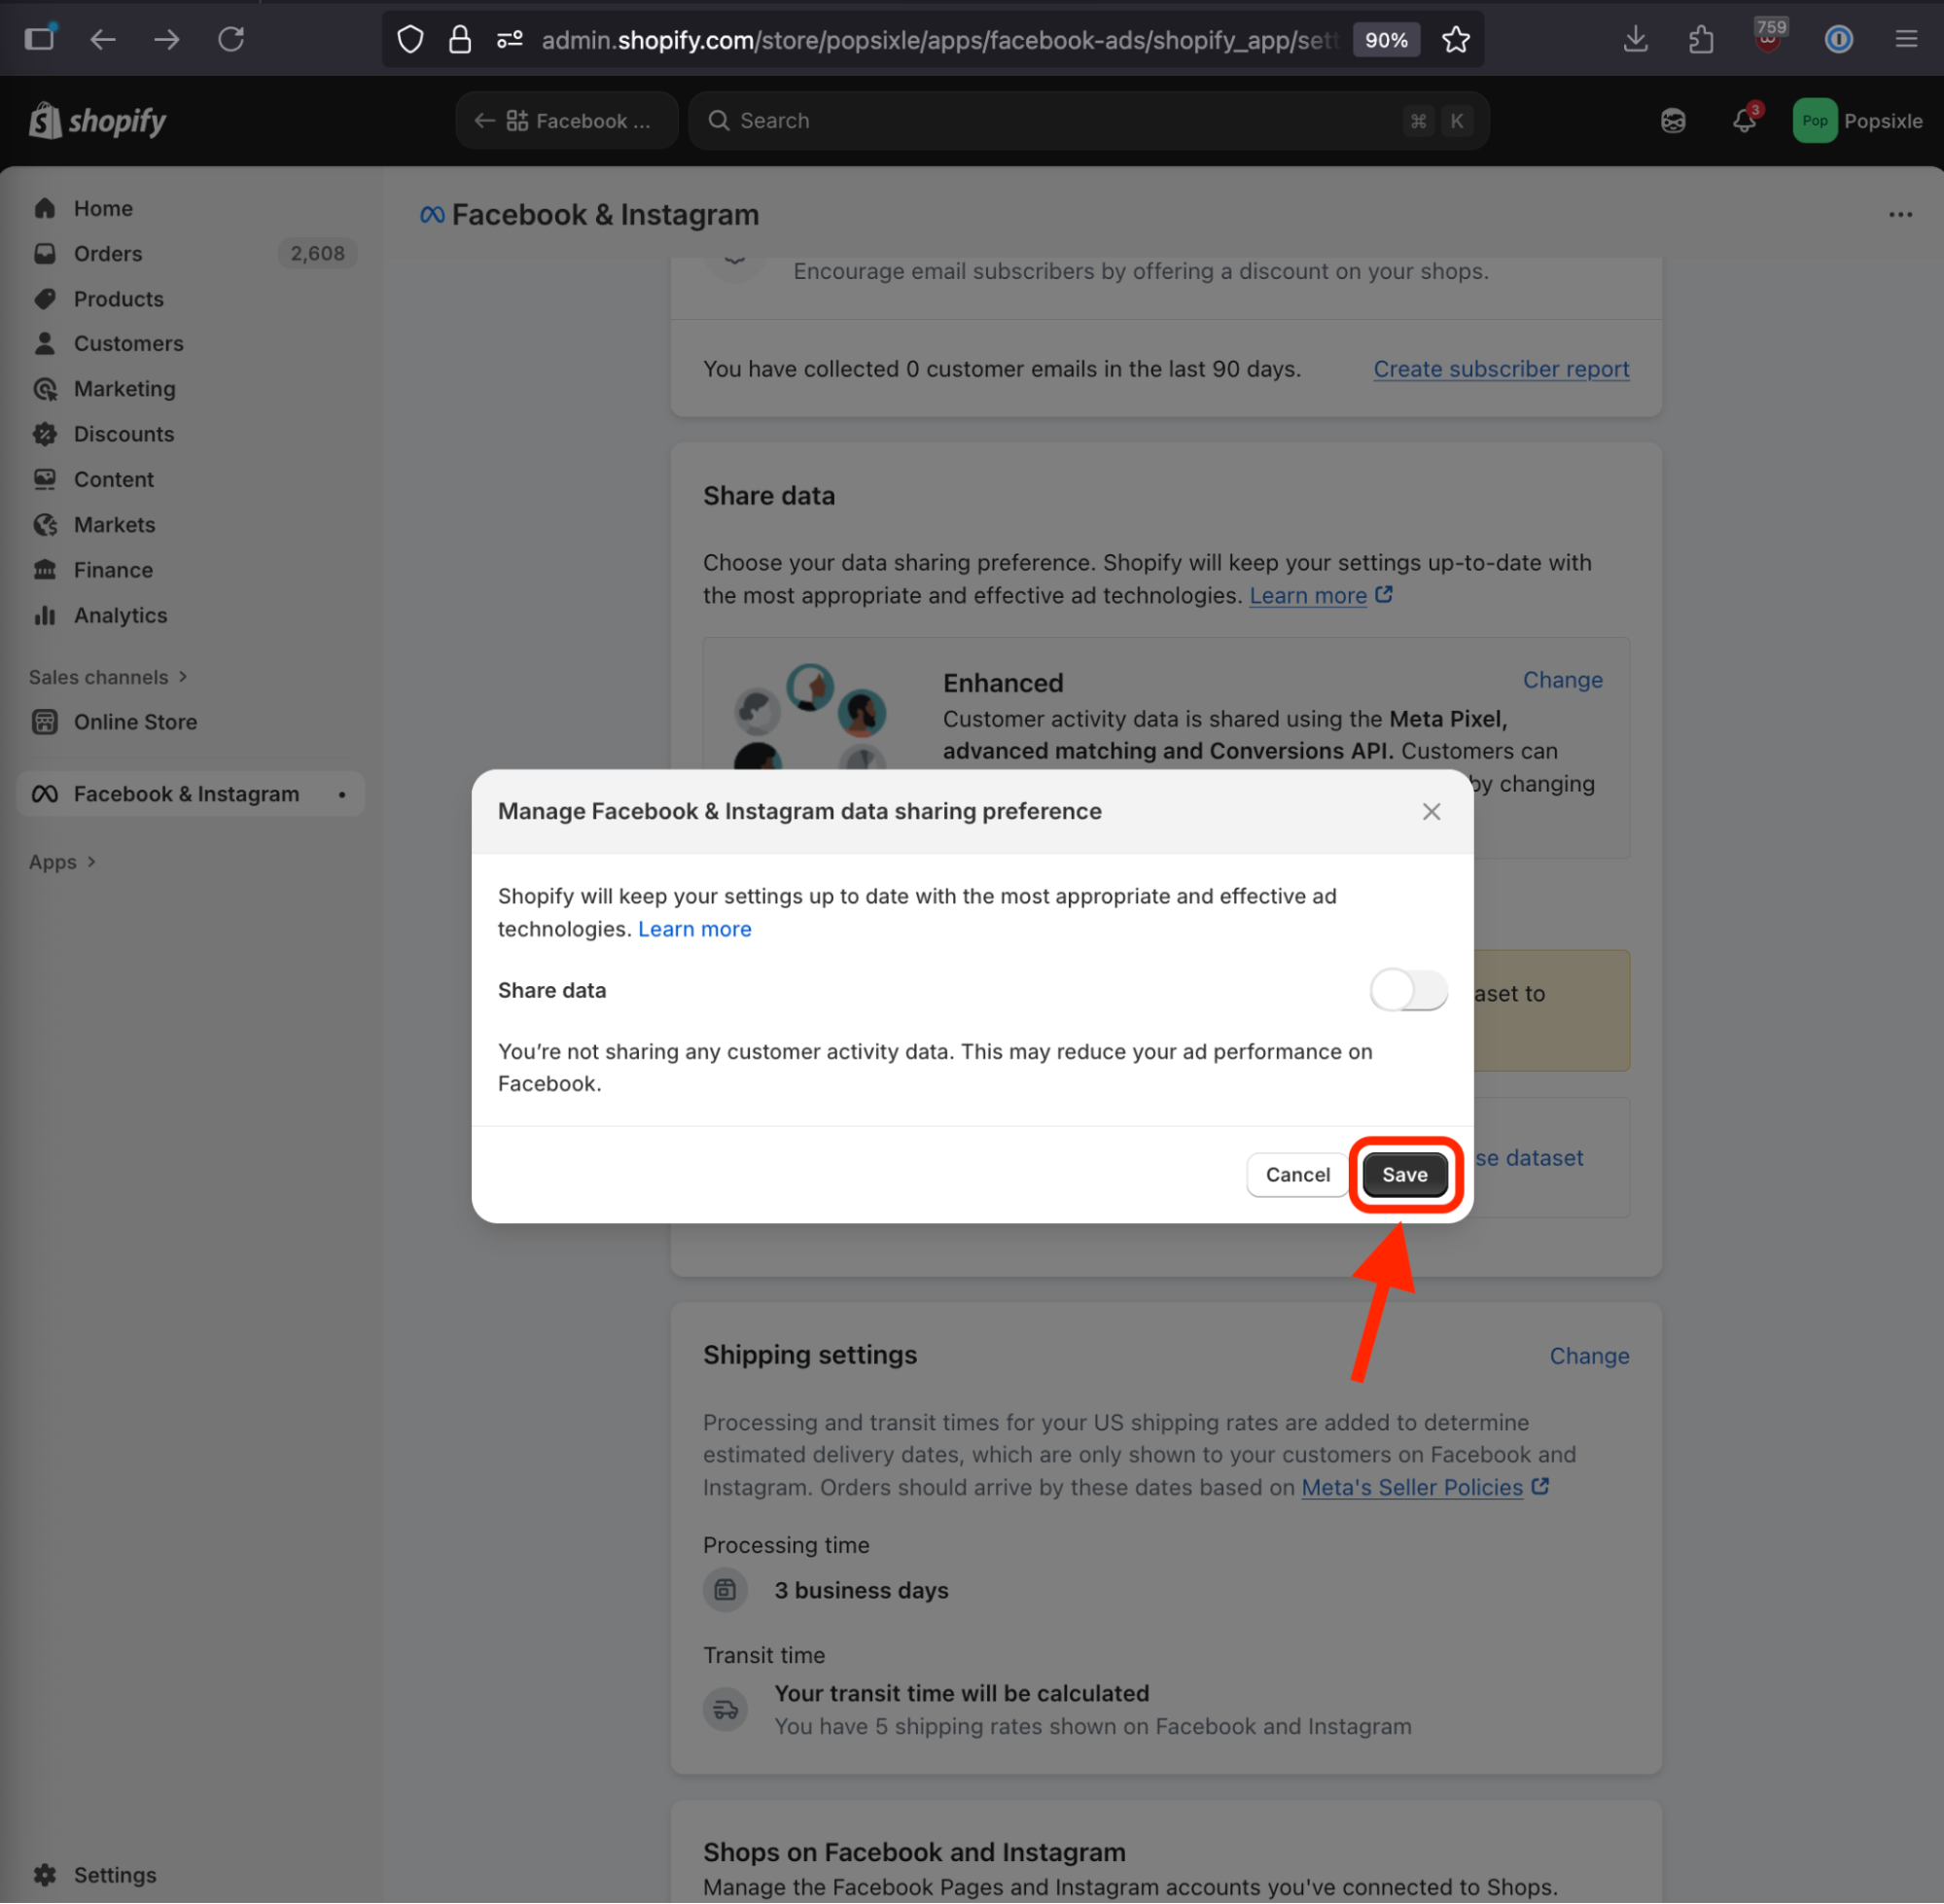
This will close the modal, and the Share data card will now show that Data sharing is off.
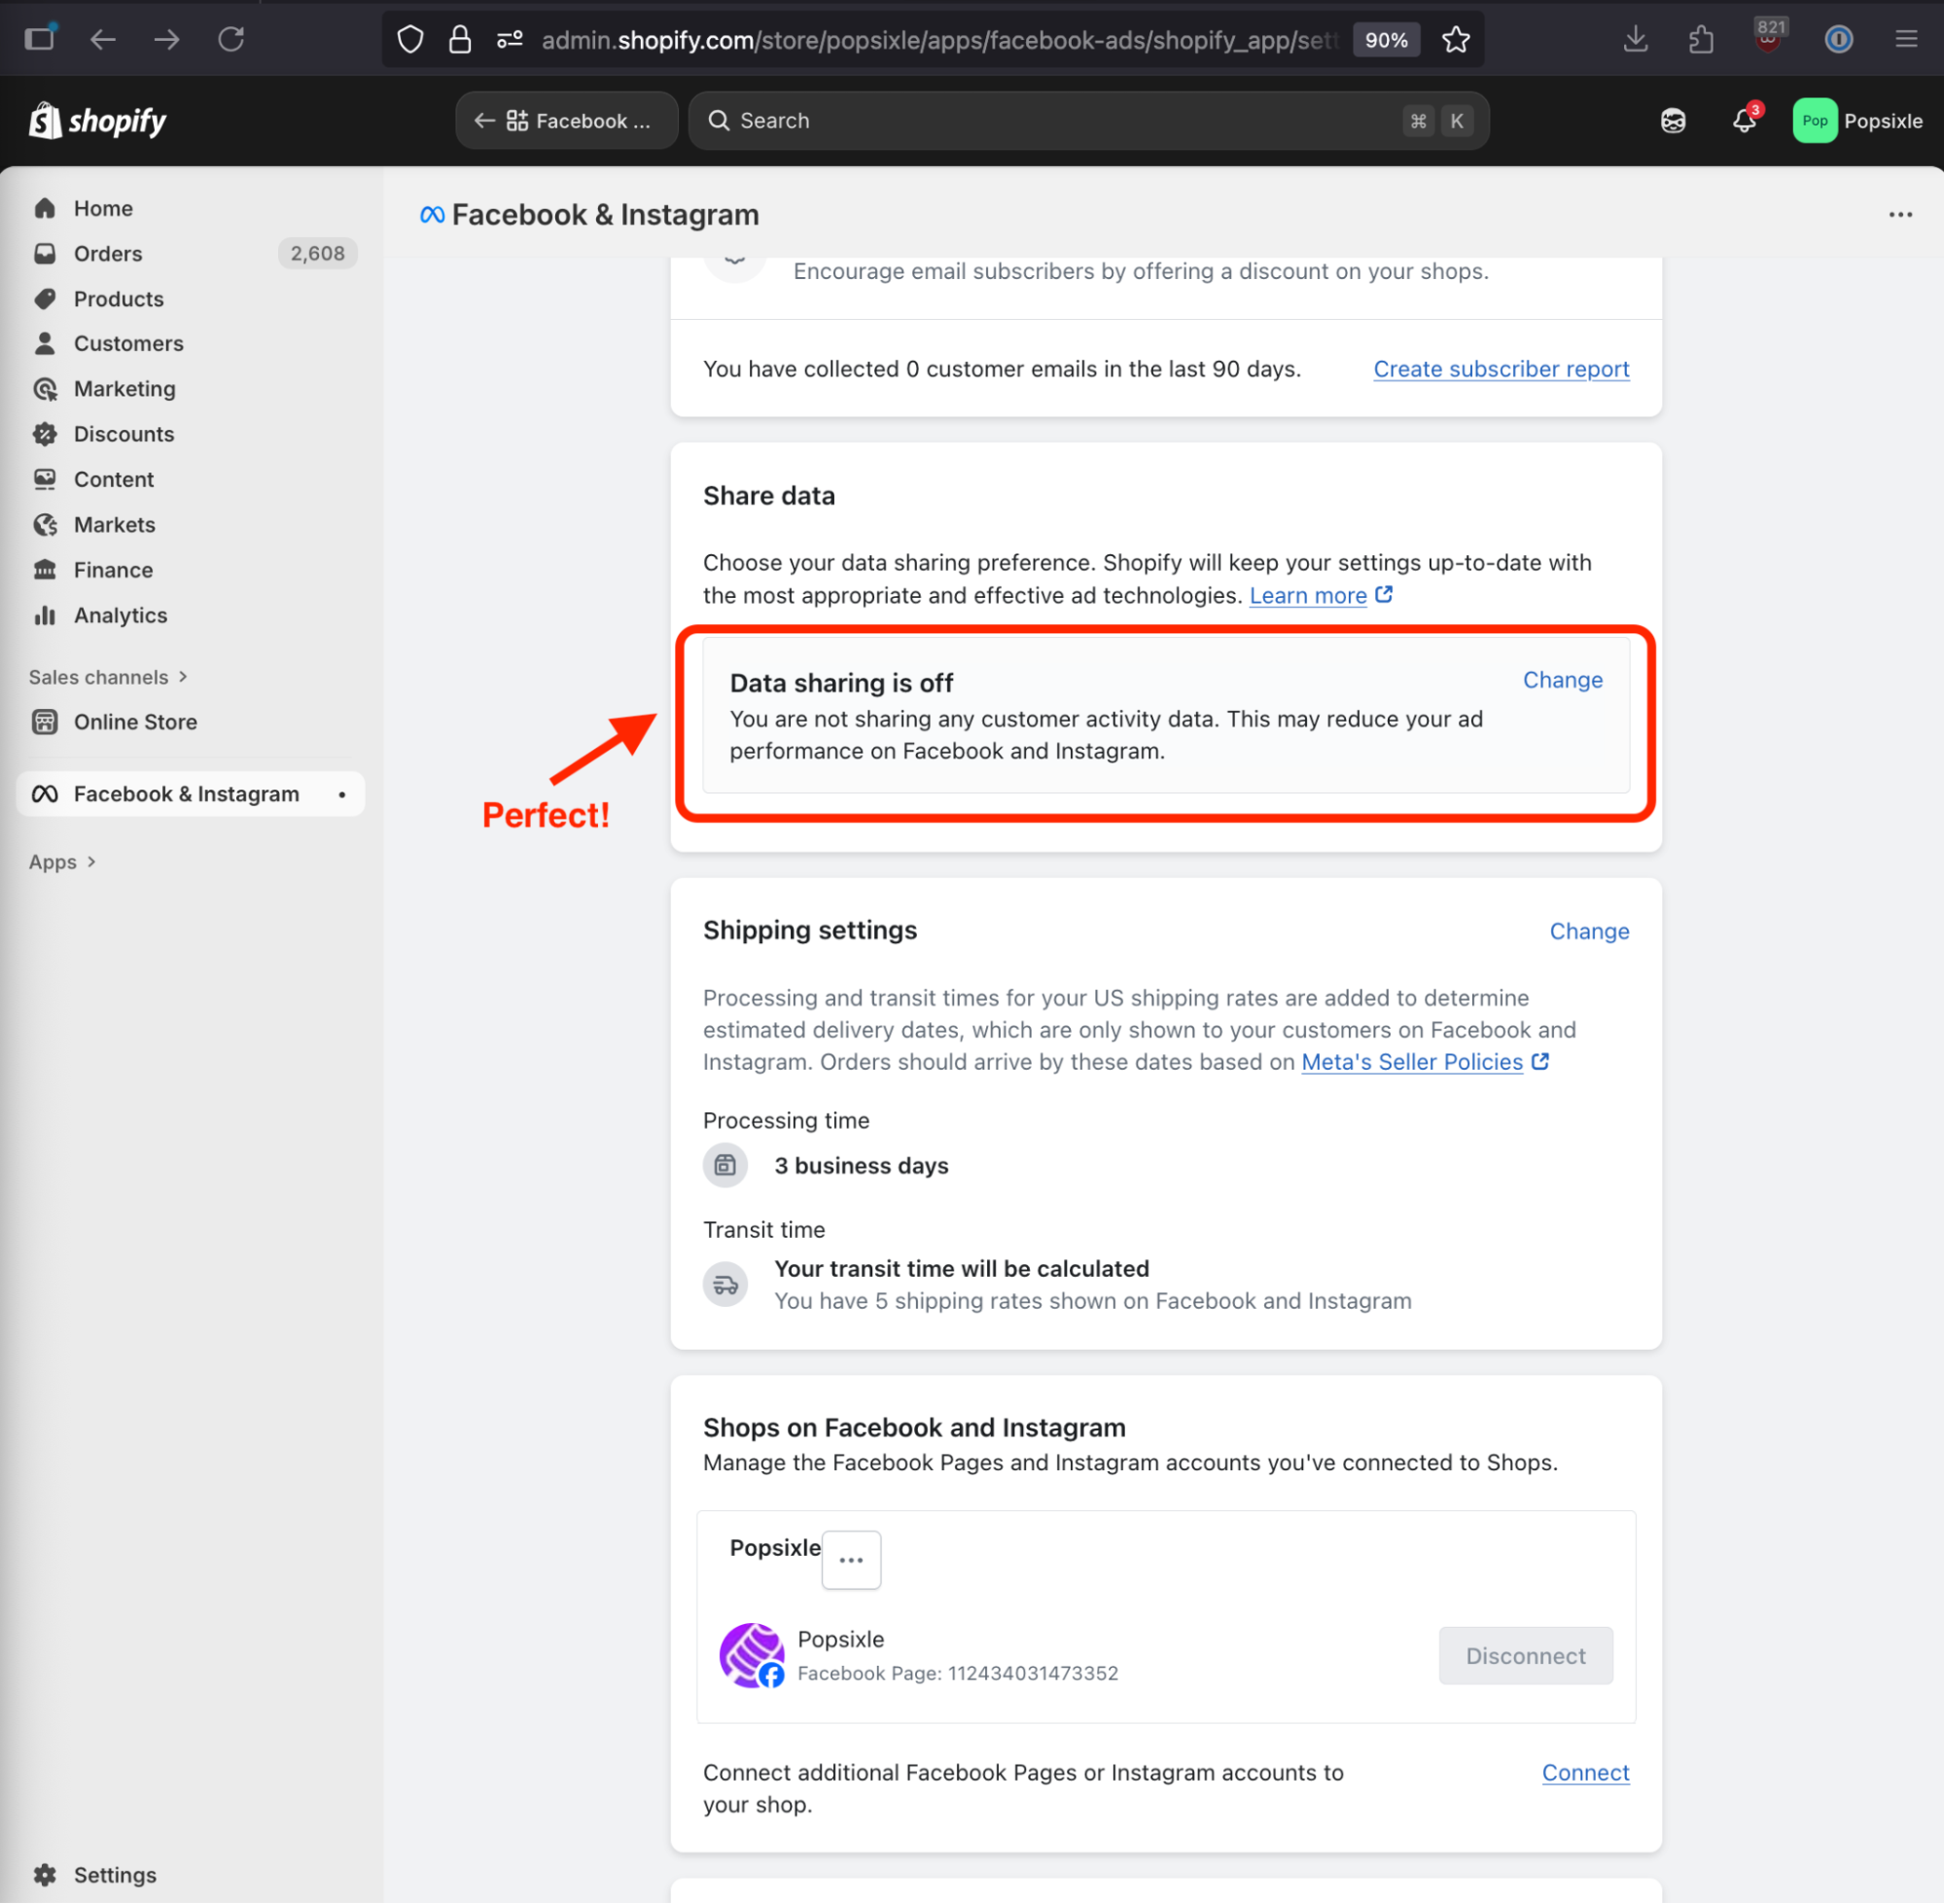
All set! Return to your Popsixle Dashboard tab and click the button to confirm you’ve disabled data sharing.
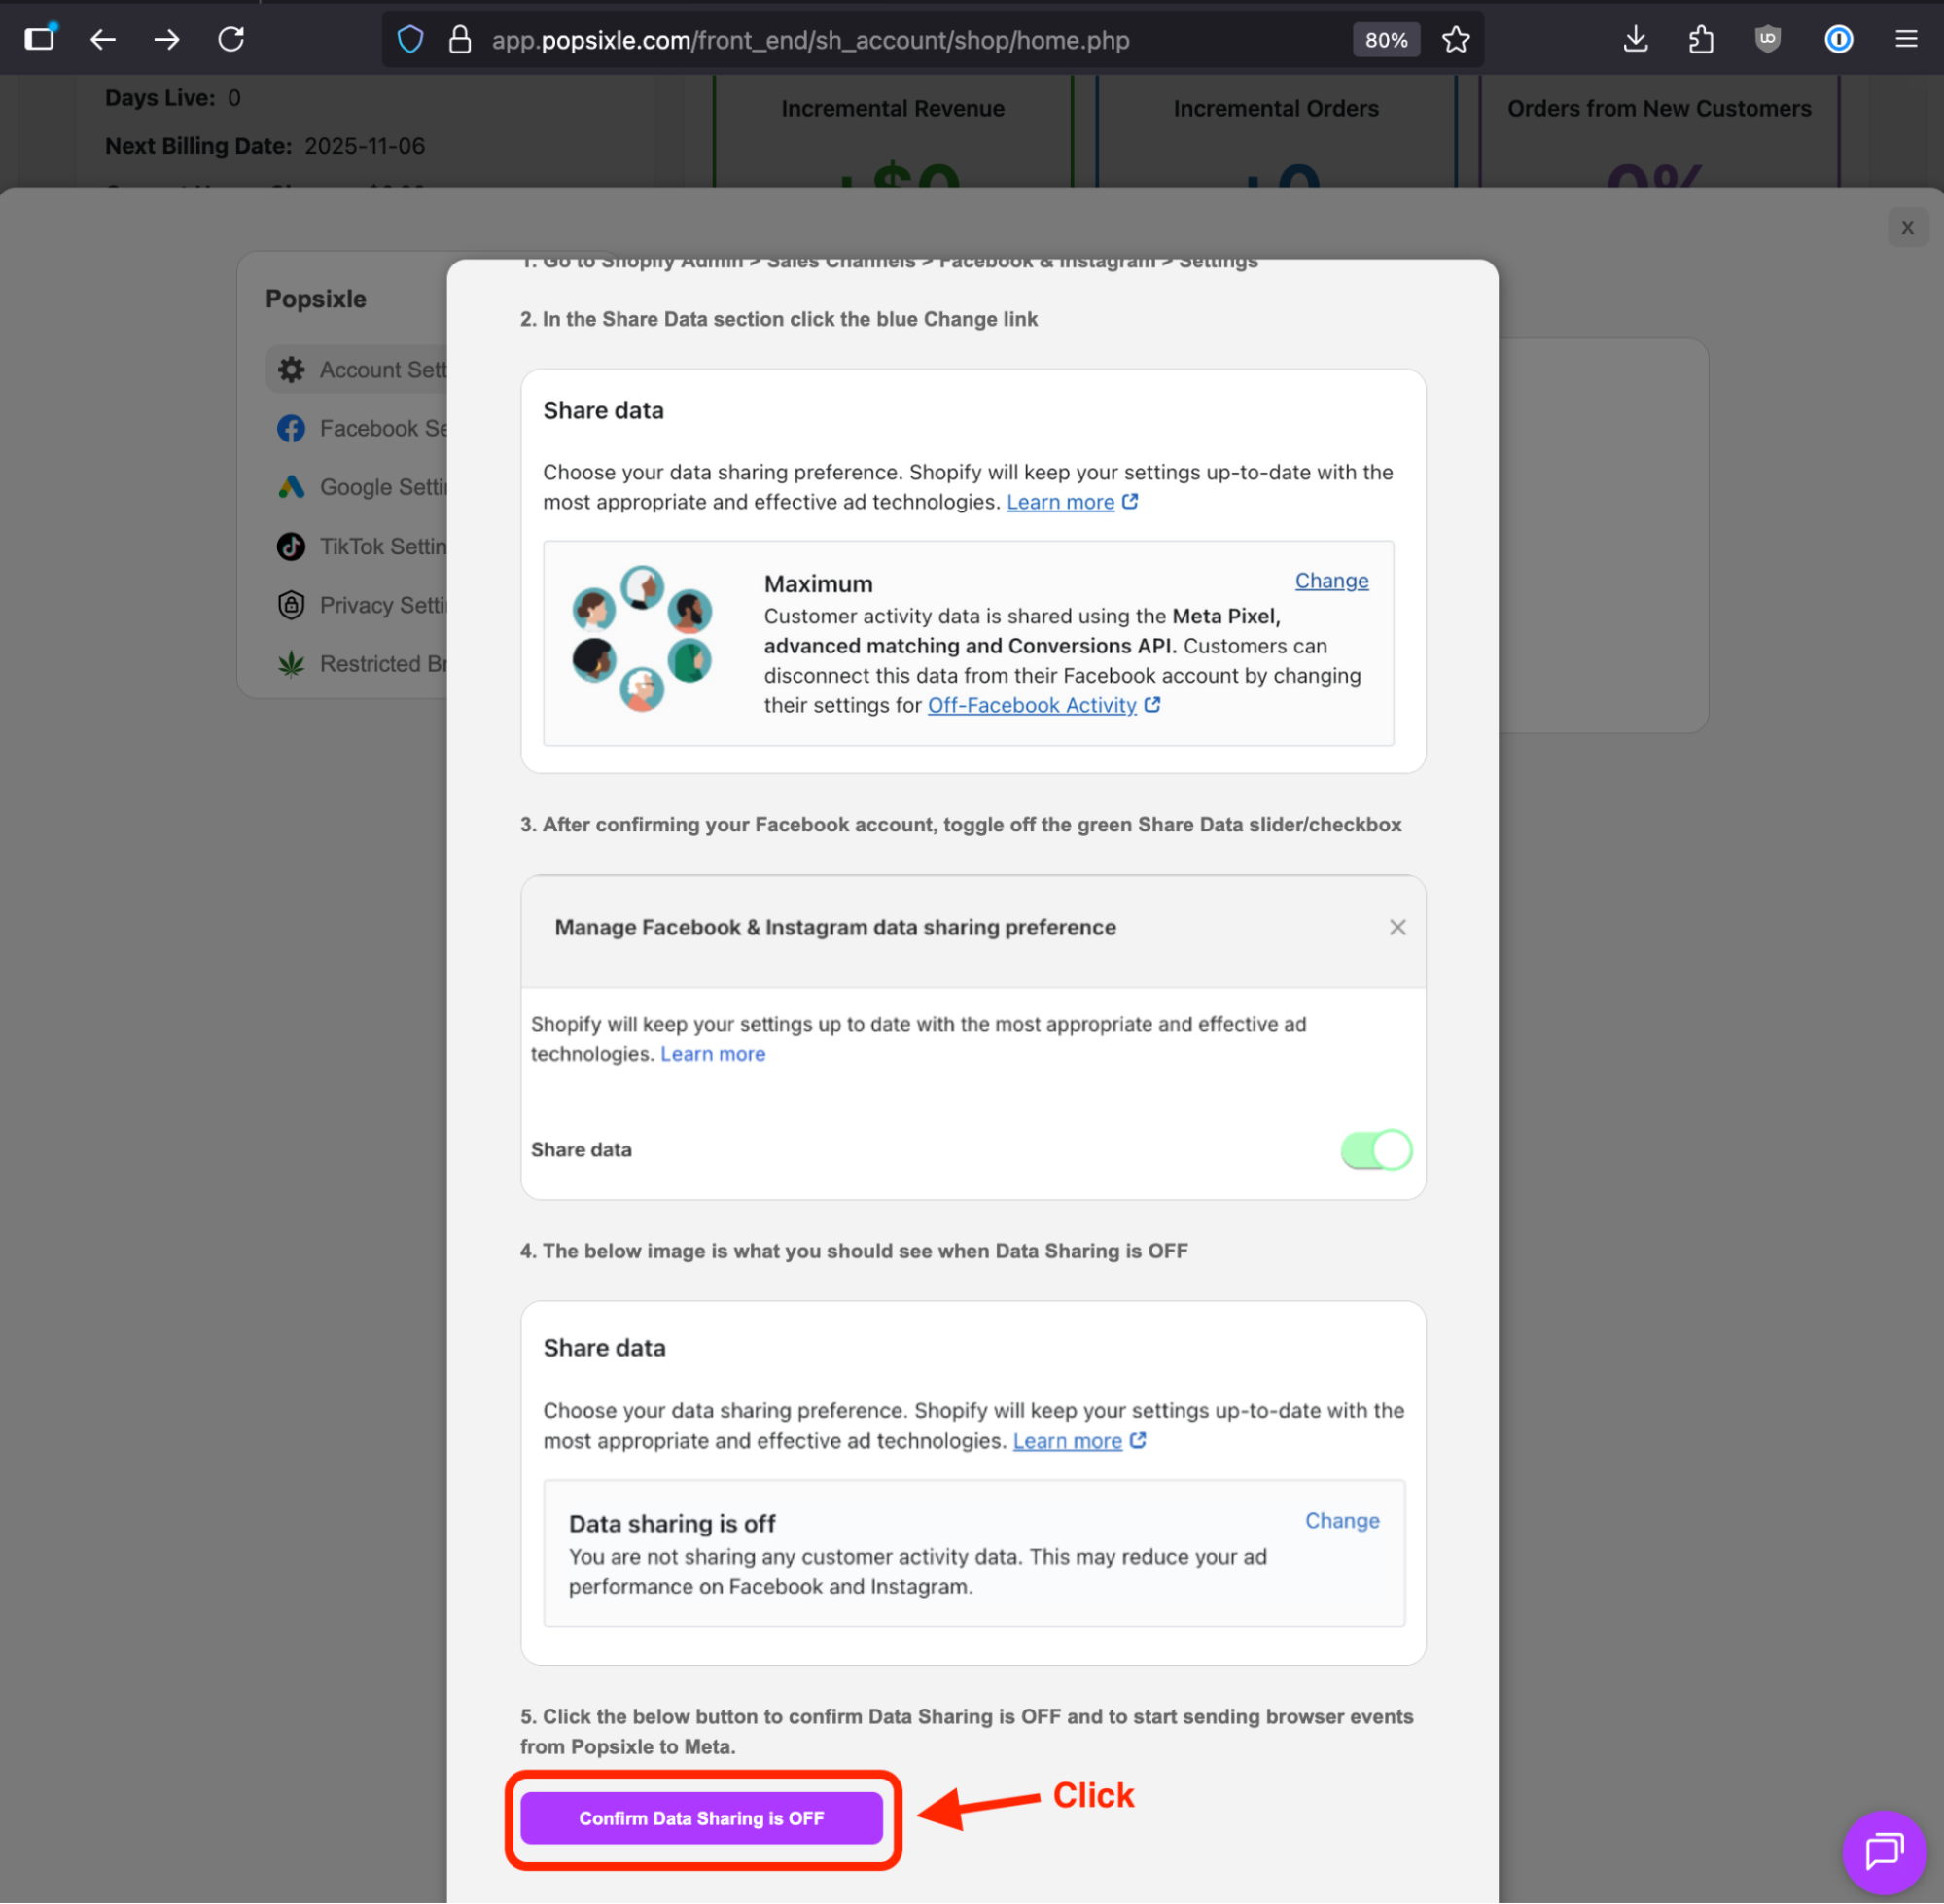
You’re all done! Popsixle is now sending enriched event data back to Meta. Within a couple of days, you should see dramatic improvement in your ad performance.
Let it run for a few days, and expect some outreach from our team detailing the performance improvement.
We can’t wait to see how much your ROAS improves by the end of your 14-day free trial!
Contact Us
Have questions or concerns? Reach out to the Popsixle via email or through the live chat on our site and a member of our team will get back to you within one business day.